Cranberry blueberry crisp started when I was looking for a dessert to make one evening. We were out of fresh fruit in the house but I had plenty of berries in the freezer! I added the brown sugar and oat topping from my apple crisp recipe and we ended up with a new family favorite!
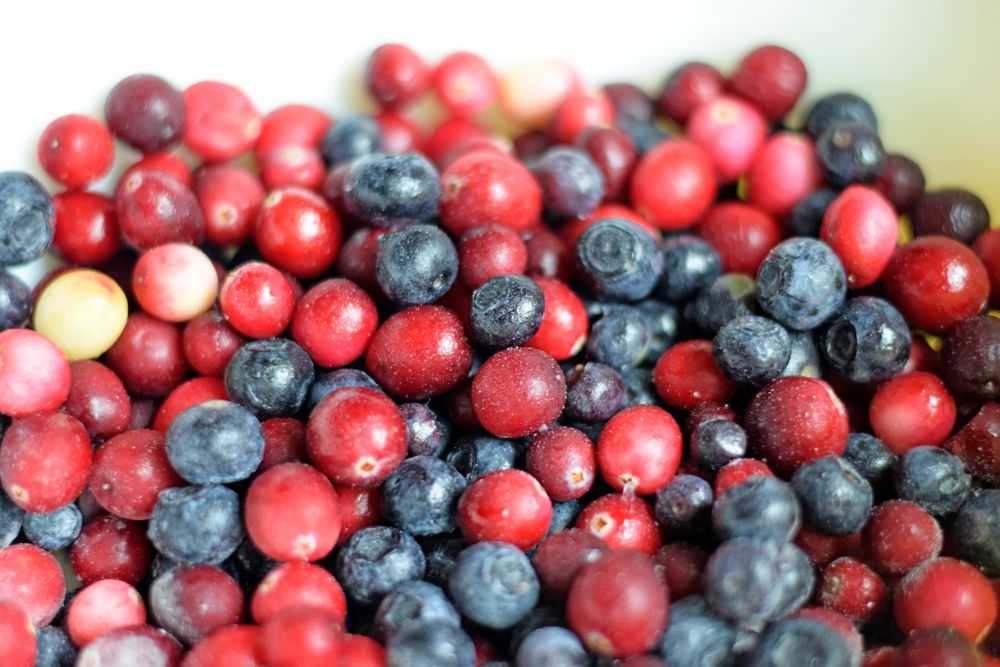
Cranberries and blueberries really are a pretty awesome combination in this dessert. On their own blueberries are too sweet, and cranberries are too tart. Together they are amazing. And beautiful too!
Sweet blueberries and tart cranberries are the perfect combination in this berry crisp!
This will take you through how to make cranberry blueberry crisp step-by-step. Let’s get started!
Ingredients for Cranberry Blueberry Crisp
Apple crisp uses only eight simple ingredients. Let’s go through them now:
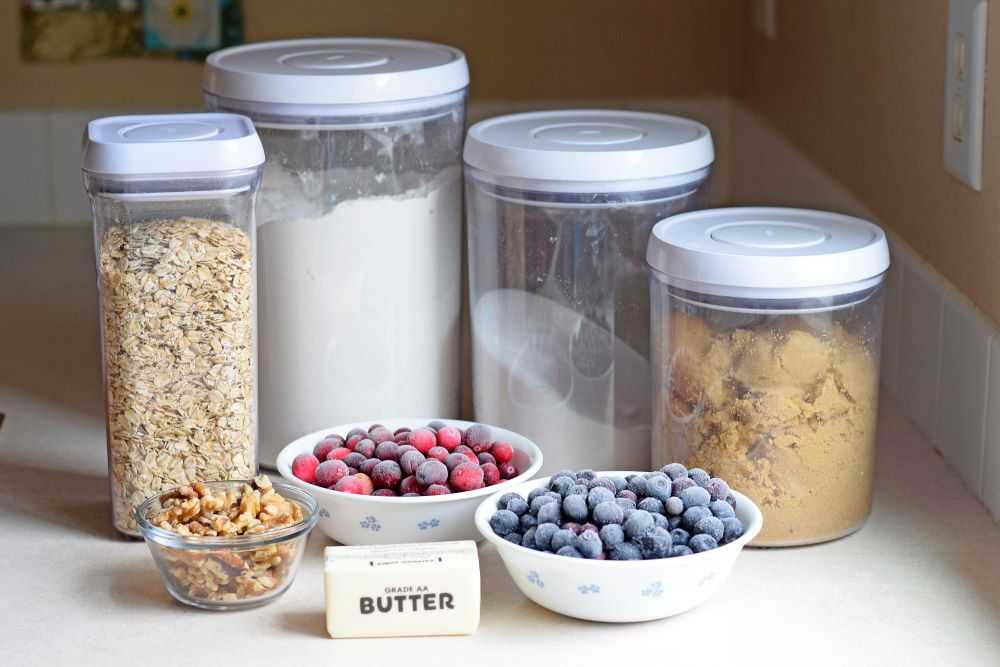
Cranberry blueberry crisp requires only a few simple ingredients.
Cranberries – Fresh cranberries are usually available in the fall. Make sure to grab a few bags to stash in the freezer so you can make this crisp all year long! Frozen cranberries work great too and you do not have to thaw them before using.
Blueberries – Fresh or frozen blueberries work fine here too. Again, you do not have to thaw them before use.
White sugar – White sugar is used in the filling to sweeten up the berries.
Flour – Flour helps to thicken the berry filling so it is gooey and delicious instead of thin and watery. Regular all-purpose flour is what you want here.
Brown sugar – I prefer brown sugar in the topping because it gives it a nice caramel-like flavor. You can also use brown sugar with the berries instead of white sugar if you prefer.
Oats – Oats give the topping a nice texture. I usually use regular oats but quick oats can be used too!
Nuts – Nuts are great in this crisp! They toast in the oven while it is baking and give it a great crunch. Walnuts, pecans, or almonds are great choices here. You can also leave them out if you like.
Butter – Real butter gives this the best texture and flavor! I use salted butter because I like how the salt in the butter helps to balance the sweetness of the sugar.
Now that we know what goes in our cranberry blueberry crisp, let’s find out how to make it!
How to Make Cranberry Blueberry Crisp
Step 1: Prepare the Berry Filling
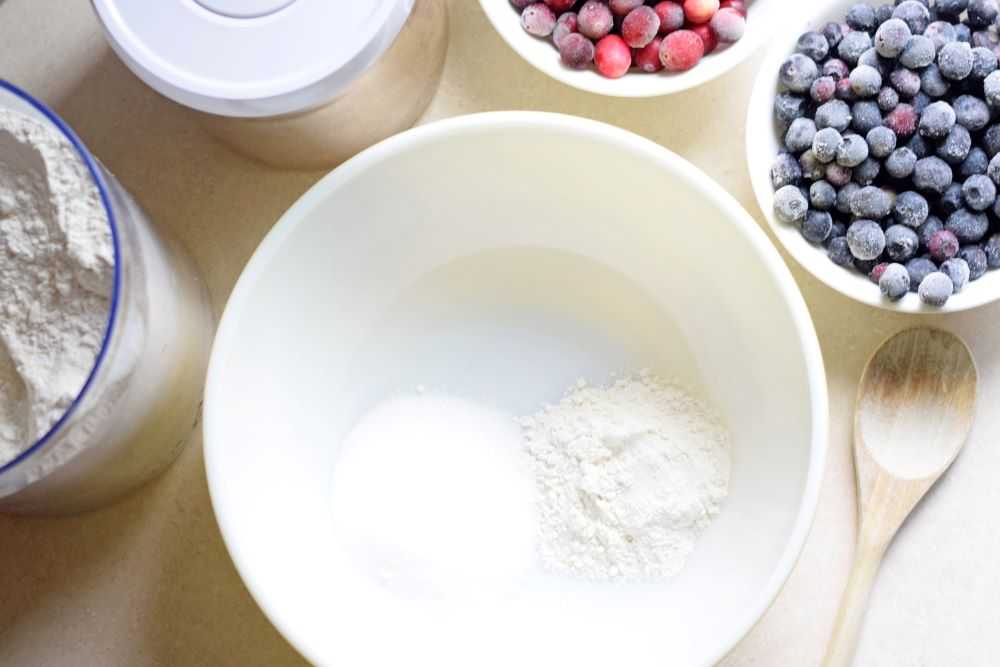
Start by stirring the flour and sugar together in a large bowl. Mixing these together first will help to prevent clumps.
Mix the sugar and flour together first before adding the berries. This will help to prevent clumps.
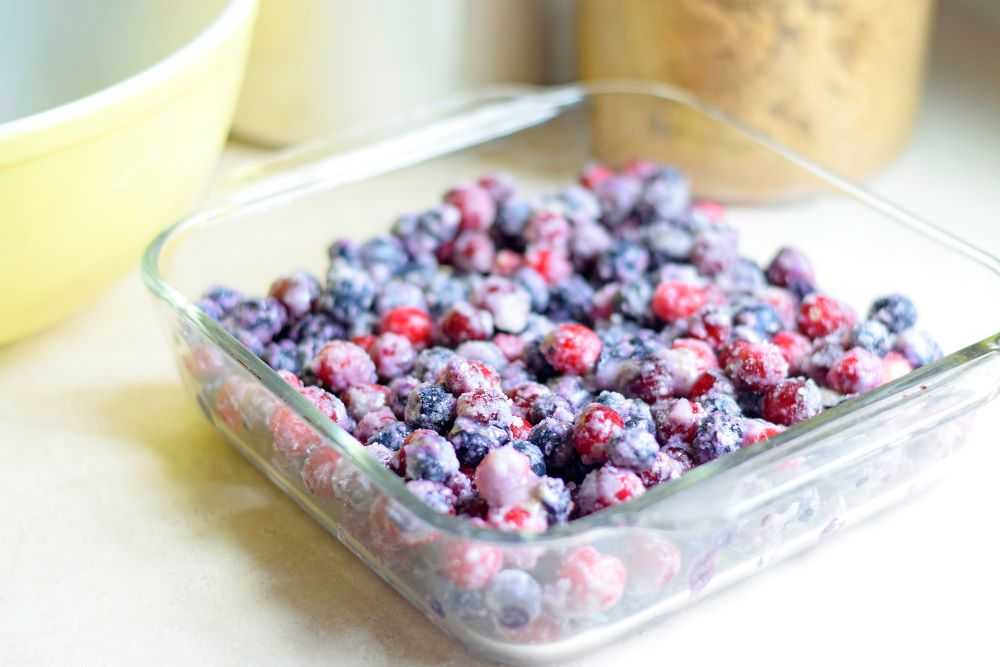
Add in the fresh or frozen berries and stir until they are evenly coated. Then transfer the berries to an ungreased 8-inch square pan and set aside while you prepare the topping.
Transfer the berries to an 8-inch square pan and set aside while you work on the topping.
Step 2: Make the Topping for the Cranberry Blueberry Crisp
Measure the brown sugar, flour, oats, and nuts into a large bowl (you can reuse the bowl the berries were in). Pour in the melted butter and mix with your hands until everything is thoroughly combined.
Add the melted butter to the dry ingredients. Mix well until thoroughly combined.
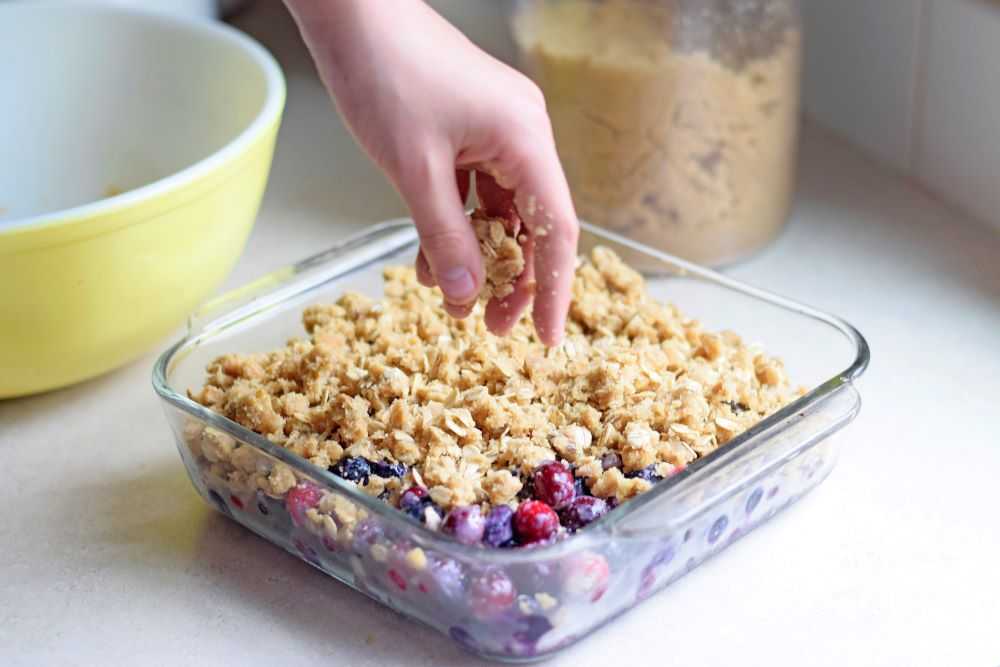
Once the topping is mixed together sprinkle it on top of the berries. To get some larger chunks I squeeze some of the topping together in my hand and then gently break it into bigger pieces. Make sure to get all the way to the edges and cover the berries evenly. The crisp is now ready to go into the oven!
Sprinkle the topping over the berries. Make sure to get all the way to the edges!
Step 3: Bake the Cranberry Blueberry Crisp
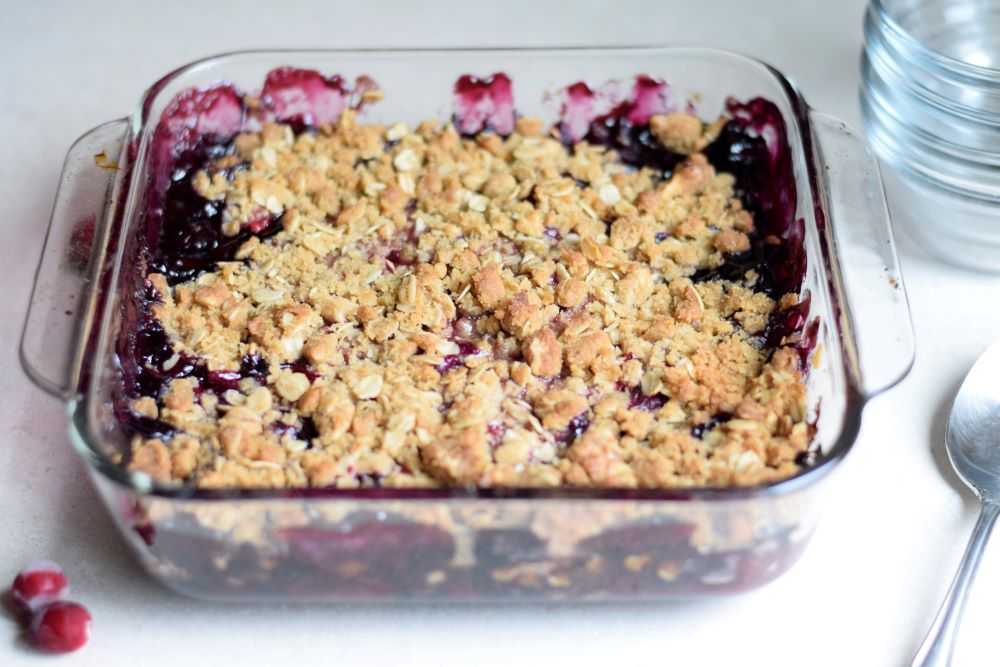
Bake the cranberry blueberry crisp at 375 degrees for 30-40 minutes. If you are using frozen berries you may need to cook it a little longer, for a total of about 40-50 minutes. The crisp is done when the edges are bubbly and the juices have thickened. The topping should be a beautiful golden brown color.
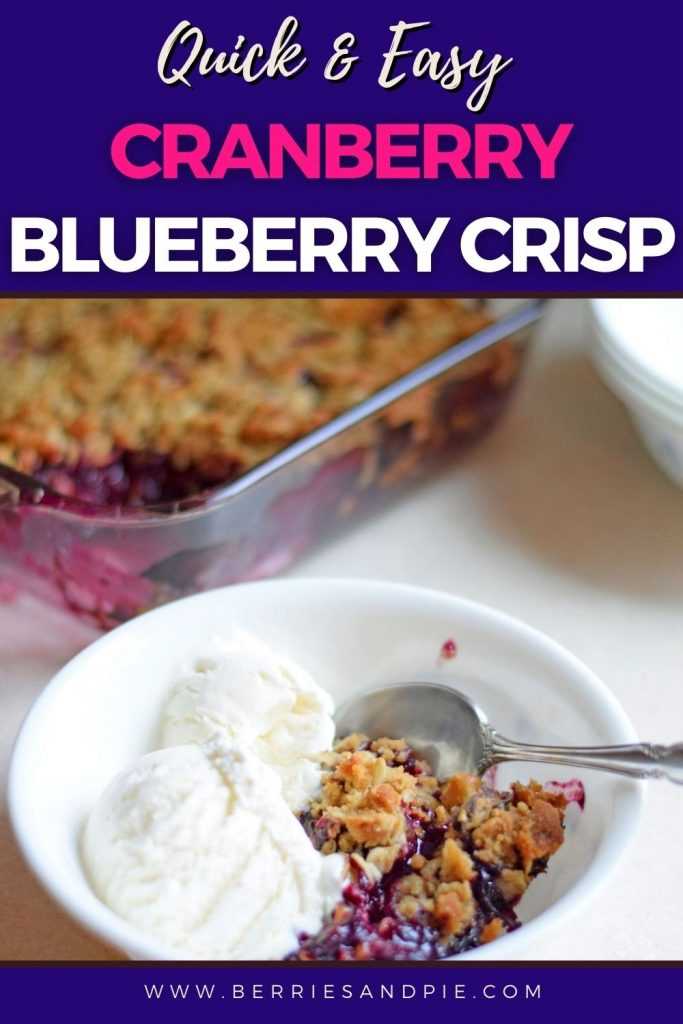
Cranberry blueberry crisp warm from the oven. Yum!!!
Serve
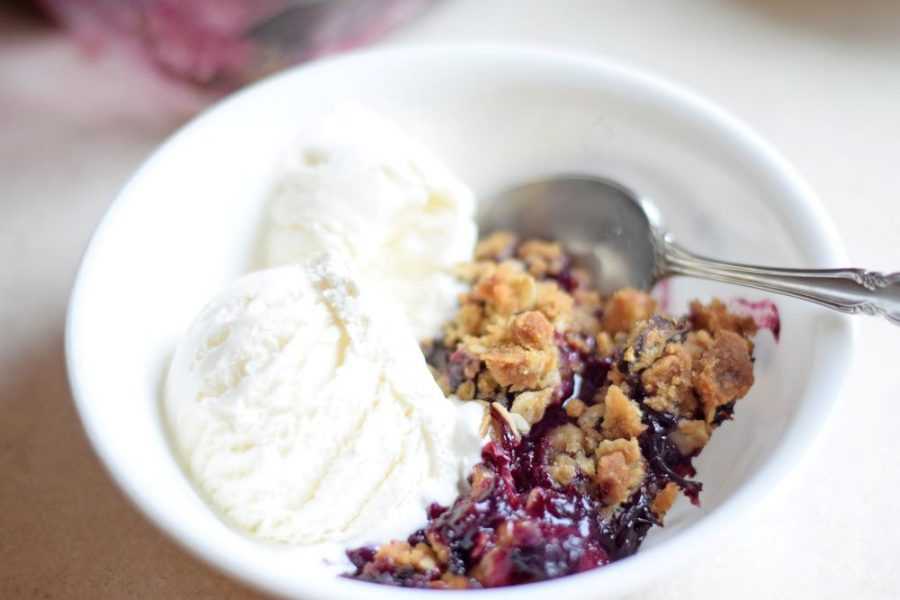
Let the crisp cool for a few minutes before serving. This will help to thicken the delicious goo around the berries. Add a big scoop of vanilla bean ice cream and you have an insanely delicious dessert! Yum!
Cranberry Blueberry Crisp with vanilla ice cream. Yum!
Hope you get to make this cranberry blueberry crisp soon! Happy Cooking!
Cranberry Blueberry Crisp
Recipe by: Mandy
Sweet blueberries and tart cranberries come together perfectly in this beautiful dessert. This cranberry blueberry crisp has a crunchy brown sugar and oat topping and tastes delicious with scoop of vanilla ice cream!
To make the berry filling stir the sugar and flour together in a large bowl. Add in the berries and mix well.
Transfer the berries to an ungreased 8-inch square pan. Set this aside while you make the topping.
Measure the brown sugar, flour, oats, and nuts into a large bowl (you can reuse the bowl the berries were in). Pour in the melted butter and mix with your hands until everything is thoroughly combined.
Sprinkle the topping over the berries in the pan. Make sure to get all the way to the edges and cover the berries evenly.
Bake the cranberry blueberry crisp at 375° for 30-40 minutes. If you are using frozen berries cook the crisp slightly longer, for a total of 40-50 minutes. It is done when the edges are bubbly and and the filling is thick. The topping should be a beautiful brown color. Set aside to cool a little before serving.
Serve the cranberry blueberry crisp warm with a big scoop of vanilla bean ice cream. Enjoy!
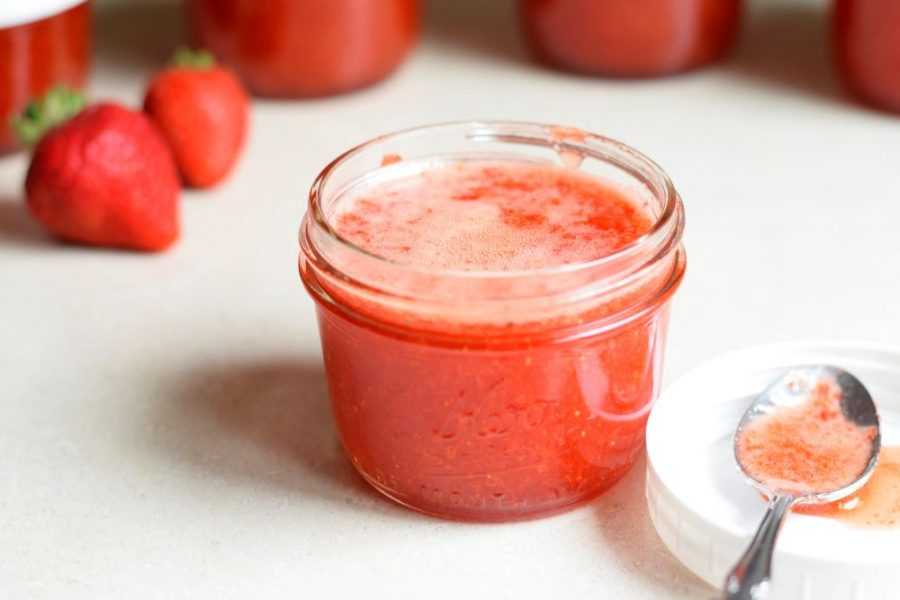
I have not bought jam at the grocery store in many years. Years. Why? Because the store does not sell freezer jam, which is my absolute favorite type of jam in the whole wide world. For those of you who have not tried freezer jam you are in for a treat! Since the fruit in freezer jam is never cooked it keeps its fresh fruit taste. It’s like summer in a jar. Yum!!!
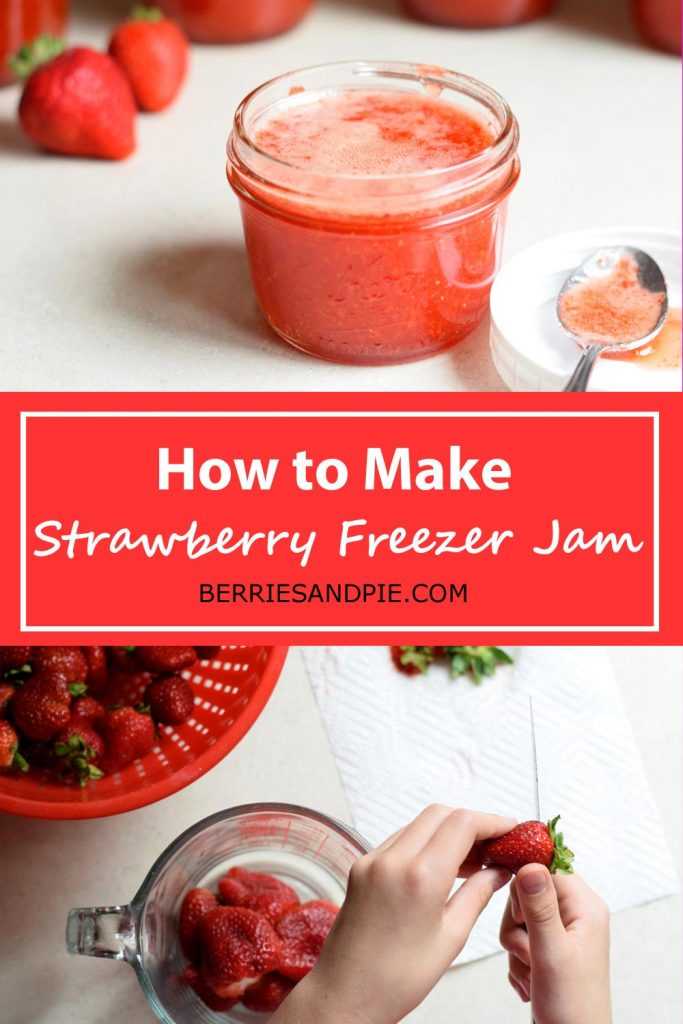
Strawberry freezer jam is one of my favorite types of freezer jam. It is easy to make at home, requires only four ingredients, and can be made in under an hour. This article will take you through how to make strawberry freezer jam, step-by-step. Let’s get started!
Strawberry freezer jam – YUM!
Note: This article may contain affiliate links, where I earn a small commission from qualifying purchases with no additional cost to you. I only provide links to products that are similar to what I use personally.
Equipment for Strawberry Freezer Jam
You need some basic equipment to make strawberry freezer jam. We will go through the list now:
Jars
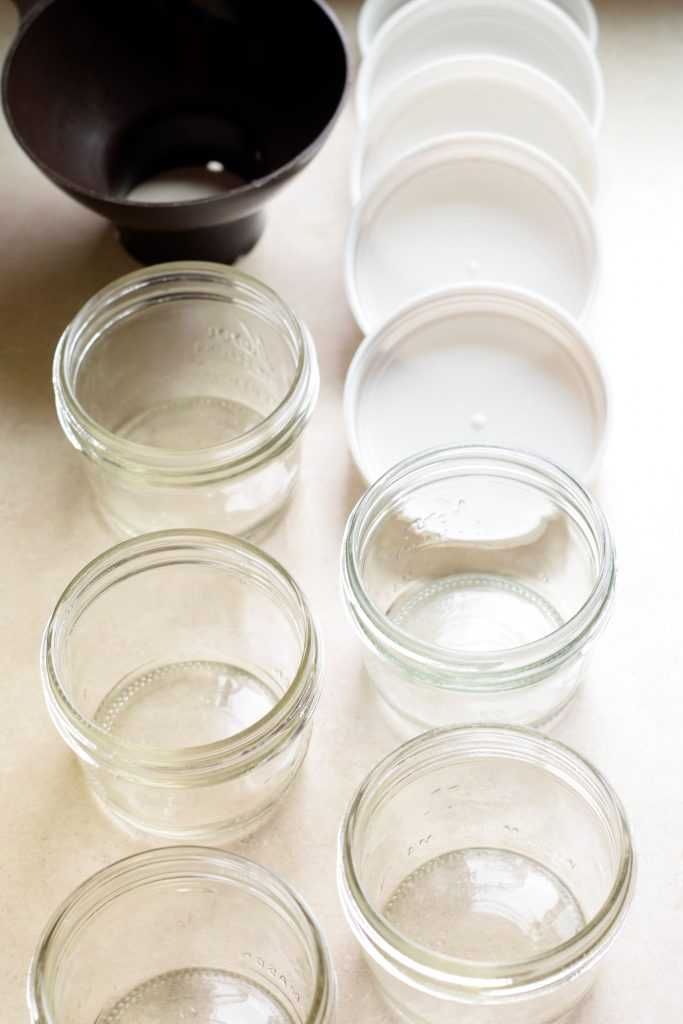
You need containers to hold about 6 cups of finished jam. Some people prefer plastic containers for freezer jam but I usually use half pint mason jars (one cup capacity). I prefer wide mouth jars so the jars are easier to fill. Jars similar to what I use can be found here (affiliate link). I use these plastic jar lids (affiliate link) so the containers are easier to open and close.
Make sure that your jars or containers are cleaned in hot soapy water before use and allowed to air dry. I run the jars and lids through the dishwasher and they are ready to go!
Jar Funnel
This makes it SO MUCH EASIER to fill your jars. If you do not have a jar funnel you can purchase one similar to the one I use here (affiliate link).
Clean your jars and lids so they will be ready when you need them. A jar funnel makes filling the jars much easier.
Immersion Blender or Potato Masher
You need some way to crush the fruit for the jam. I prefer to use an immersion blender (or regular blender) to puree the fruit most of the way. If you don’t have a blender you can also use a potato masher or even a fork to crush the berries, especially if you like your jam a little on the chunky side.
Measuring Cups
I use a standard measuring cup for the sugar but I like a glass measuring cup for the strawberry puree because it is easier to measure and pour.
Other items needed: A large bowl, a small saucepan, a whisk, and a ladle.
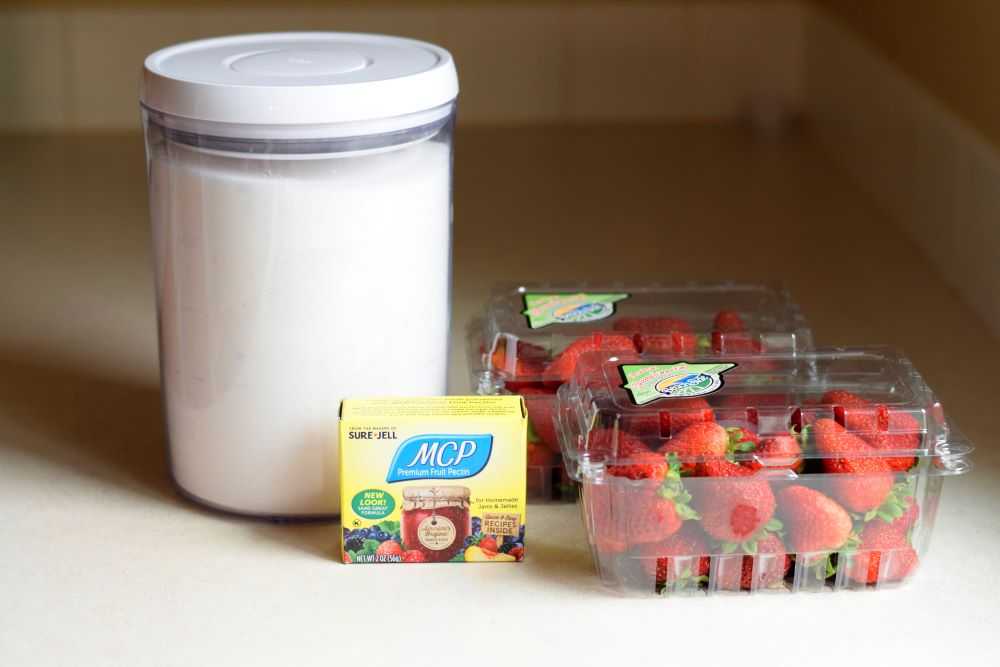
Ingredients for Strawberry Freezer Jam
Fresh Strawberries
For fresh strawberry taste you need to start with fresh strawberries! You can use strawberries out of your garden or strawberries from the store. Both taste great in this jam!
You need less fruit than you may think for jam, only about 2 cups of crushed or pureed fruit. One pound of fresh strawberries is probably enough but I always purchase an extra carton to make sure that I have what I need.
Sugar
Jam takes a LOT of sugar. About 4 cups of it to be exact! Plain old granulated sugar is what you want here. Do not try to reduce the amount of sugar or use a sugar substitute because the jam will not thicken properly.
Pectin
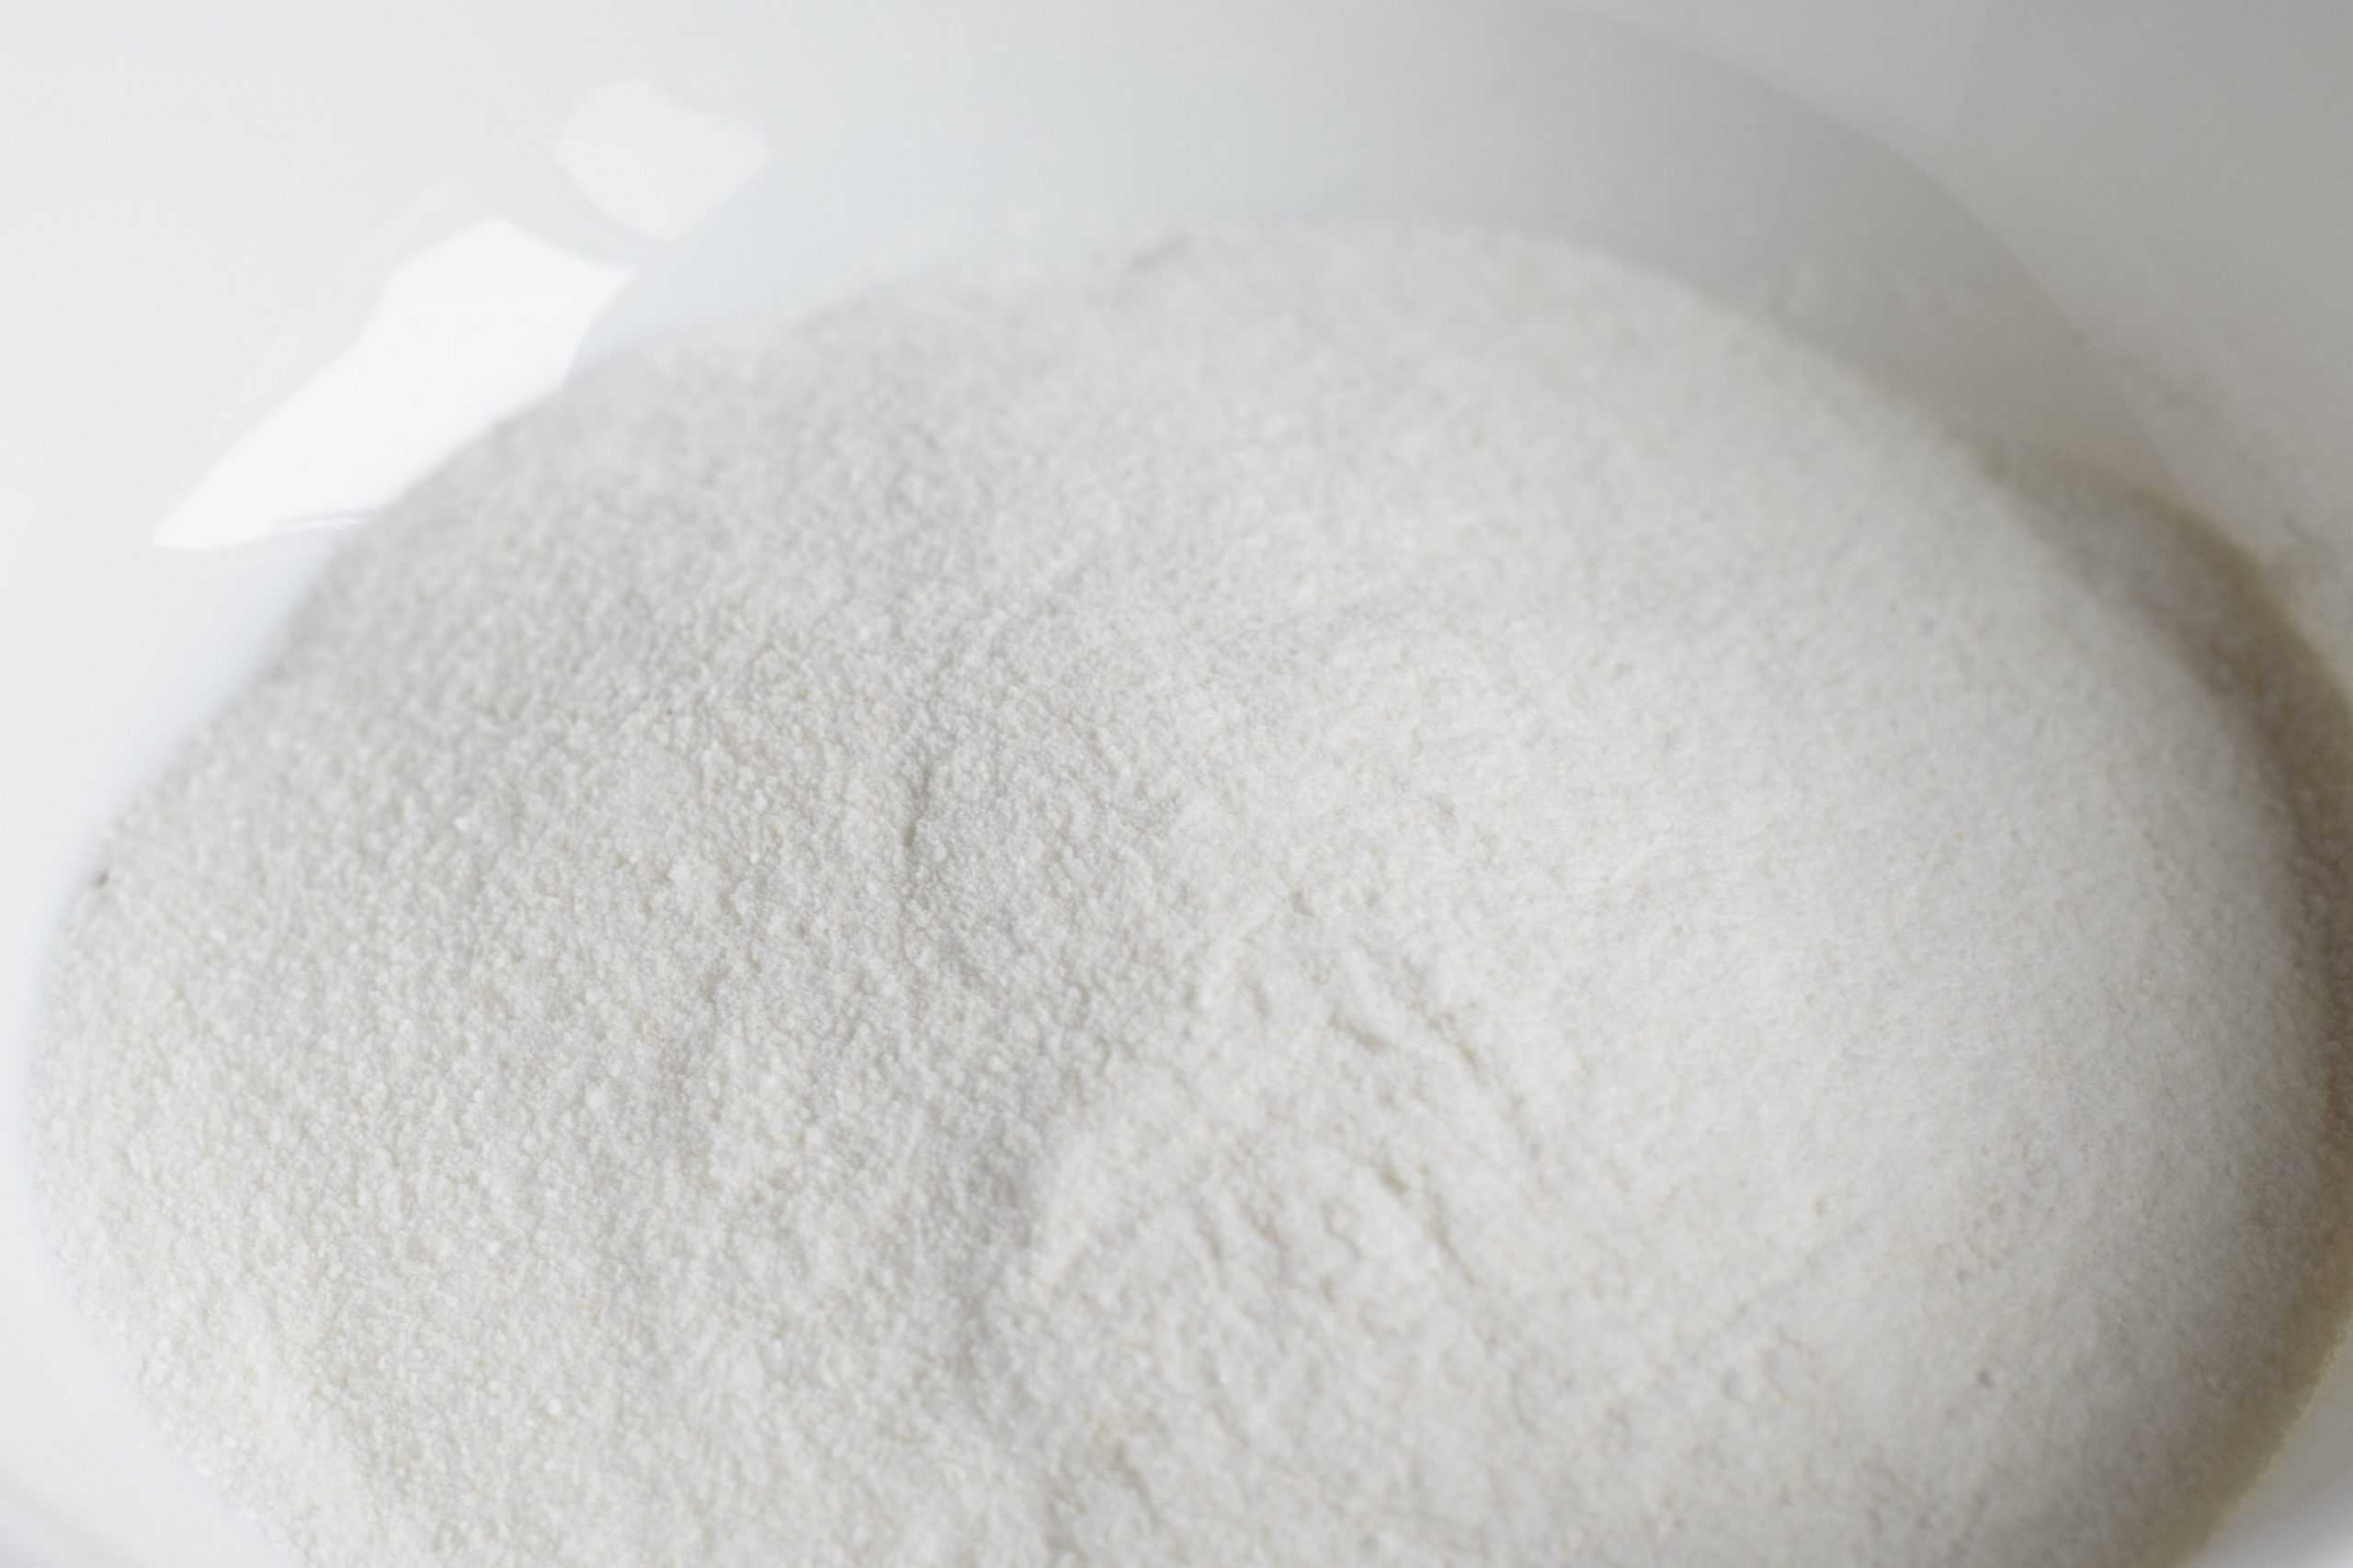
Pectin is very important for making jam. It is what makes the jam gel and become thick. Many people have never bought or used pectin before, so we will now learn more about it.
Pectin is a type of fiber most commonly made from green apples or citrus fruits. It comes in a powdered form and is what makes jam thicken.
What is pectin? Pectin is a type of fiber that is usually made from green apples citrus fruits. Some dextrose and citric acid is also added to the powdered pectin so it tastes sour if you try it. This sour taste is good though because it helps to counter all the sweetness from the sugar and bring out the taste of the fruit. When heated along with with sugar and acid the pectin will gel and give the jam the correct texture.
What types of pectin should I buy? This recipe calls for powdered pectin that comes in a small box, usually 1.75 to 2 ounces depending on the brand. Make sure that you purchase regular pectin and not the type formulated for low sugar recipes.
Where can I find pectin? Pectin usually comes in a single-use box but you can also buy it in bulk on Amazon. Pectin is sold in many grocery stores in the summer months, when many people are making jam. If you can’t find it at your grocery store try looking at Bi-Mart or a farm store.
Pectin differs a little between brands and you may have more success with some brands than others. Today I am using MCP pectin (fun fact: MCP stands for Modified Citrus Pectin) but I have also used Mrs. Wages pectin in the past with great results. I do not have a favorite brand and usually buy what is on sale 🙂
Now that that you have everything you need, let’s go through the process of making homemade strawberry freezer jam!
How to Make Strawberry Freezer Jam
Step 1: Prepare the Fruit
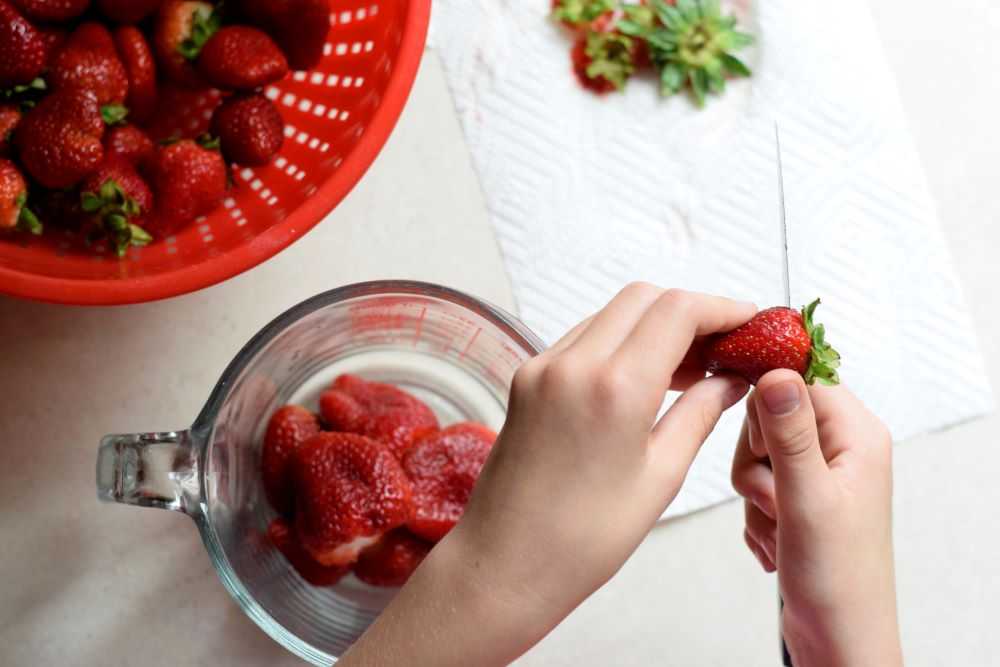
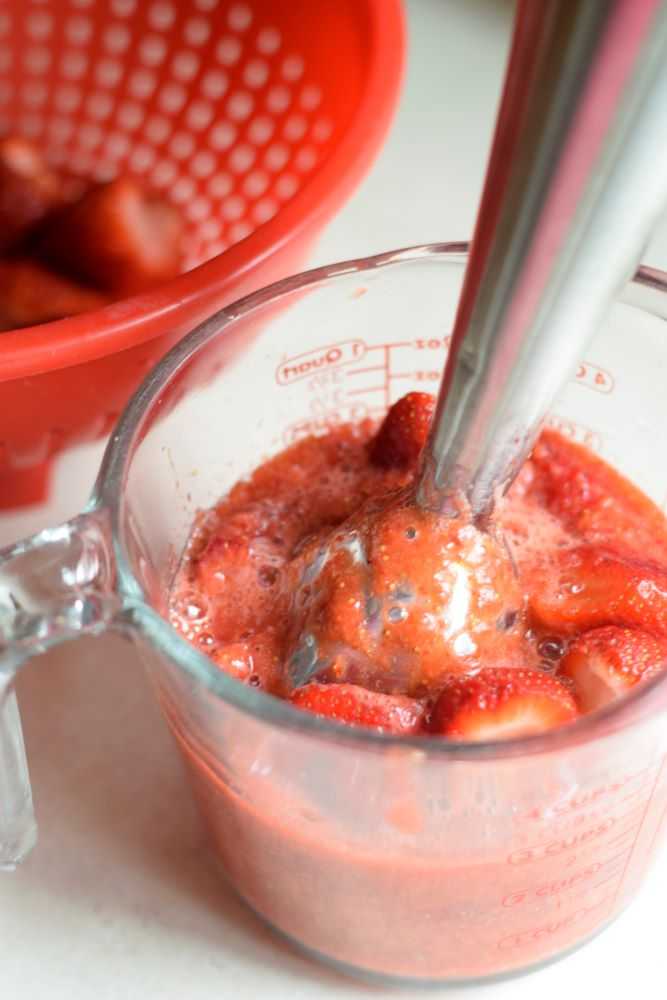
Start by washing the strawberries and removing the stems. Then puree or mash the fruit until the desired consistency is reached.
There are several ways to crush the berries. Some people spread the fruit into a 9×13 inch pan and mash them with a potato masher. I prefer to put the strawberries in a four cup glass measuring cup and use my immersion blender to puree them most of the way, leaving a few small pieces here and there. You can leave your fruit a little chunky or puree it until it is perfectly smooth. The choice is up to you!
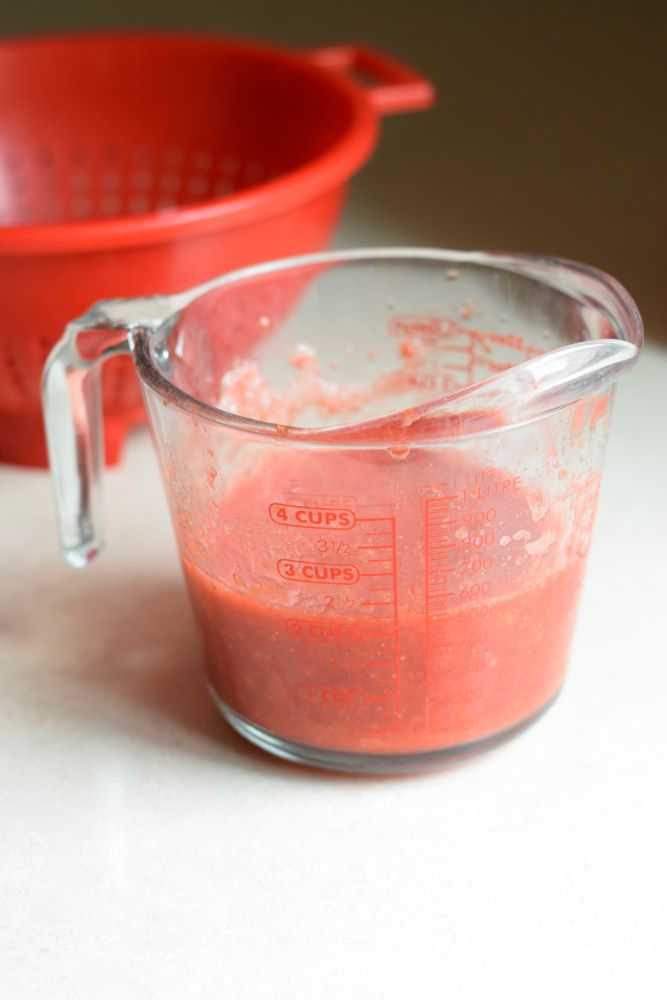
After the berries are mashed measure out exactly two cups of fruit. You are now ready to add the sugar!
Puree or mash the strawberries until the desired consistency is reached. Measure out two cups of berries and proceed to the next step.
Step 2: Stir the Fruit and Sugar Together
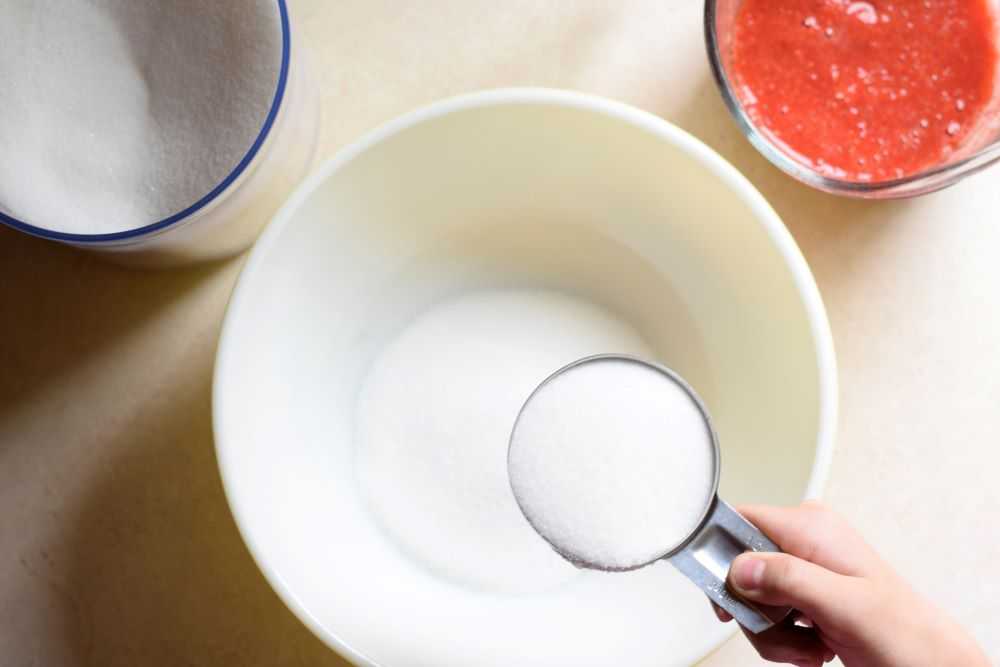
Measure out 4 cups of sugar into a large bowl. Add in the pureed strawberries and stir well. Let the strawberries and sugar sit in the bowl for 20 minutes, stirring occasionally. This will allow the sugar to dissolve most of the way.
Measure the sugar into a large bowl, then stir in the strawberry puree.
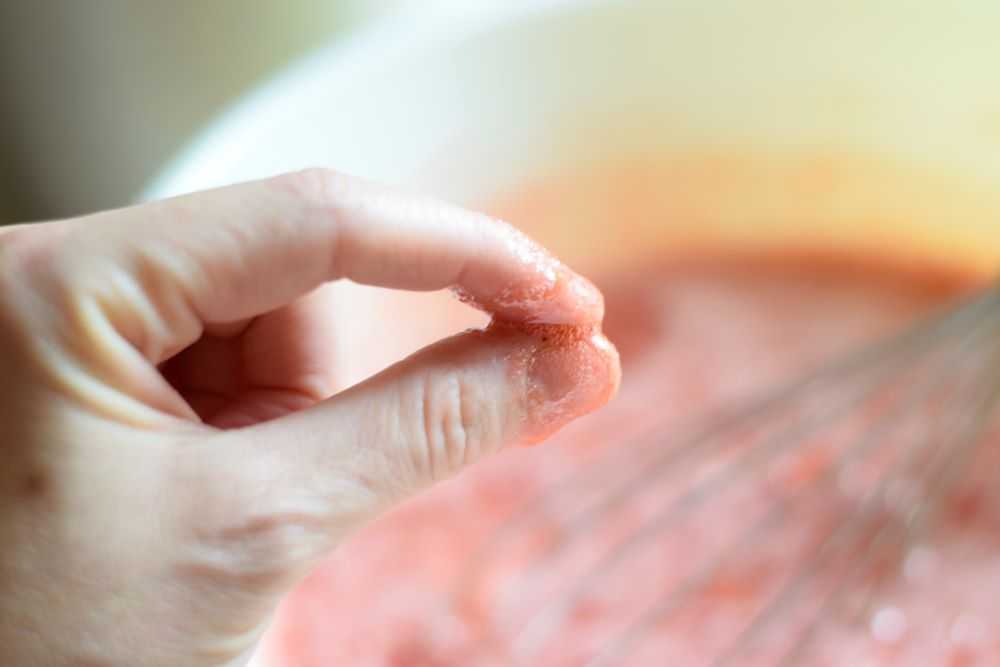
To test whether the sugar has dissolved enough you can take out a little jam and rub it between your fingers. By the end of the 20 minutes it should be much less gritty that it was initially (but it is okay if it is not perfectly smooth at this point). Towards the end of the 20 minutes you can start to cook the pectin.
Rub a little of the sugar and berries between your fingers to see if the sugar has dissolved.
Step 3: Cook the Pectin
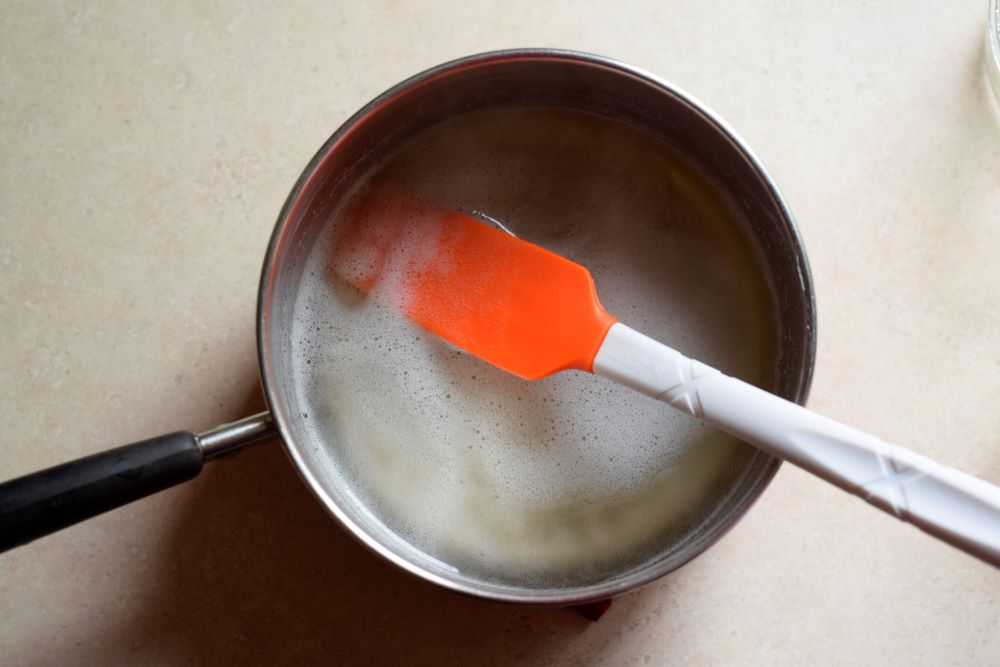
Empty the box of pectin into a small saucepan. Add 1 cup of cool water and stir well with a whisk to break up any clumps. Heat the pectin over medium high heat, stirring constantly, until it comes to a full boil. Boil for one minute and then remove from heat.
Cook the pectin and water together in a saucepan. Boil for one minute and then remove from heat.
Step 4: Add the Pectin to the Fruit
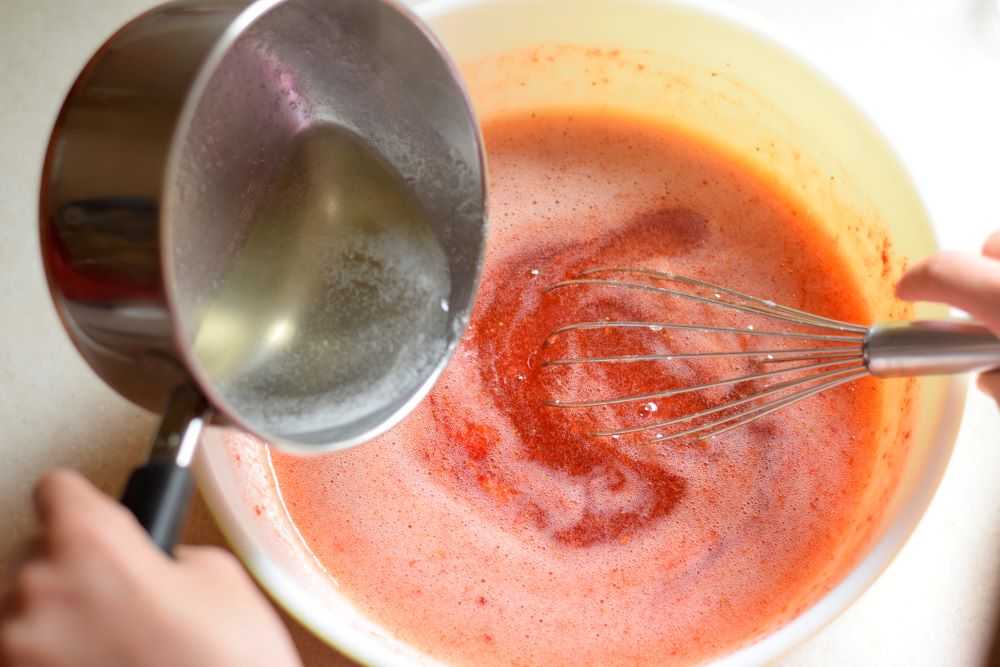
Add the hot pectin to the fruit and sugar. Whisk briskly for 1-2 minutes or until thoroughly incorporated. Instead of being watery the fruit should now have a thicker, more syrupy consistency. Your jam is now done and you are ready to fill the jars!
Add the pectin into the fruit. Stir briskly for 1-2 minutes or until thoroughly incorporated.
Step 5: Fill the Jars
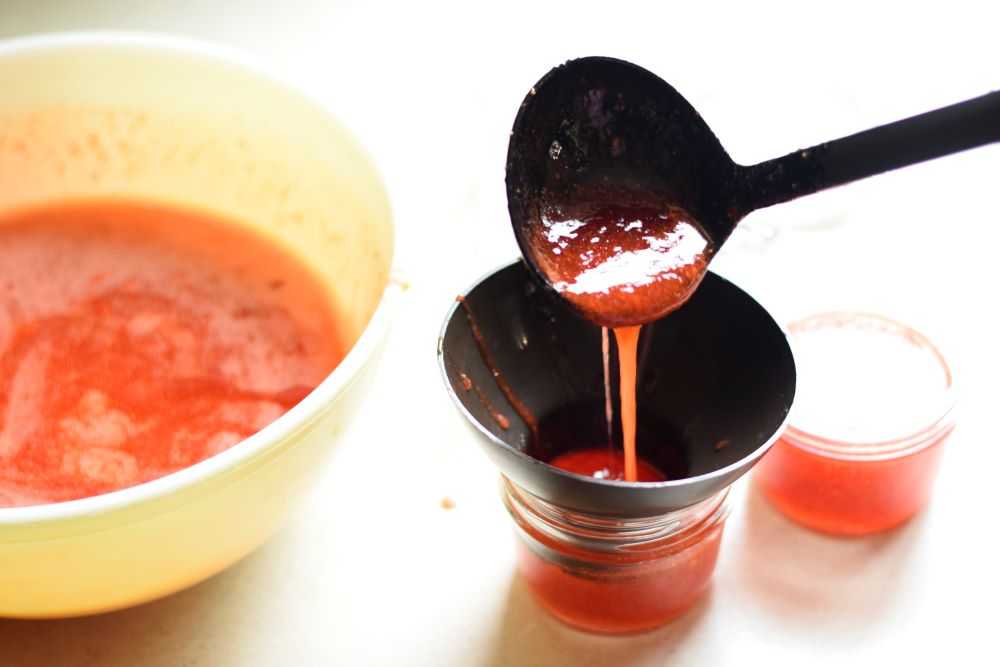
Use a ladle to fill the jars with the jam. A jar funnel is very handy for this so you do not drip sticky jam on the edges of the jars.
Fill the jars with jam. A jar funnel makes this an easier task.
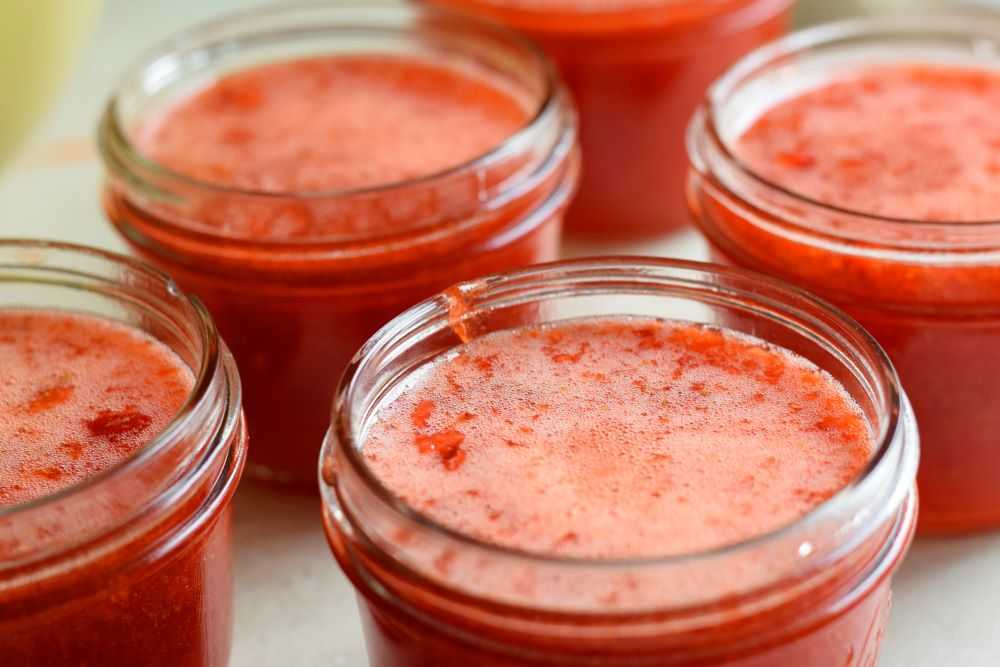
Leave about half an inch of head space between the top of the jam and the top of the jar. I use these plastic jar lids so the lids are easier to open and close. Once all of the jars are filled, transfer them to the refrigerator to cool and fully set.
After the jars are filled put on the lids and transfer them to the refrigerator for one day to fully set.
Freezer Jam Storage
After 24 hours the jam can be transferred to the freezer for long term storage. Thaw it in the refrigerator for a day before use. Once opened, use within 3 weeks or so. Jam keeps for up to 1 year in the freezer.
Serve
This strawberry freezer jam is good on so many different things! Try it on pancakes or waffles, toast or biscuits. It also tastes amazing on homemade yogurt!
Hope you get to try this freezer jam soon! Let me know how it went in the comments below. Happy Cooking!
Strawberry Freezer Jam
Recipe by: Mandy
This jam is easy to make, requires only four ingredients, and can be made in under an hour. Since the fruit is never cooked it is bursting with fresh strawberry taste. Yum!
2cupscrushed or pureed strawberries (from 1-2 pounds of fruit)
4 cupssugar
1boxregular fruit pectin (1.75 or 2 oz box, depending on the brand)
1cupcool water
Instructions
Stir the crushed strawberries and sugar together in a large bowl. Let sit for 20 minutes for the sugar to dissolve most of the way.
Empty the box of pectin into a small saucepan. Add in the water and stir well with a whisk to break up any clumps. Heat over medium high heat, stirring constantly, until it comes to a full boil. Boil for one minute then remove from heat.
Stir the hot pectin mixture into the strawberries. Whisk briskly for 1-2 minutes or until thoroughly incorporated.
Ladle the jam into small, clean jars or containers. Leave about half an inch of headspace between the top of the jam and the top rim of the jar. Once all the jars are filled, put the lids on the jars and transfer them to the refrigerator to cool and fully set.
After 24 hours the jam can be transferred to the freezer for long term storage. Thaw in the refrigerator for a day before use. Once opened use jam within three weeks or so. Jam keeps for up to 1 year in the freezer.