Tag: recipe

Chicken Chop Suey

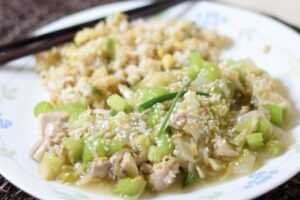
Tender chicken, celery, and bean sprouts combine in this delicious dish. It will remind you of takeout at your favorite restaurant!

Quick and Easy Chicken Chop Suey

This dish goes by many names but the most common are chicken subgum chow mein or chicken chop suey. Whatever you call it a version of this is a staple at many Chinese restaurants across the country. It is loaded with crunchy vegetables and tender chicken held together in a slightly thickened sauce that is served over crunchy noodles or cooked rice. Yum!

Chicken chop suey is easy to make at home and is ready in about half an hour. Let’s get started!

Ingredients for Chicken Chop Suey

Chicken chop suey has 10 ingredients:

Ingredients for chicken chop suey

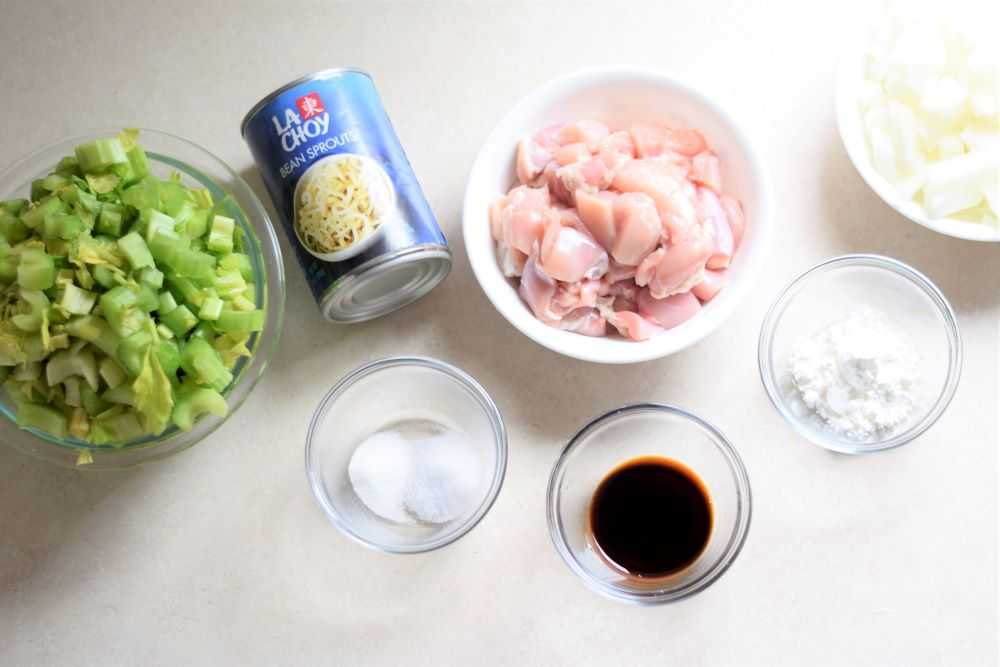
Chicken – I prefer chicken thighs in this recipe because they stay tender and add a lot of flavor to the dish. Chicken breasts will also work well.

Celery – You will need a whole bunch of celery. It sounds like a lot but it is the foundation of the dish.

Onion – A white onion or yellow onion is best (not red or purple) so it does not change the color of the sauce.

Bean sprouts – Fresh or canned bean sprouts are okay to use here. Fresh bean sprouts usually stay a little crunchier so that is what I usually use. Today I am using canned because the fresh bean sprouts at the store did not look very fresh 🙂 Use whatever you prefer!

Soy sauce – This helps to flavor the sauce. I use regular soy sauce here.

Cornstarch – This is used to thicken the sauce. You can use more or less depending on how thick you want the sauce to be.

Also needed: salt, sugar, water, and cooking oil.

How to Make Chicken Chop Suey

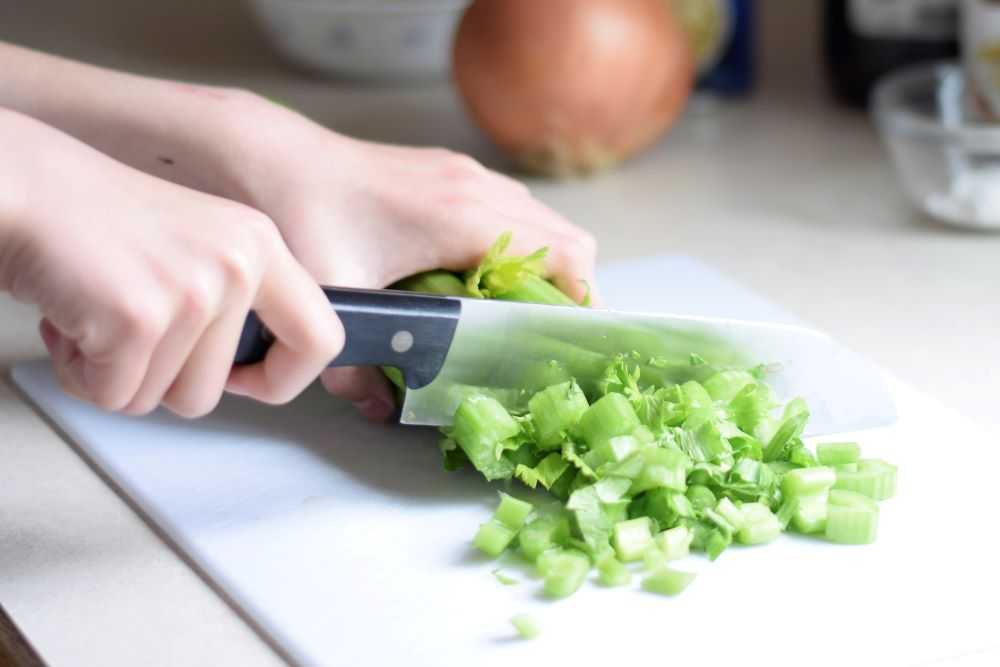
Step 1: Prepare the ingredients

Chicken chop suey cooks pretty quickly so you want to have all of your ingredients ready to go. Start by washing and chopping all of the vegetables and cutting up the chicken. Set this aside for now.

chopping celery

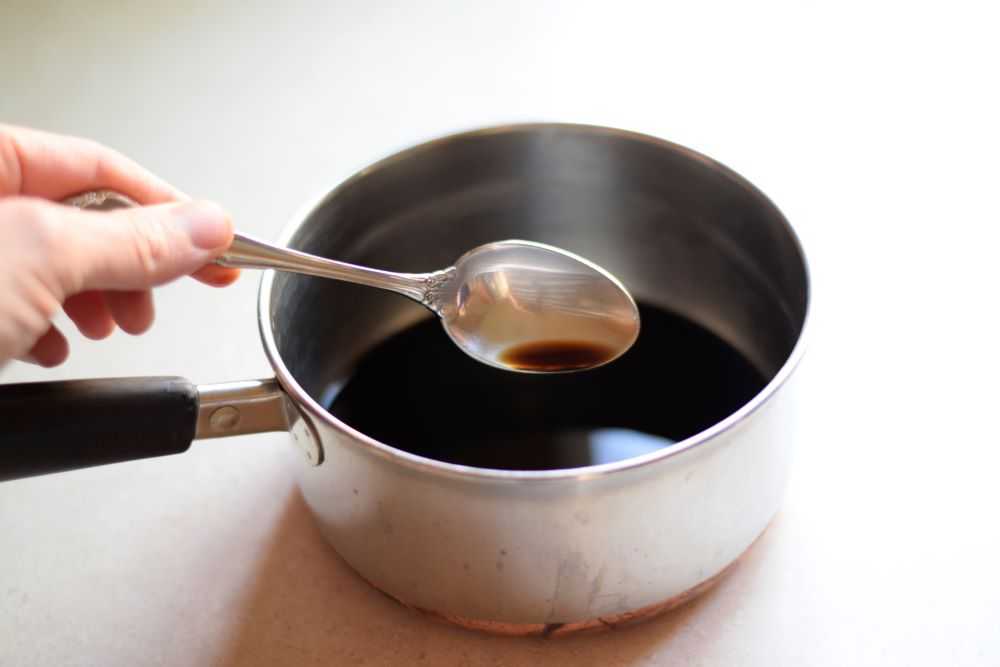
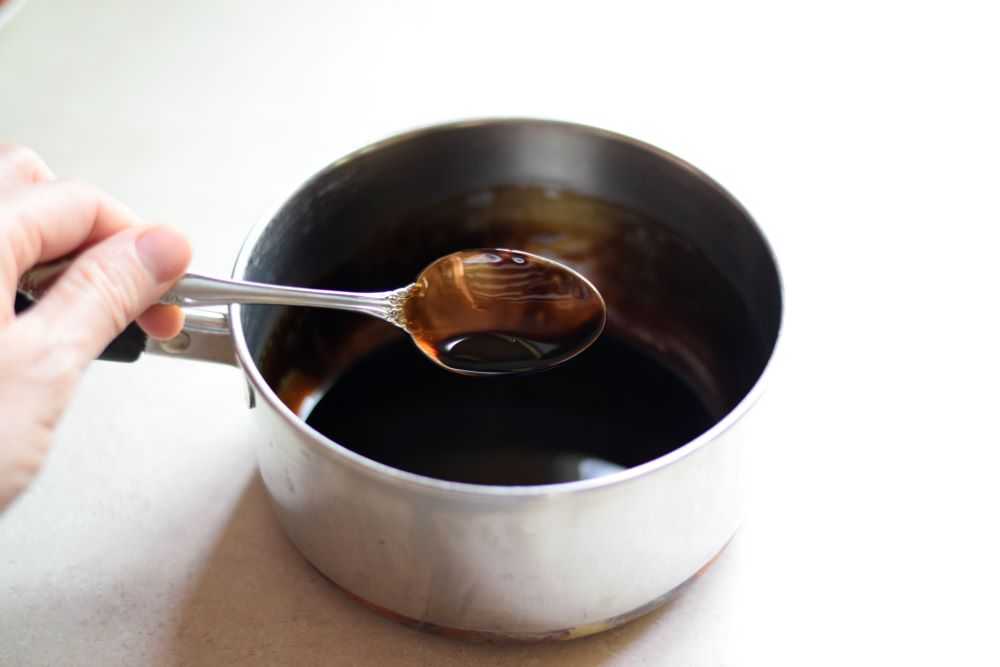
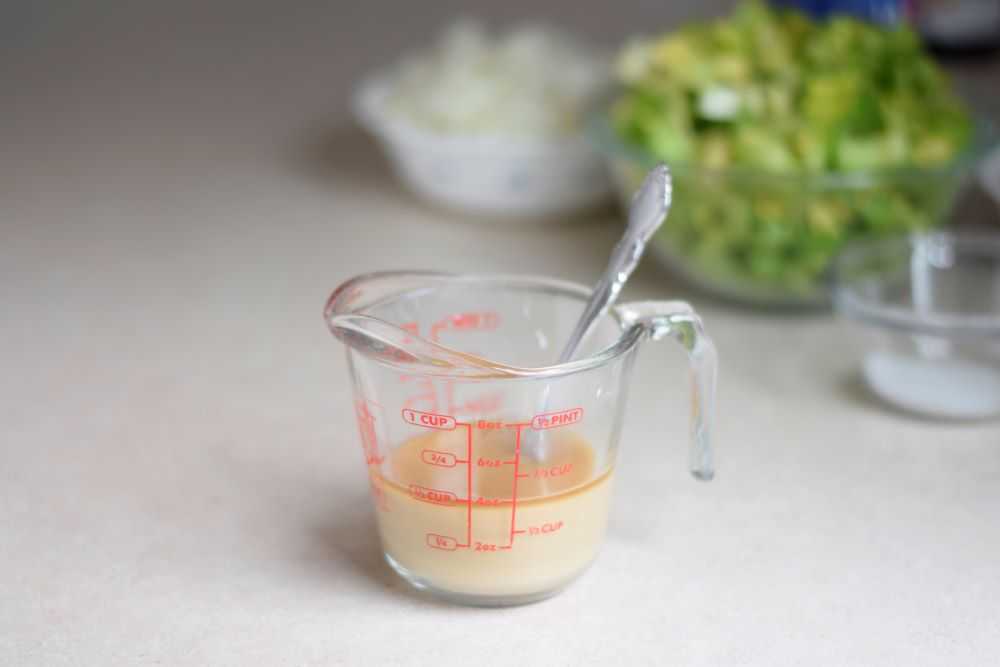
Step 2: Prepare the sauce

Stir the 1/3 cup water, cornstarch, soy sauce, and sugar together in a small bowl or liquid measuring cup. Set this aside.

Sauce for chicken chop suey

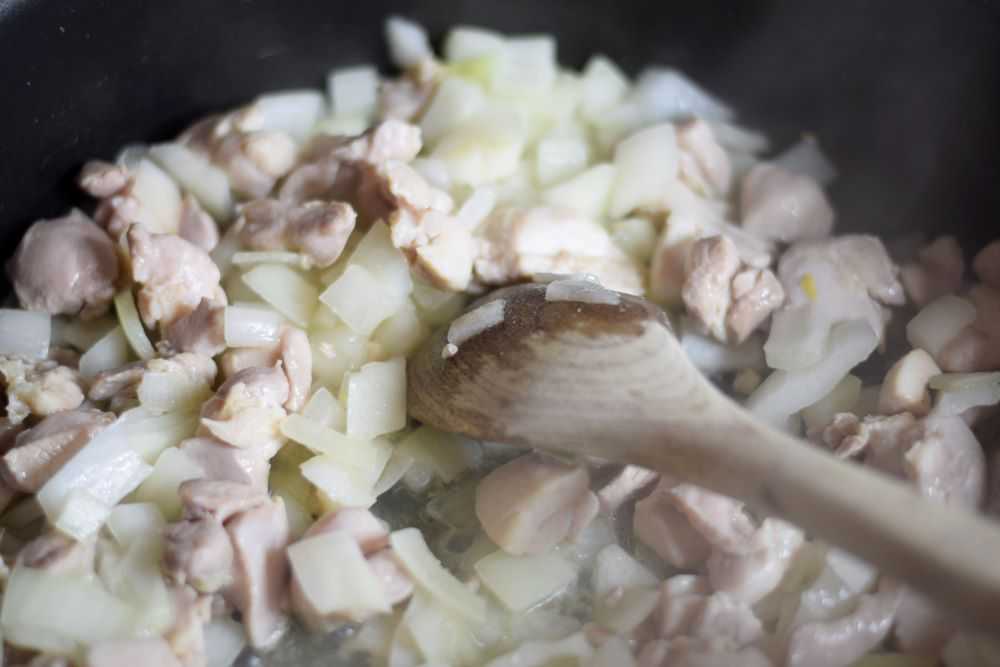
Step 3: Cook the chicken and onion

It’s time to start cooking! Add a little oil to a hot pan and add the chicken and chopped onion. Cook it until the chicken is done and the onion is tender.

Cook chicken and onion together

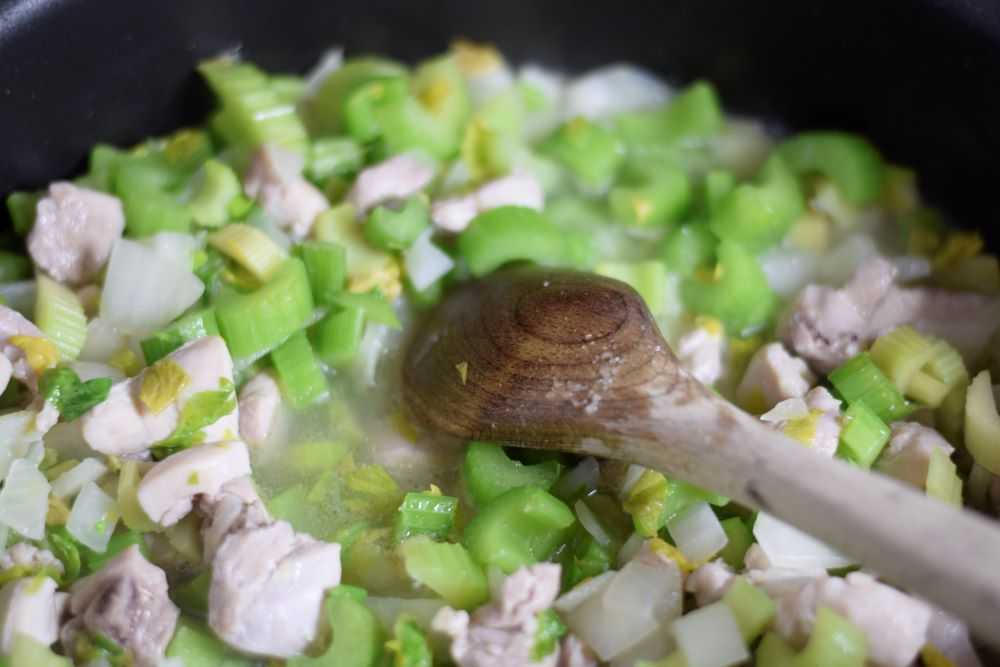
Step 4: Stir in the celery, water, and salt

Stir in the celery, 1 cup water, and salt and bring to a boil. Cover, reduce heat, and simmer for a few minutes or until celery is crisp-tender. Watch the celery carefully here because it goes from perfect to overcooked rather quickly.

Chicken, onion, and celery in a pan

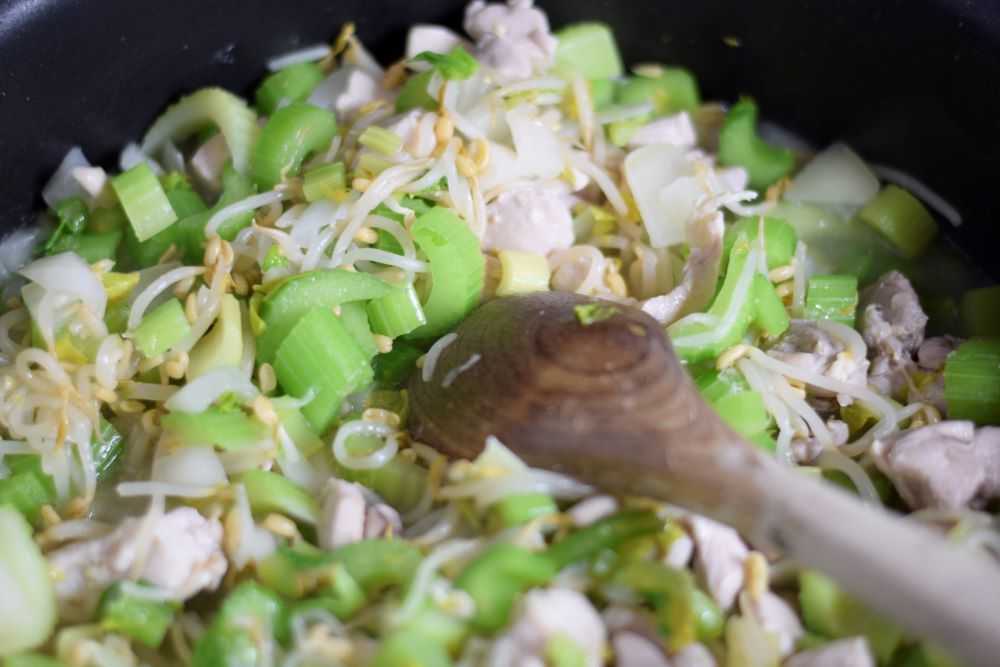
Step 5: Add in the bean sprouts

If you are using canned bean sprouts, simply stir them in and proceed directly to the next step.

If you are using fresh bean sprouts stir them in and cover then pan. Cook for 1-2 minutes or until they soften up a bit before proceeding.

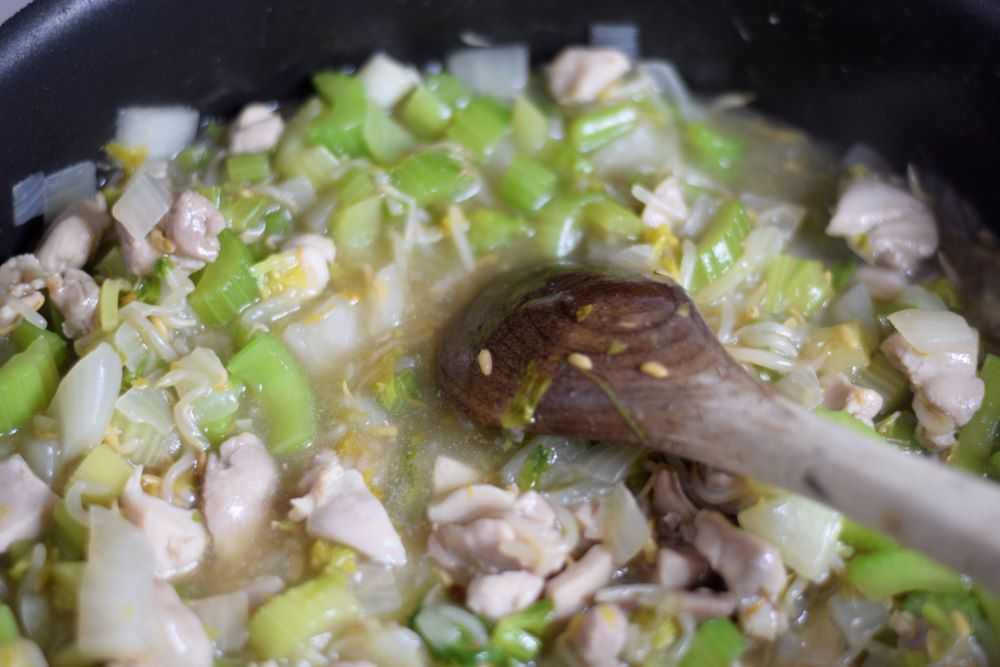
Step 6: Add in the sauce

Add in the reserved sauce mixture and cook and stir until thickened and bubbly. Taste the chop suey and add in a little additional salt or soy sauce if needed. The chop suey is now ready to serve!

Chicken chop suey

Serve

Serve the chicken chop suey with crunchy noodles or fried rice. Enjoy!

Chicken Chop Suey

Recipe by: Mandy
Tender chicken, crunchy celery, and bean sprouts combine in this delicious dish. It is easy to make and ready in about 30 minutes!
Prep Time 15 minutes
Cook Time 15 minutes
Total Time 30 minutes

Ingredients
  

For the sauce:

  • cup water
  • 3 tablespoons cornstarch
  • 2 teaspoons soy sauce
  • 1 teaspoon sugar

For the chop suey:

  • 2 tablespoons oil
  • 1 pound chicken , cut into bite-sized pieces
  • 1 onion, diced
  • 1 bunch celery, chopped
  • 1 cup water
  • 1 teaspoon salt
  • 1 can bean sprouts, drained (14 oz)

Instructions

  • Stir all sauce ingredients together in a small bowl and set aside.
  • Heat the oil in a large skillet and add in the chicken and onion. Cook until the chicken is done and the onion is tender.
  • Stir in the celery, 1 cup water, and salt. Reduce heat to low, cover, and simmer for a few minutes or until the celery is crisp-tender.
  • Stir in the bean sprouts and reserved sauce. Cook and stir until thickened and bubbly.
  • Taste the chop suey and add additional salt or soy sauce if needed. Serve hot with rice or crispy noodles. Enjoy!

Notes

  • Fresh bean sprouts may also be used instead of canned.  Add them in after the celery and cook for a few minutes or until they start to soften.  Add in the sauce and proceed as directed by the recipe.
  • One of the great things about this dish is that you can add in whatever vegetables you like.  Water chestnuts, mushrooms, and bamboo shoots are delicious additions!

You may also like:

Peanut sauce

Peanut Sauce and Dressing


Garlic roasted green beans

Garlic Roasted Green Beans


chocolate mint cookies

Chocolate Mint Cookies

Chocolate Pecan Pie

This chocolate pecan pie tastes like a cross between a pecan pie and a rich, chocolate brownie. It is sure to disappear quickly!

Chocolate pecan pie with ooey gooey chocolate filling

Up until recently I had never had a chocolate pecan pie. Unfortunately I never even knew what I was missing out on!

Chocolate pecan pie has a gooey center like traditional pecan pie but the addition of chocolate makes it taste rich and fudgy. Add in the crunch of the pecans and the flakey pie crust and you have a dessert that is sure to please!

Chocolate pecan pie is very easy to make and we will go through how to make it step-by-step. Let’s get started!

Ingredients for Chocolate Pecan Pie

Chocolate pecan pie has 10 ingredients:

Sugar and brown sugar – Sugar helps to sweeten the pie. Adding some brown sugar gives the pie a greater depth of flavor.

Corn syrup – Corn syrup sweetens the pie and helps to give pecan pie its characteristic texture. It also helps to prevent sugar crystallization. Light corn syrup is what you want here.

Eggs – Eggs help to give structure to the pie.

Vanilla – Vanilla brings out the chocolate flavor.

Salt – This helps to balance the flavor and cut down on the sweetness a bit.

Butter – I use salted butter.

Chocolate – You will need 2 ounces of semi-sweet or bittersweet chocolate. You can use squares of baking chocolate, chocolate chips, or whatever you have on hand. If you want you can double the chocolate if you want the pie to be extra fudgy!

Pecans – I coarsely chop them so the pie is easier to serve and eat. You can also substitute walnuts if you prefer.

Pie crust – You will need an unbaked, single crust pie shell. You can make your own or purchase one from the store.

How to Make Chocolate Pecan Pie

Step 1: Prepare the pie crust

Roll out the pie crust and place it in a 9-inch pie pan. Flute the edges and set aside while you prepare the filling for the pie.

Step 2: Stir together the sugars, corn syrup, eggs, salt, and vanilla

Stir the sugar, brown sugar, corn syrup, eggs, salt, and vanilla together in a large bowl. Whisk it so that everything is smooth and set aside.

ingredients for chocolate pecan pie
Place the sugar, brown sugar, eggs, corn syrup, salt, and vanilla in a bowl.
Whisk until smooth and set aside.

Step 3: Melt the chocolate and butter together

Place the chocolate and butter in a small saucepan. Heat over low heat, stirring constantly, until completely melted and smooth.

chocolate and butter in a saucepan
Place the chocolate and butter in a saucepan.
melted chocolate
Heat over low heat, stirring constantly, until the chocolate is melted.

Step 4: Add the remaining ingredients

Stir the melted chocolate and pecans into the egg mixture. Whisk until smooth and pour into the unbaked pie crust. The pie is now ready for the oven!

Chocolate pecan pie ready for the oven
Add the remaining ingredients and pour the filling into the unbaked pie crust.

Step 5: Bake the pie

Bake the pie at 350 degrees for 55 minutes. The pie will still be very jiggly at this point but it will thicken as it cools. Place it on a wire rack to cool completely.

Chocolate pecan pie
Look at that delicious crackly top! Let the pie cool for at least 2 hours before serving.

Serve

Let the pie cool for at least 2 hours before serving so it will hold its shape. It is delicious topped with whipped cream. Ice cream is surprisingly good too! Enjoy!

A slice of chocolate pecan pie

Chocolate Pecan Pie

Recipe by: Mandy
This chocolate pecan pie tastes like a cross between a pecan pie and a rich, chocolate brownie. It is sure to disappear quickly!
Prep Time 20 minutes
Cook Time 55 minutes
Total Time 1 hour 15 minutes
Servings 8

Ingredients
  

  • 1 unbaked pie crust
  • ½ cup sugar
  • ½ cup brown sugar
  • 1 cup light corn syrup
  • 3 eggs
  • ¼ teaspoon salt
  • 1 teaspoon vanilla
  • 2 ounces semi-sweet or bittersweet chocolate (if you are using chocolate chips this is about ⅓ cup)
  • 2 tablespoons butter
  • cup pecans, coarsely chopped if desired

Instructions

  • Roll out the pie crust and place it in a 9-inch pie pan. Flute the edges and set aside.
  • Preheat the oven to 350°.
  • Stir the sugar, brown sugar, corn syrup, eggs, salt, and vanilla together in a large bowl. Whisk until smooth and set aside.
  • Place the chocolate and butter in a small saucepan. Heat over low heat, stirring constantly, until completely melted and smooth.
  • Stir the melted chocolate and pecans into the egg mixture. Whisk until smooth and pour into the unbaked pie crust.
  • Bake the pie at 350° for 55 minutes. The pie will still be very jiggly at this point but it will thicken as it cools. Place it on a wire rack to cool completely.
  • Let the pie cool for at least 2 hours before serving so it will hold its shape. It is delicious topped with whipped cream or ice cream. Enjoy!

You may also like:

Chocolate Mint Cookies

Apple crisp

Perfect Apple Crisp

Chocolate Mint Cookies

These chocolate cookies are soft and thick. If you like chocolate and mint together you will LOVE these cookies!

Soft & Chewy Chocolate Mint Cookies

There are few cookies that disappear as quickly as these at our house. Everyone loves them and an entire batch is gone in just a few days!

These cookies are soft and chewy. They taste a little like a brownie with their rich chocolate taste. Mint chips give them the perfect amount of cool minty flavor. Yum!

This post will take you through how to make these delicious chocolate mint cookies step-by-step. Let’s get started!

Ingredients to Make Chocolate Mint Cookies

Chocolate mint cookies contain 16 ingredients: butter, shortening, sugar, brown sugar, two eggs, vanilla, flour, cocoa, baking soda, salt, and mint chips.

Don’t let that long list scare you! It may sound like a lot but you probably have most of the ingredients already in your kitchen!

Ingredients for chocolate mint cookies

The mint chips I use are Guittard brand and they work really well in this recipe. You can also use Andes mints baking chips or purchase a package of Andes mints and coarsely chop them yourself. You will need 12 ounces or about 2 cups for the cookies.

How to Make Chocolate Mint Cookies

Step 1: Stir the butter, shortening, and sugars together

Start by stirring the shortening, white sugar, and brown sugar together in a large bowl. Make sure the butter is at room temperature so it easier to mix.

I usually use a wooden spoon for this job. As long as the butter is soft it is easy to smoosh everything together (I know, a real technical term) with the back of the spoon. You can certainly use a stand mixer for this if you prefer. When all of the sugar is incorporated you are ready to add the wet ingredients.

Stir butter, shortening, and sugar together.
Mix the butter, shortening, and sugars together in a large bowl. “Smoosh” the butter and shortening with the back of the spoon until the sugars are fully incorporated.

Step 2: Add the wet ingredients

When the butter, shortening, and sugars are well mixed add in the eggs and vanilla. Mix these ingredients together until they are smooth.

Add the vanilla to the cookie dough

Step 3: Stir in the dry ingredients

Things are about to get chocolatey here! Next add in the flour, cocoa, baking soda, and salt and stir just until combined. The cocoa can be quite lumpy but I do not usually sift it. Most of the lumps will get worked out as you stir the thick batter.

Stir in the dry ingredients
Chocolate cookie dough

Step 4: Stir in the mint chips

Lastly add in the mint chips. If you are using a mixer put it on the lowest setting here so it does not break up the mint chips. The dough is now done and you are ready to bake your cookies!

Mint chip chocolate cookie dough

Step 5: Drop the cookies onto the baking sheet

Since the dough contains shortening which is solid at room temperature it does not need to chill before baking. Drop the dough by rounded tablespoons onto a greased baking sheet. Make sure they are about two inches apart because they will spread slightly as they bake. I like to use my handy dandy cookie scoop for this job but you can also use two spoons if that is easier. The cookies are now ready for the oven!

Drop the chocolate cookie dough onto a baking sheet

Step 6: Bake the cookies

Bake the cookies at 350 degrees for 8 minutes. They are done when they are just set and the top has lost its gloss. At this point they may not look done but they will firm up as they cool. Let them sit on the baking sheet for 1-2 minutes before transferring them to a wire rack to finish cooling completely.

Chocolate mint chip cookies

Serve

Enjoy these chocolate mint cookies warm out of the oven. Yum!

Chocolate mint chip cookies

Store them in an airtight container to keep them soft and chewy. They also freeze well for longer term storage. Enjoy 🙂

Hope you get to try these chocolate mint cookies soon. Happy Cooking!

Chocolate Mint Cookies

Recipe by: Mandy
These chocolate cookies are soft and chewy. If you like chocolate and mint together you will LOVE these cookies!
Prep Time 10 minutes
Cook Time 10 minutes
Total Time 1 hour
Servings 4 dozen

Ingredients
  

  • ½ cup butter, softened (1 stick)
  • ½ cup shortening
  • 1 cup sugar
  • ½ cup brown sugar
  • 2 eggs
  • 1 teaspoon vanilla
  • 2 cups flour
  • cup cocoa
  • ¾ teaspoon baking soda
  • ¼ teaspoon salt
  • 1 package mint chips (12 oz package, about 2 cups)

Instructions

  • Preheat the oven to 350°.
  • Stir the butter, shortening, sugar, and brown sugar together in a large bowl.
  • Add in the eggs and vanilla and mix until smooth.
  • Next add in the flour, cocoa, baking soda, and salt and mix well. Add in the mint chips and stir just until combined.
  • Drop the cookies by rounded teaspoons onto a greased baking sheet. Make sure they are about two inches apart because they will spread slightly as they bake.
  • Bake at 350° for 8 minutes. They are done when they are just set and the top has lost its gloss. At this point they may not look done but they will firm up as they cool. Let them sit on the baking sheet for 1-2 minutes before transferring to a wire rack to cool completely.
  • Serve these cookies warm right out of the oven. Enjoy!

Variation:

Do you want to mix things up a bit? The great thing about this recipe is that it is SO versatile! Try using peanut butter chips or white chocolate chips. You can also use semisweet chocolate chips for the richest most chocolatey cookies you have ever had! Experiment to see which is your favorite!

Chocolate cookies with peanut butter chips, white chocolate chips, and semisweet chocolate chips

Other recipes you may like:

Oatmeal raisin cookies

Mom’s Oatmeal Raisin Cookies

Simple Caprese Salad

I first stumbled upon caprese salad a few years ago when I was looking for ways to use extra tomatoes from my garden. Our family fell in love with the fresh taste and it quickly became one of our favorite accompaniments to grilled chicken!

If you have never had caprese salad it tastes like summer on a plate. A little bit of balsamic vinegar brings out the bright flavor of vine ripened tomatoes and sweet basil. It is a very simple salad to make and the flavors of summer really shine through. It is a great way to use all those tomatoes growing in your garden! Read on to learn how to make this delicious caprese salad at home.

Ingredients

Caprese salad uses only six ingredients. We will go through them now:

Ingredients for caprese salad: tomatoes, basil, and mozzarella cheese.
Caprese salad is made with only six simple ingredients.

Tomatoes – Select tomatoes that are ripe, fresh, and full of flavor. Watery winter grocery store tomatoes aren’t going to cut it here. Try to choose ones that are about the same size around as your mozzarella cheese to make layering easier.

Basil – Fresh basil is the only way to go here. I like to use basil from our garden when we have it. Luckily basil has such a strong flavor you do not need too much of it.

Mozzarella Cheese – Fresh mozzarella cheese is best for this salad, and it is usually sold in a ball or log. This type of mozzarella is moister and less rubbery than the cheese that you would buy for pizza, for example. Fresh mozzarella cheese does not keep very long and needs to be eaten within a few days of opening the package. Luckily, this caprese salad won’t last that long. 🙂

Fresh mozzarella can be a little difficult to cut because it is so soft and delicate. The mozzarella I use is pre-sliced, which saves time and makes things much easier.

Balsamic Vinegar – Balsamic vinegar really brings out the flavor of the tomatoes. A little goes a long way here. If you are not a fan of balsamic vinegar you can omit it if you would like.

Olive oil – Olive oil gives some flavor to the salad and keeps things moist.

Salt – I like to use kosher salt here because it is easier to sprinkle on top of the salad. Table salt works too, in a pinch. (Get it? 🙂 )

Instructions

Step 1: Make the Balsamic Glaze

Start by making the balsamic glaze that is drizzled over the top of the salad. Cooking the balsamic vinegar will remove some of the harshness and make it taste sweeter. It also makes it thicker so it will not slide off of your salad.

To make the balsamic glaze put half a cup of balsamic vinegar into a small saucepan and bring it to a gentle boil. Allow it to simmer for 15-20 minutes, or until it is reduced by about half and the consistency is as thick as you would like. Do not walk away from this because it goes from perfect to burned in about two minutes. (Yes, I did this and yes, I had to start over). Set the glaze aside to cool while you make the rest of the salad.

Step 2: Assemble the Salad

While the vinegar is cooling assemble the salad. Start by cutting the stems out of the tomatoes and slicing them in nice thick slices about 1/4 inch thick. Open the mozzarella cheese and drain out any whey in the package. Wash the basil and remove the leaves from the stems. Now everything is ready to go!

Slicing tomatoes.
Slice your tomatoes and get your ingredients ready.

Get your serving platter and start alternating the tomatoes with the mozzarella cheese in a pretty pattern. Then poke some basil leaves here and there between the layers. Just before serving drizzle the salad with the olive oil and some of the cooled balsamic glaze. Don’t go crazy with the glaze here people, a little goes a long way. Lastly, sprinkle with salt. Isn’t it so pretty?

Caprese salad on a plate.
Caprese salad. Yum, yum, yum!

Serve

Serve your salad immediately. Enjoy it as a side dish or serve it alone with crusty bread for an easy summer lunch. Yum, yum, yum! Welcome to summer 🙂

I hope you get to try this caprese salad soon! Happy Cooking!

Simple Caprese Salad

Recipe by: Mandy
A little bit of balsamic vinegar brings out the bright flavor of vine ripened tomatoes and summery basil to give big flavor to this salad. Enjoy it as a side dish or serve it alone with crusty bread for an easy summer lunch!
Prep Time 10 minutes
Cook Time 30 minutes
Total Time 40 minutes
Servings 6

Ingredients
  

  • 1 lb fresh mozzarella cheese, cut into 1/4 inch thick slices
  • 4-5 medium tomatoes, cut into 1/4 inch thick slices
  • 10-20 basil leaves
  • ½ cup balsamic vinegar
  • 1 tablespoon olive oil
  • kosher salt, to taste

Instructions

  • Make the balsamic glaze by pouring the balsamic vinegar into a small saucepan. Bring to a boil, then reduce heat to low. Simmer for 15-20 minutes or until the vinegar is thick enough to coat a spoon and desired consistency is reached. Set aside to cool.
  • While the vinegar is cooling assemble the salad. On your serving platter alternate the sliced tomatoes with the mozzarella cheese in a pretty pattern. Then poke some basil leaves here and there between the layers. 
  • Drizzle the salad with the olive oil and as much balsamic glaze as you would like. Sprinkle with kosher salt to taste.
  • Serve immediately. Enjoy!

Notes

This salad may also be made without the balsamic glaze if desired.

Be sure to pin for later!

Powered by WordPress & Theme by Anders Norén