Tag: dinner

Peanut sauce

Peanut Sauce and Dressing

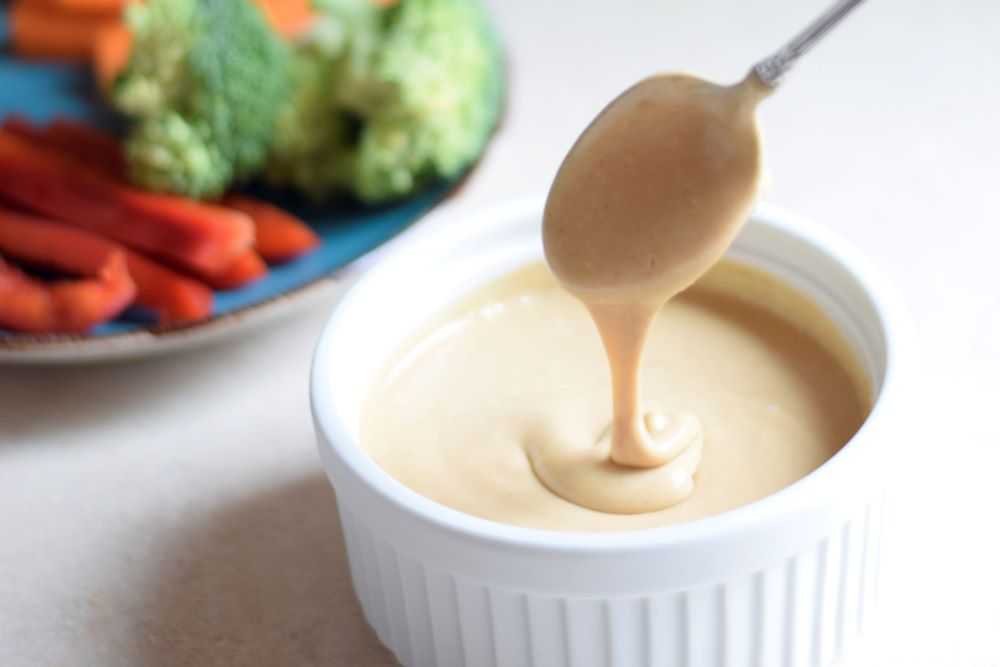
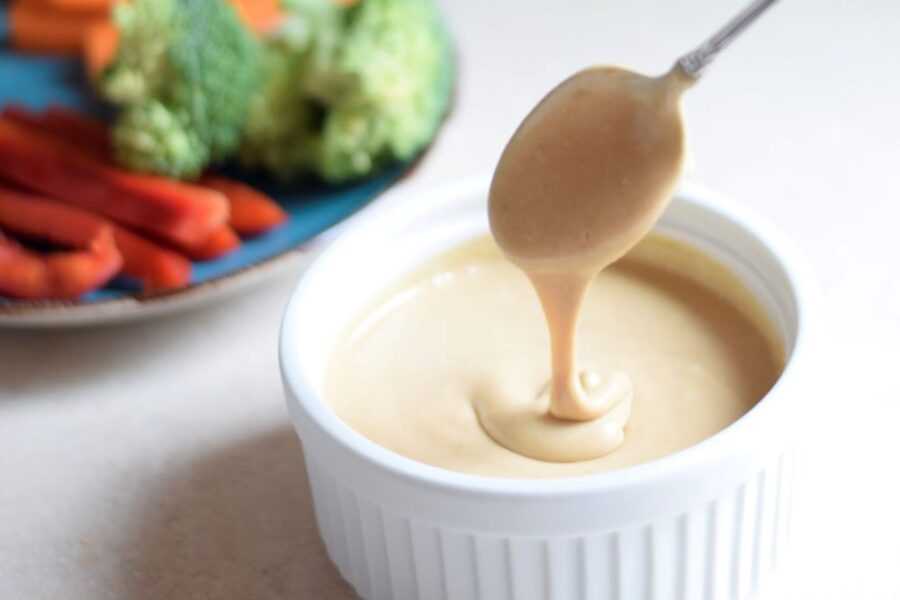
This versatile peanut sauce can be used on everything from salads to chicken to noodles. It is creamy and smooth with the perfect balance of flavors.

smooth and creamy peanut sauce

This peanut sauce is one of my favorites. It is so versatile and can be used as a sauce, dressing, or dip. Coconut milk acts as the base of the sauce and helps to give the peanut sauce a creamy, rich texture. Yum!

This peanut sauce uses only 6 ingredients. Many of them are pantry ingredients you probably already have on hand! It easy to make and ready in about 5 minutes. Let’s get started!

Ingredients for Peanut Sauce
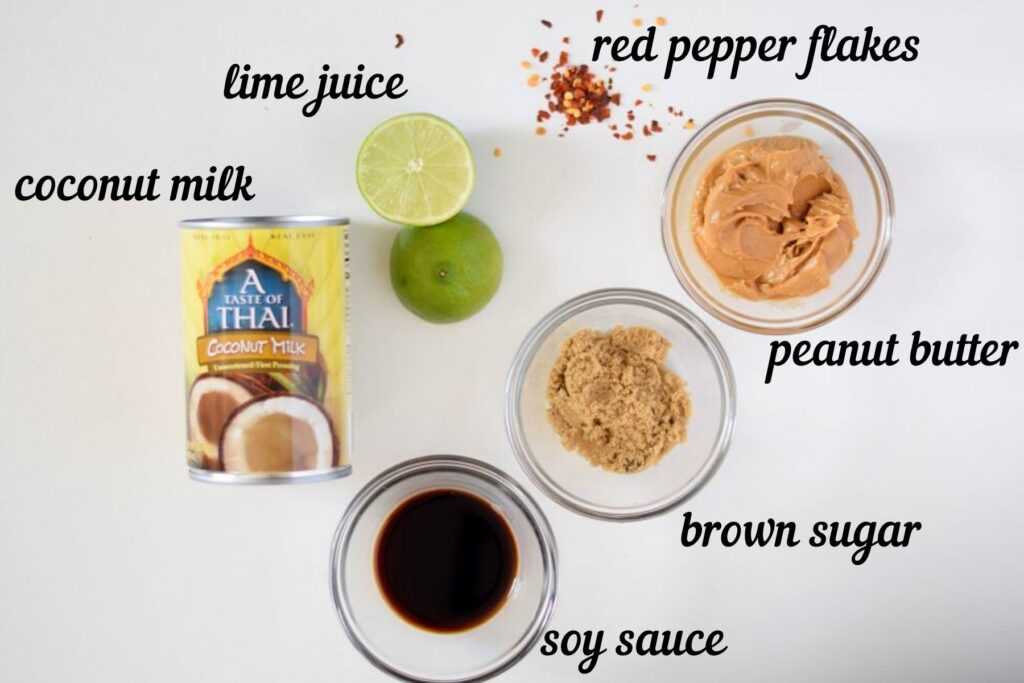
Ingredients for peanut sauce

Peanut butter – It wouldn’t be peanut sauce without the peanut butter! I have made this with both natural types of peanut butter and “regular” peanut butter (like Jif or Skippy). Regular peanut butter has a stronger taste and smoother texture than natural peanut butter but both are good! You may need to adjust the amount of soy sauce and sugar slightly depending on what type you use.

Coconut milk – Coconut milk is creamy and smooth and forms the base of the sauce. It is made from cooking water and coconut together and has a mild coconut flavor. You will find unsweetened coconut milk in the canned food section of the grocery store. Make sure you do not purchase coconut cream, cream of coconut, or coconut milk from the refrigerated section as these are different products.

I usually use regular unsweetened coconut milk. Light coconut milk can also be used but the sauce might have a thinner consistency.

Right out of the can the coconut milk can separate, with the fat rising to the surface like in the picture below. Stir it well before measuring and adding to the sauce.
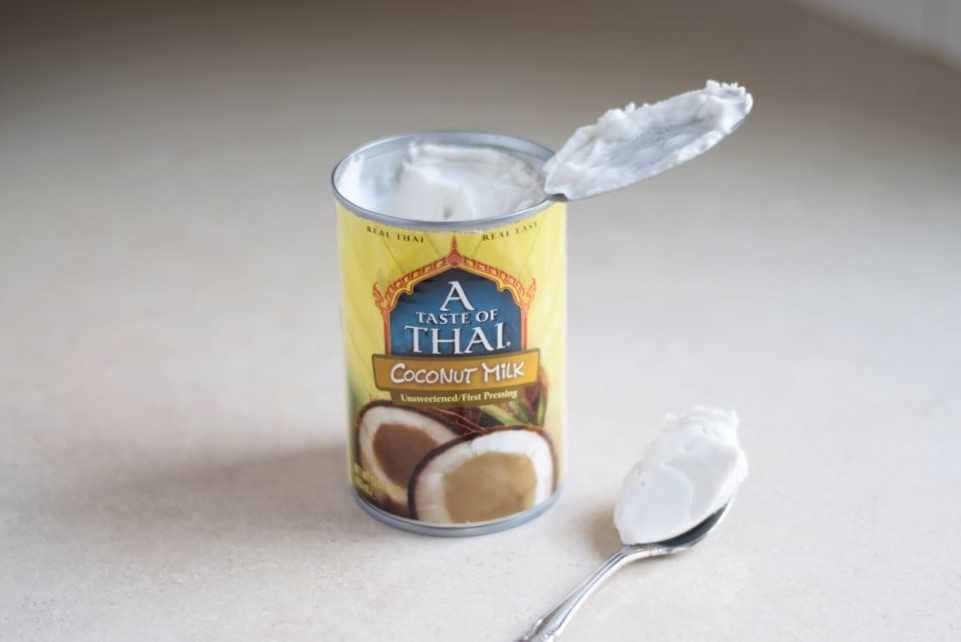
Coconut milk
Coconut milk can separate, with the fat rising to the surface. Stir it well before adding it to the sauce.

Soy sauce – I use regular soy sauce here.

Brown sugar – Sweetens the sauce.

Fresh lime juice – This brightens the flavor of the sauce. Only a tablespoon is needed, from about half of a lime.

Red pepper flakes – Adds a little heat. Adjust this to taste.

How to Make Peanut Sauce

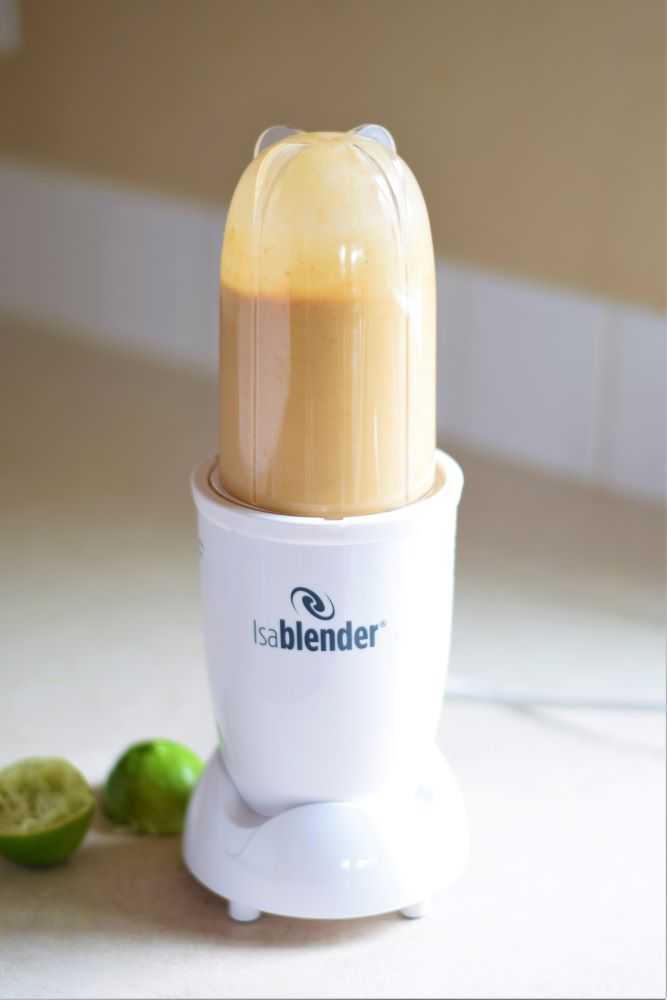
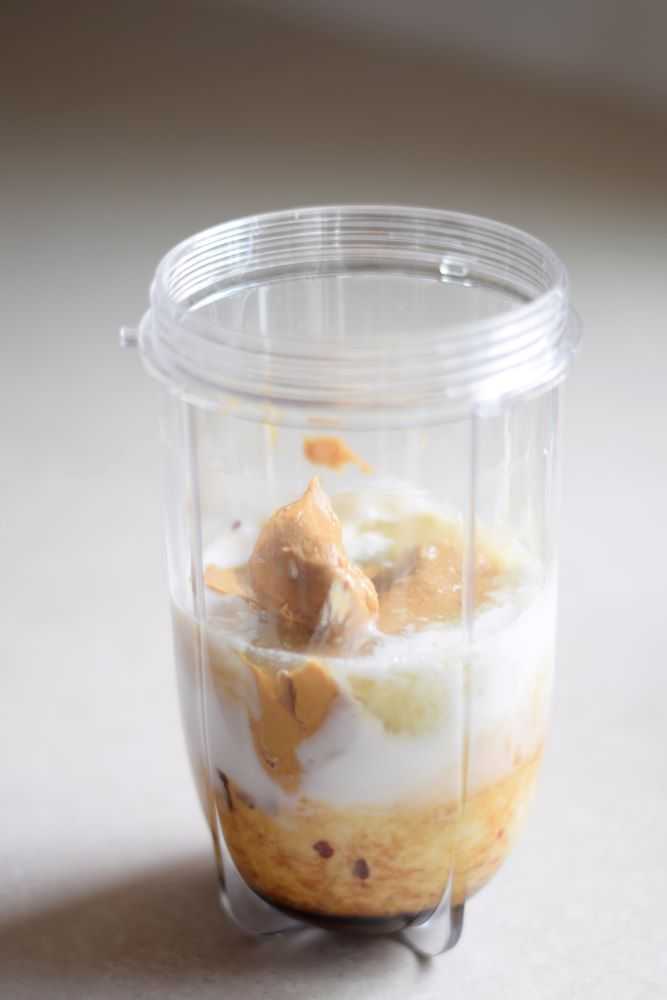
Combine all of the ingredients in a blender cup and puree until smooth. Taste the sauce and adjust the seasonings to your liking. That’s it! SO easy!

I like using some type of blender for this sauce because it helps to easily incorporate the peanut butter into the coconut milk and makes a smoother sauce. If you do not have a blender you can use a whisk to mix everything together. It might take a minute or two to get everything incorporated and smooth.
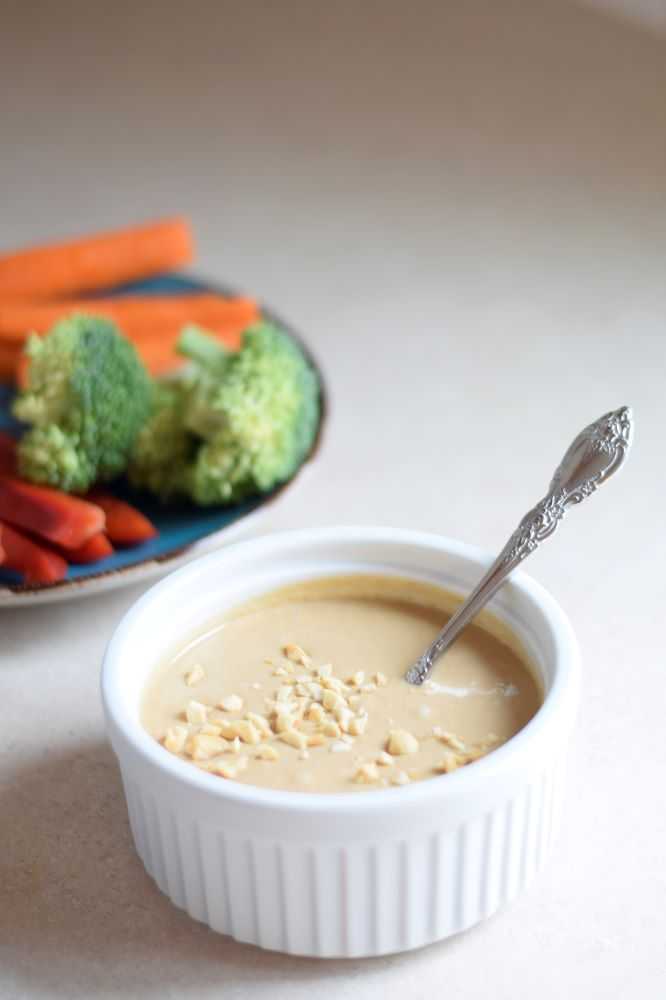
Peanut sauce with raw vegetables

How to Use Peanut Sauce

The great thing about this sauce is that it is SO versatile! Try using it as:

  • a dressing with Thai Chicken Salad
  • a dip for fresh vegetables
  • a dipping sauce for chicken satay
  • a dressing over a warm or cold noodle salad

Whatever you do with it will be delicious!

How to Store Peanut Sauce

Store peanut sauce in the refrigerator until ready to use. It will thicken in the refrigerator so you may need to let it sit at room temperature or heat it in the microwave for a few seconds before serving. Enjoy!

Peanut sauce

Peanut Sauce and Dressing

Recipe by: Mandy
This versatile peanut sauce can be used on everything from salads to chicken to noodles. It is creamy and smooth with the perfect balance of flavors.
Prep Time 5 minutes
Total Time 5 minutes
Servings 1 cup

Ingredients
  

  • cup creamy peanut butter (see note)
  • cup coconut milk
  • 1 tablespoon soy sauce
  • 4 teaspoons brown sugar
  • 1 tablespoon fresh lime juice (from half a lime)
  • teaspoon red pepper flakes, or to taste

Instructions

  • Place all ingredients in a blender cup and blend until smooth. Taste and adjust seasonings to taste. Store in the refrigerator. Enjoy!

Notes

  • Regular peanut butter has a stronger taste and smoother texture than natural peanut butter but both are good! You may need to adjust the amount of soy sauce and sugar slightly depending on what type you use.
  • This peanut sauce will thicken in the refrigerator so you may need to let it sit at room temperature or heat it in the microwave for a few seconds before serving.  

You may also like:

Chicken chop suey

Chicken Chop Suey


spaghetti with kielbasa, peppers, and onions

Spaghetti with Kielbasa, Peppers, and Onions


chocolate mint cookies

Chocolate Mint Cookies

Chicken Chop Suey

Tender chicken, celery, and bean sprouts combine in this delicious dish. It will remind you of takeout at your favorite restaurant!

Quick and Easy Chicken Chop Suey

This dish goes by many names but the most common are chicken subgum chow mein or chicken chop suey. Whatever you call it a version of this is a staple at many Chinese restaurants across the country. It is loaded with crunchy vegetables and tender chicken held together in a slightly thickened sauce that is served over crunchy noodles or cooked rice. Yum!

Chicken chop suey is easy to make at home and is ready in about half an hour. Let’s get started!

Ingredients for Chicken Chop Suey

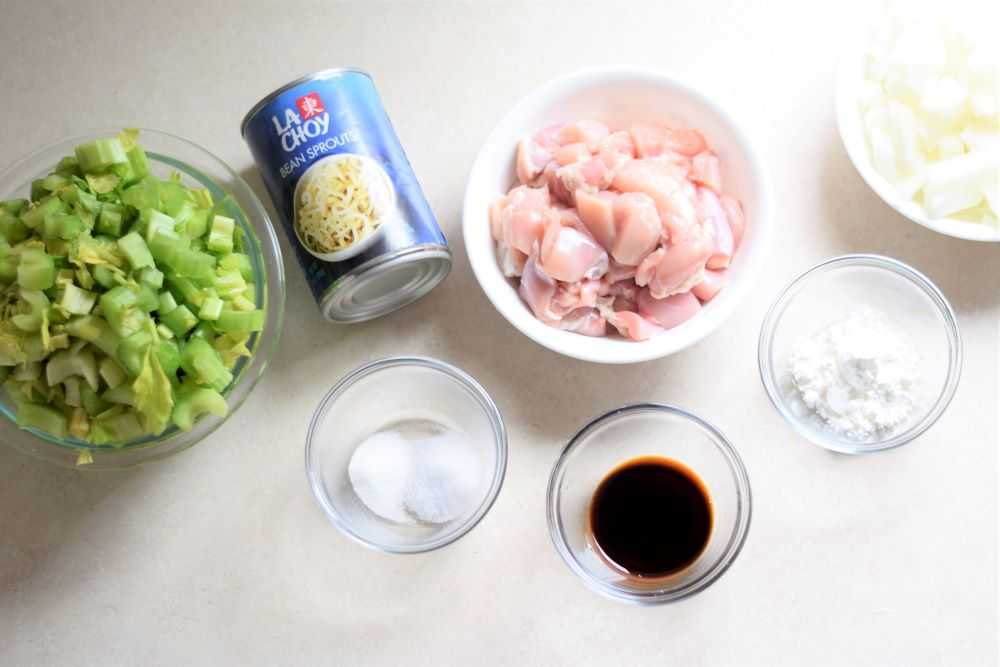
Chicken chop suey has 10 ingredients:

Ingredients for chicken chop suey

Chicken – I prefer chicken thighs in this recipe because they stay tender and add a lot of flavor to the dish. Chicken breasts will also work well.

Celery – You will need a whole bunch of celery. It sounds like a lot but it is the foundation of the dish.

Onion – A white onion or yellow onion is best (not red or purple) so it does not change the color of the sauce.

Bean sprouts – Fresh or canned bean sprouts are okay to use here. Fresh bean sprouts usually stay a little crunchier so that is what I usually use. Today I am using canned because the fresh bean sprouts at the store did not look very fresh 🙂 Use whatever you prefer!

Soy sauce – This helps to flavor the sauce. I use regular soy sauce here.

Cornstarch – This is used to thicken the sauce. You can use more or less depending on how thick you want the sauce to be.

Also needed: salt, sugar, water, and cooking oil.

How to Make Chicken Chop Suey

Step 1: Prepare the ingredients

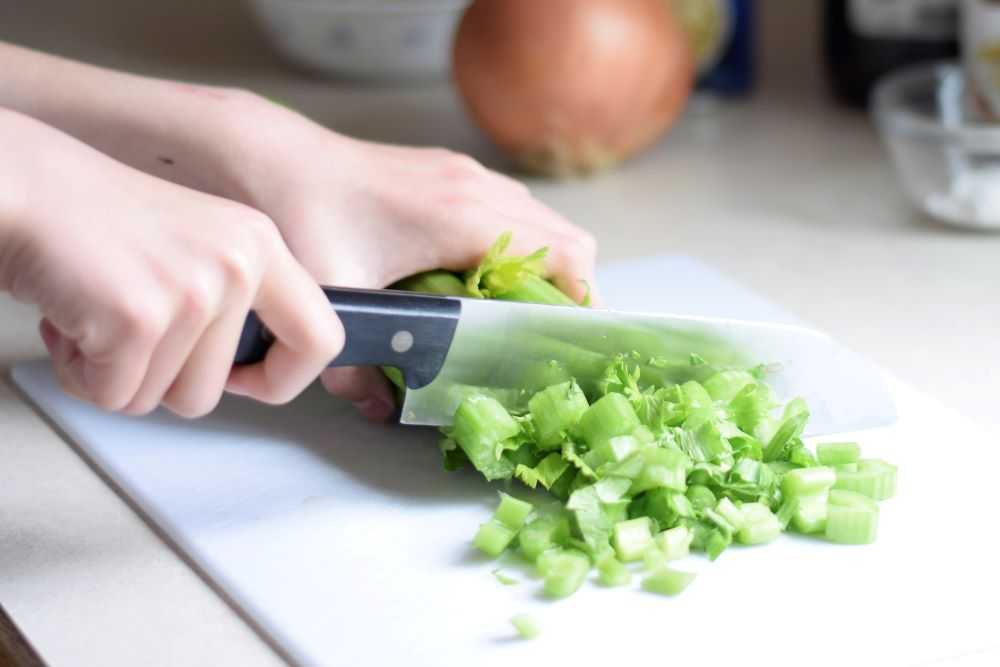
Chicken chop suey cooks pretty quickly so you want to have all of your ingredients ready to go. Start by washing and chopping all of the vegetables and cutting up the chicken. Set this aside for now.

chopping celery

Step 2: Prepare the sauce

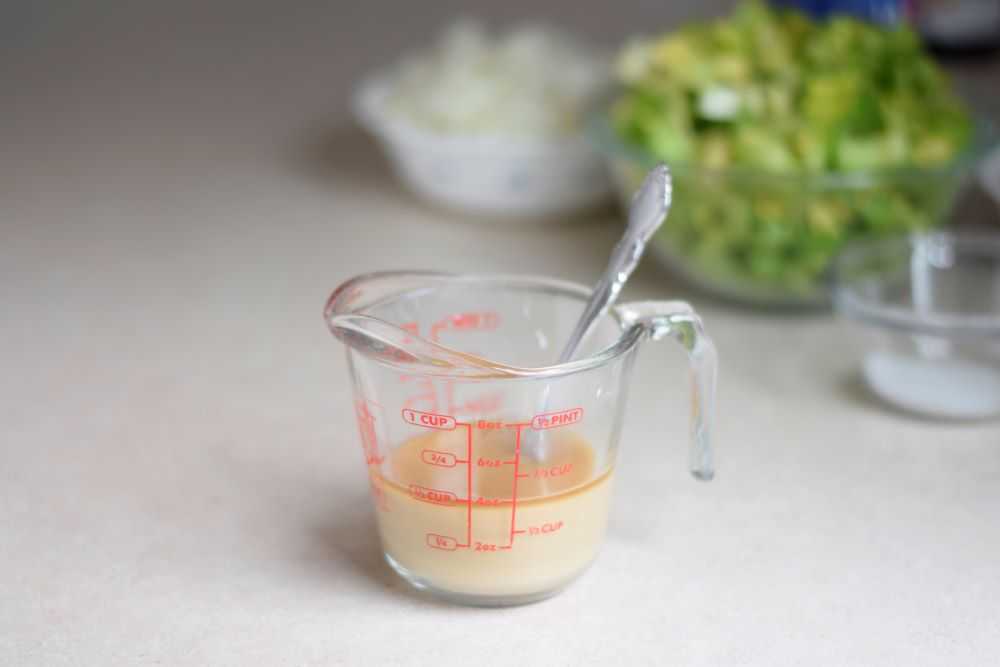
Stir the 1/3 cup water, cornstarch, soy sauce, and sugar together in a small bowl or liquid measuring cup. Set this aside.

Sauce for chicken chop suey

Step 3: Cook the chicken and onion

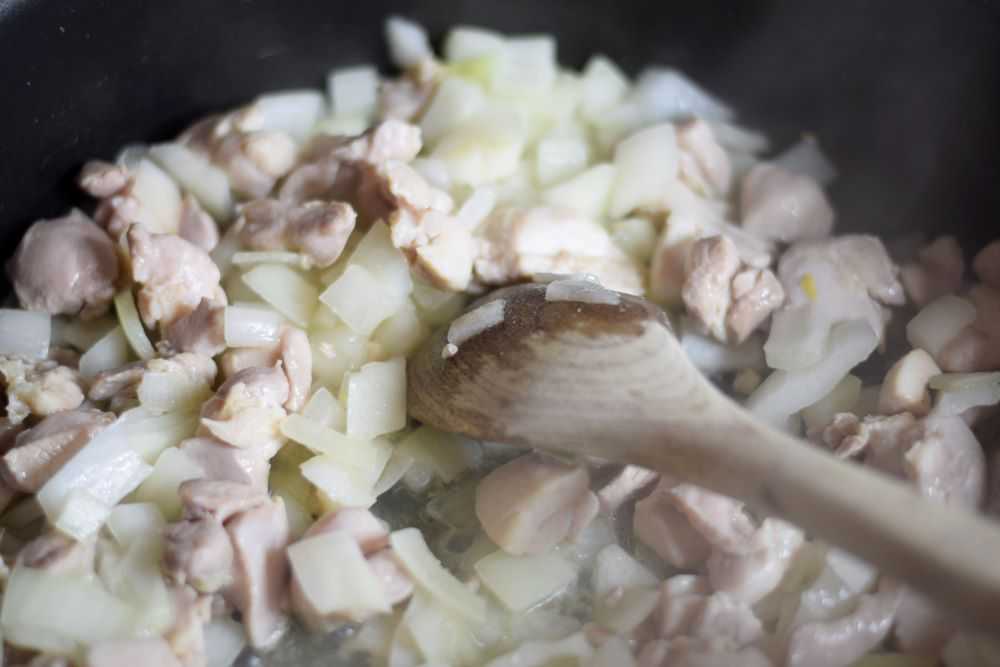
It’s time to start cooking! Add a little oil to a hot pan and add the chicken and chopped onion. Cook it until the chicken is done and the onion is tender.

Cook chicken and onion together

Step 4: Stir in the celery, water, and salt

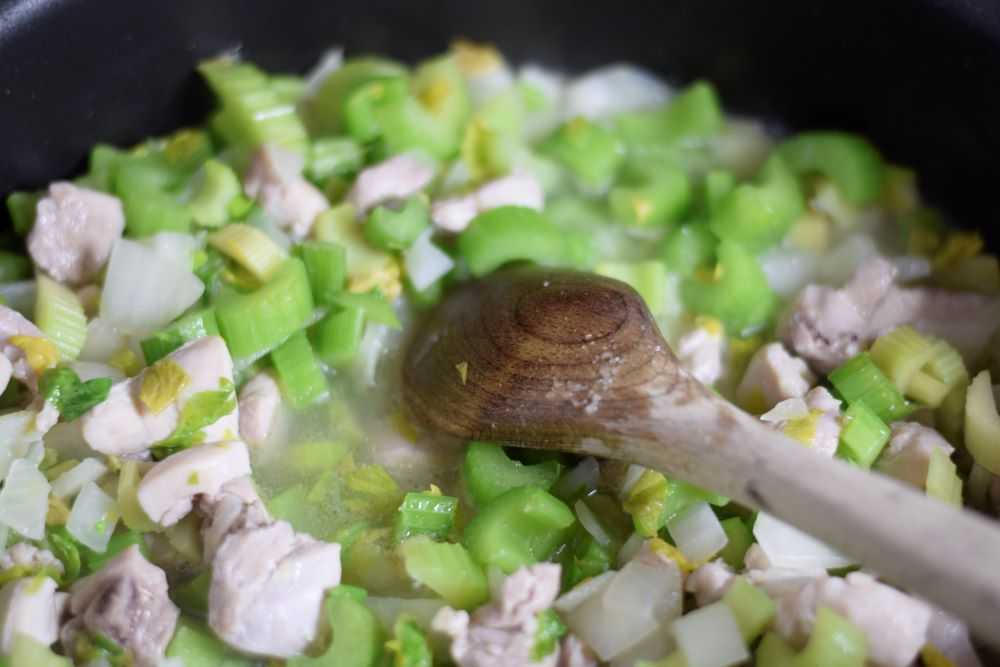
Stir in the celery, 1 cup water, and salt and bring to a boil. Cover, reduce heat, and simmer for a few minutes or until celery is crisp-tender. Watch the celery carefully here because it goes from perfect to overcooked rather quickly.

Chicken, onion, and celery in a pan

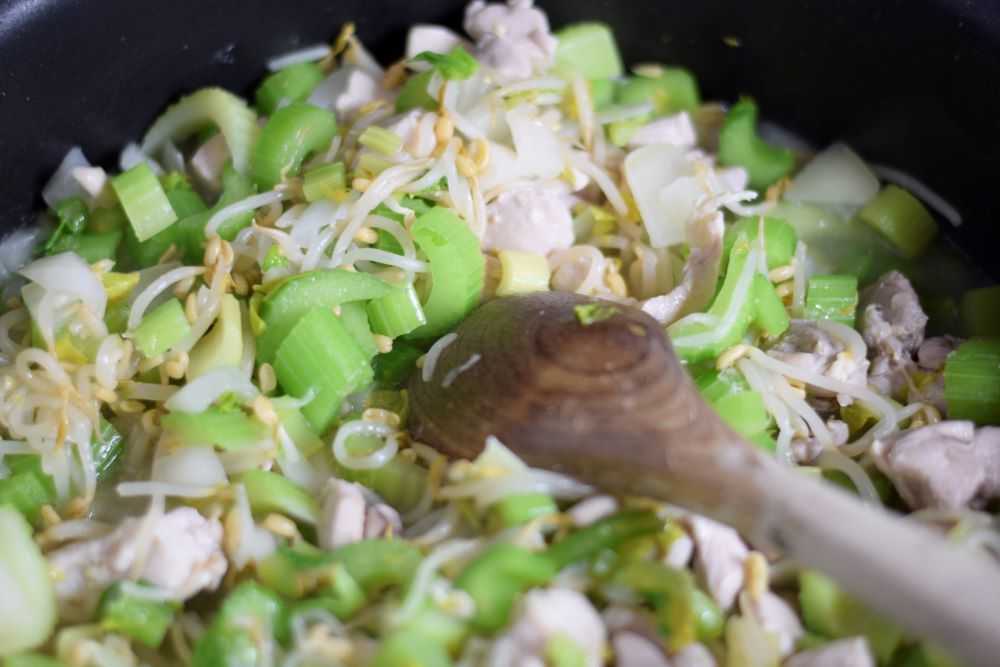
Step 5: Add in the bean sprouts

If you are using canned bean sprouts, simply stir them in and proceed directly to the next step.

If you are using fresh bean sprouts stir them in and cover then pan. Cook for 1-2 minutes or until they soften up a bit before proceeding.

Step 6: Add in the sauce

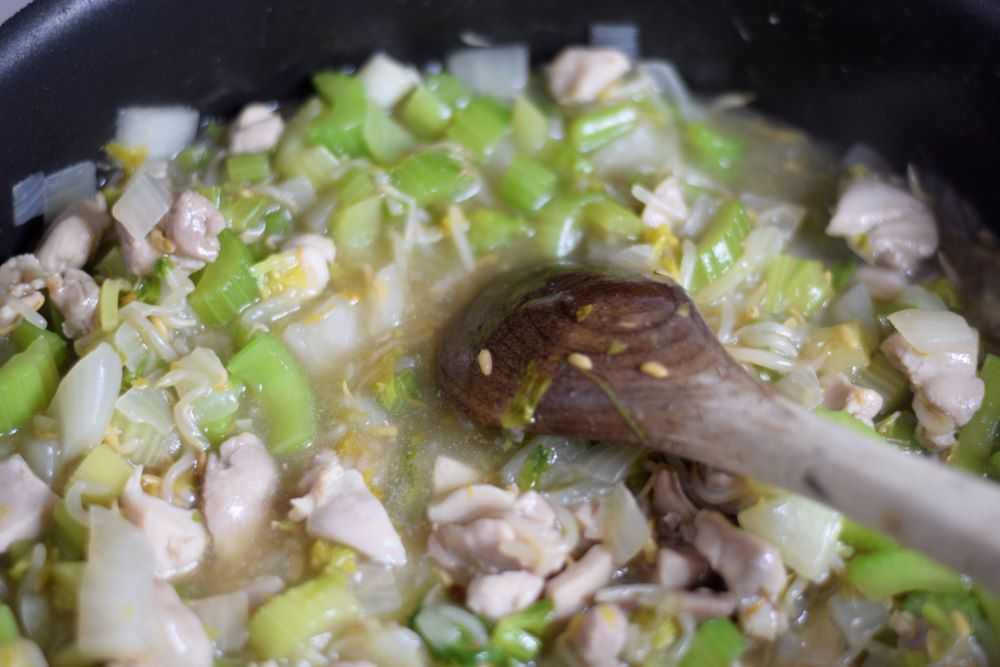
Add in the reserved sauce mixture and cook and stir until thickened and bubbly. Taste the chop suey and add in a little additional salt or soy sauce if needed. The chop suey is now ready to serve!

Chicken chop suey

Serve

Serve the chicken chop suey with crunchy noodles or fried rice. Enjoy!

Chicken Chop Suey

Recipe by: Mandy
Tender chicken, crunchy celery, and bean sprouts combine in this delicious dish. It is easy to make and ready in about 30 minutes!
Prep Time 15 minutes
Cook Time 15 minutes
Total Time 30 minutes

Ingredients
  

For the sauce:

  • cup water
  • 3 tablespoons cornstarch
  • 2 teaspoons soy sauce
  • 1 teaspoon sugar

For the chop suey:

  • 2 tablespoons oil
  • 1 pound chicken , cut into bite-sized pieces
  • 1 onion, diced
  • 1 bunch celery, chopped
  • 1 cup water
  • 1 teaspoon salt
  • 1 can bean sprouts, drained (14 oz)

Instructions

  • Stir all sauce ingredients together in a small bowl and set aside.
  • Heat the oil in a large skillet and add in the chicken and onion. Cook until the chicken is done and the onion is tender.
  • Stir in the celery, 1 cup water, and salt. Reduce heat to low, cover, and simmer for a few minutes or until the celery is crisp-tender.
  • Stir in the bean sprouts and reserved sauce. Cook and stir until thickened and bubbly.
  • Taste the chop suey and add additional salt or soy sauce if needed. Serve hot with rice or crispy noodles. Enjoy!

Notes

  • Fresh bean sprouts may also be used instead of canned.  Add them in after the celery and cook for a few minutes or until they start to soften.  Add in the sauce and proceed as directed by the recipe.
  • One of the great things about this dish is that you can add in whatever vegetables you like.  Water chestnuts, mushrooms, and bamboo shoots are delicious additions!

You may also like:

Peanut sauce

Peanut Sauce and Dressing


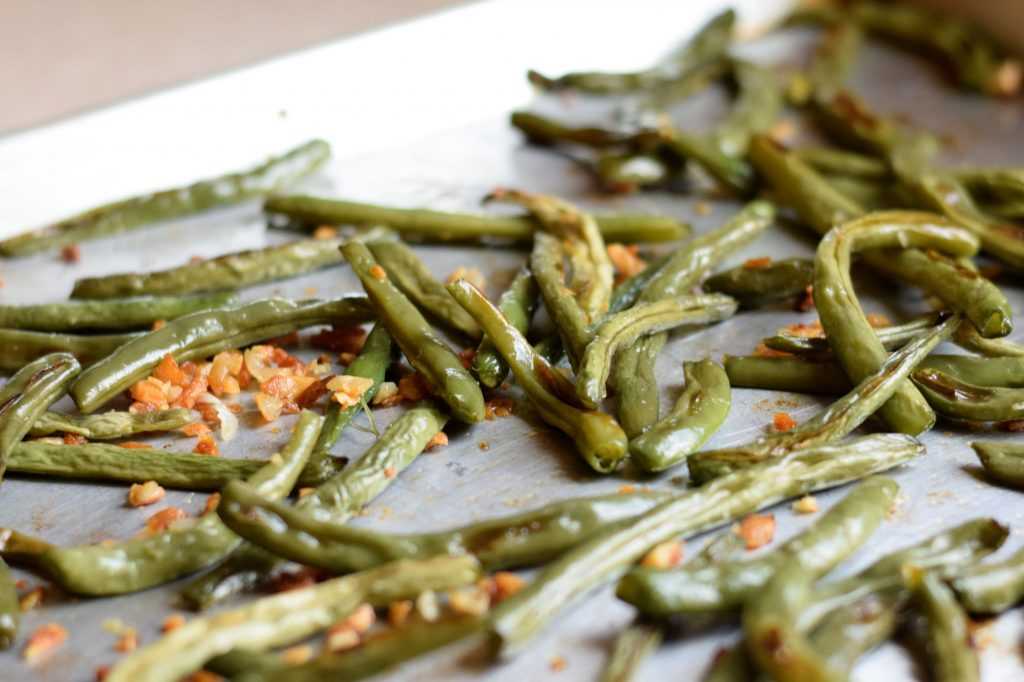
Garlic roasted green beans

Garlic Roasted Green Beans


chocolate mint cookies

Chocolate Mint Cookies

One Hour Clam Chowder

This thick & hearty New-England style clam chowder is loaded with potatoes, onions, and tender clams. It is easy to make at home and ready in less than an hour!

Note: This post may contain affiliate links, where I earn a small commission from qualifying purchases.

One thing I miss about pre-pandemic life is going to the coast to enjoy a big bowl of clam chowder at our favorite restaurant. While many restaurants are closed right now, it does not mean that you cannot enjoy a satisfying bowl of chowder at home, no trip to the beach required!

If you have never tried to make your own clam chowder before you are in for a treat! This New-England style clam chowder is absolutely loaded with potatoes and clams. This recipe is not only easy to make, but it is ready in under an hour! Serve it with oyster crackers or crispy bacon sprinkled on top for a satisfying salty crunch. Yum!

This will take you through how to make this delicious clam chowder step-by-step. Let’s get started!

Ingredients for One Hour Clam Chowder

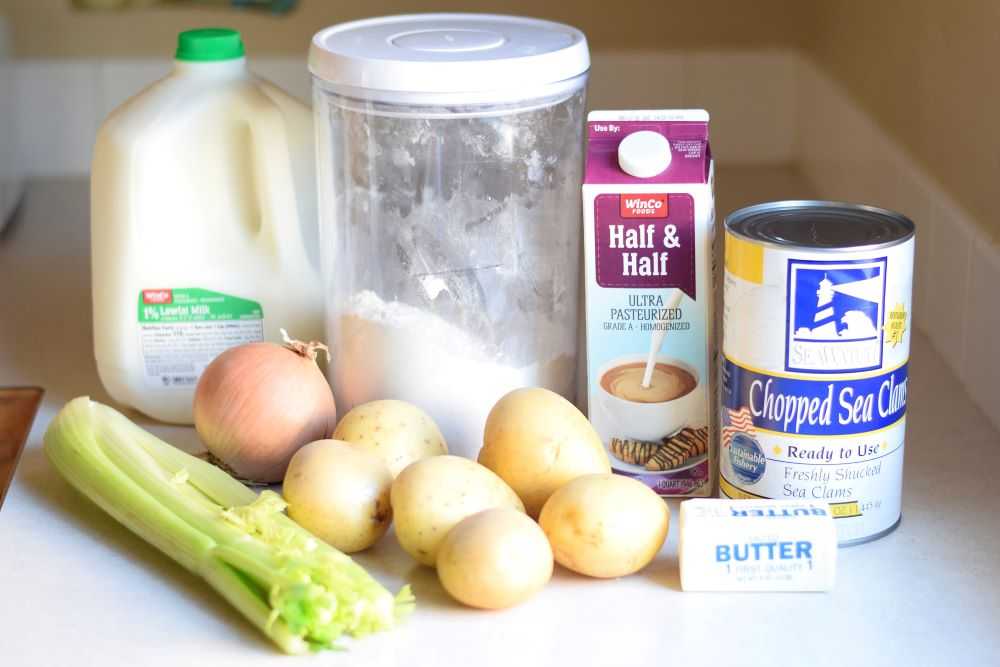
Clam chowder only requires 7 ingredients: onion, celery, potatoes, clams (with juice), milk, flour, half-and-half, and butter. We will go through the ingredients now:

Ingredients for one hour clam chowder

Onions and Celery – These add flavor to the soup. Be sure to use a yellow or white onion (not a red onion) so it does not change the color of the broth.

Potatoes – My favorite potatoes to use in this soup are red potatoes or yukon gold potatoes. Since they have thin skin, I usually do not peel them.

If you don’t have yukon gold or red potatoes, russets work great too! They are a little more tender than the yukon golds or red potatoes and break down a little more in the soup. You may want to peel them though because they have a slightly thicker skin.

Clams – This recipe calls for one large can of chopped clams (51 oz). Grocery stores may not have this size available but you can find them at Costco, Sam’s Club, restaurant supply stores such as Smart Foodservice, or Amazon. What I like about using a large can of clams is that it is less expensive and much easier than buying the smaller cans. It also has plenty of clam juice so you do not need to buy the clam juice separately.

My absolute favorite clams are from Costco. There are about 3 cups of clam juice and 4-5 cups of loosely packed chopped clams in the can. If you cannot find a large can of clams, you may use 4-6 of the smaller 6.5-oz cans, depending on how many clams you would like in your soup.

Half-and-Half – Half-and-half makes the soup rich and satisfying. It also gives it its creamy white color. You can control the richness of the soup by substituting any combination of milk or heavy cream if you prefer 🙂

Flour – Flour helps to thicken the clam chowder. This is added at the very end.

Also needed: butter, water, salt, and pepper.

How to Make One Hour Clam Chowder

Step 1: Prepare the Ingredients

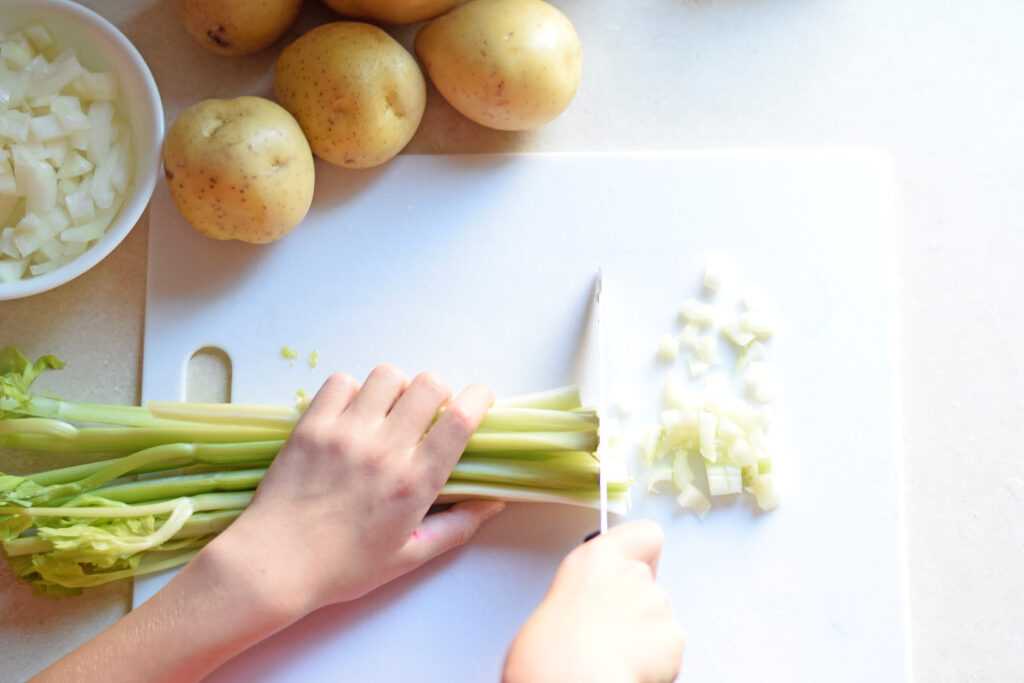
Chop celery, onions, and potatoes for one hour clam chowder

Start by chopping the vegetables for the soup. You want to chop the celery and onions into fairly small pieces. Cut the potatoes into half inch cubes so they will cook more quickly.

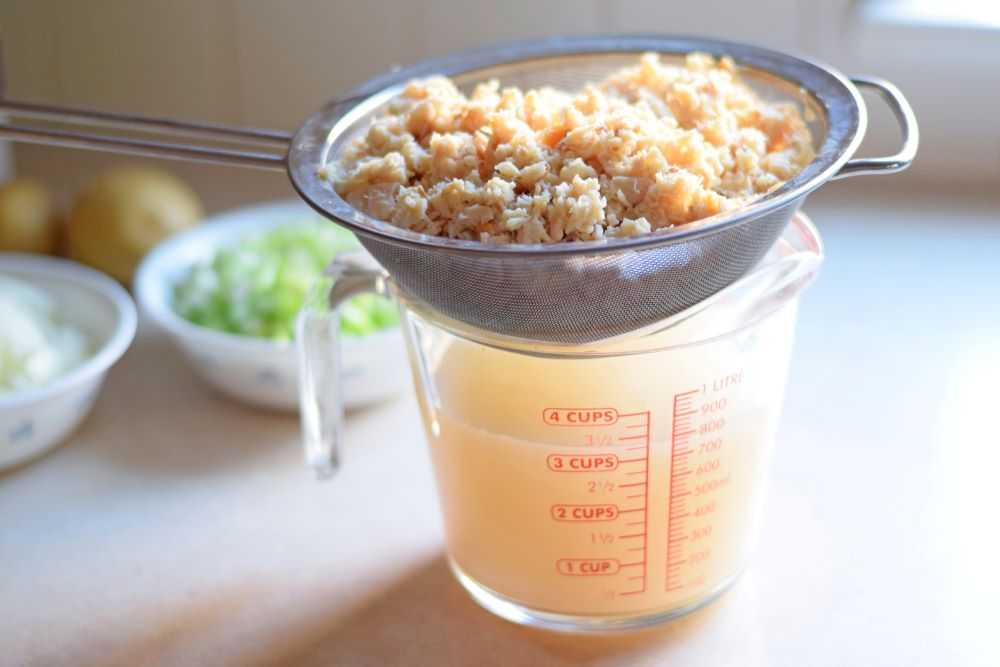
drain the clams, reserving the clam juice

Drain the clams, reserving the juice. I like to do this by putting a strainer over a large bowl or measuring cup. I usually get about 3 cups of clam juice from my can of clams. If you have less than this, add a little water until you have about 3 cups.

Look through the clams and remove any strings or pieces that don’t look right. Set this aside as you start your soup.

Step 2: Cook the Onion and Celery

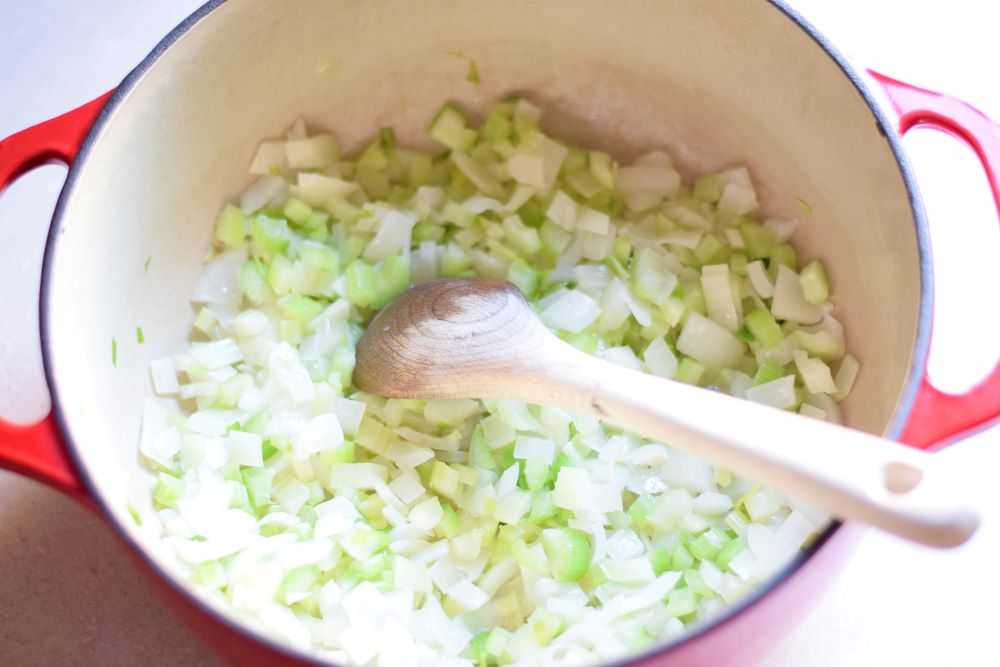
Melt the butter in a large pot. Add in the onion and celery and cook over medium high heat for 5 minutes or until they soften up a bit, stirring occasionally.

Cook the onions and celery together

Step 3: Add in the Potatoes and Clam Juice

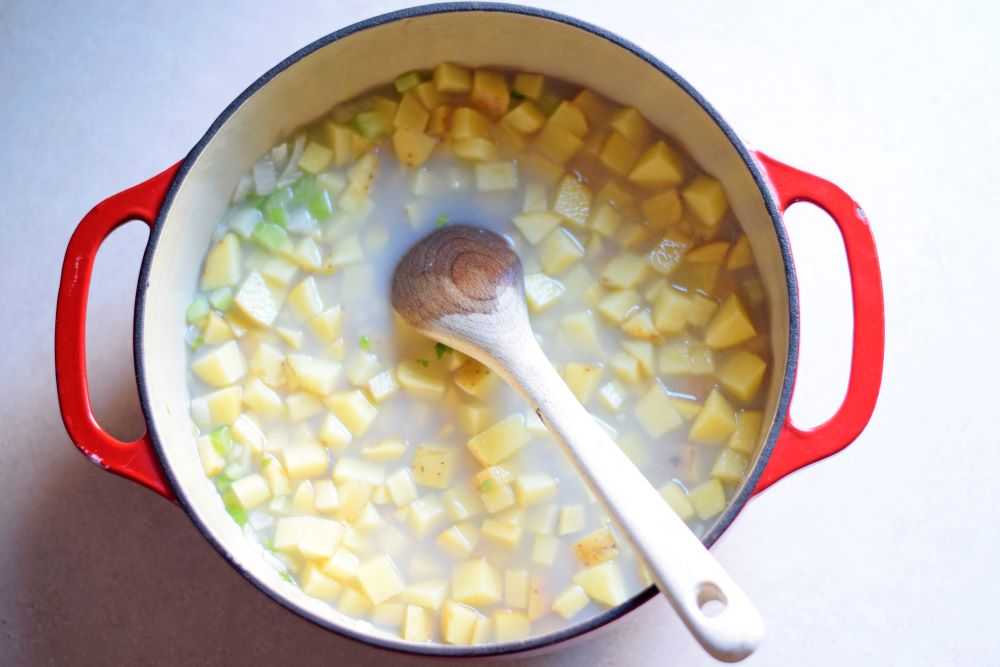
After the onion and celery are tender, add in the cubed potatoes and reserved clam juice. Bring to a boil then cover and reduce the heat. Simmer for 20 minutes or until the potatoes are tender.

Add the potatoes and clam juice

Step 4: Add in the Clams and Milk

When the potatoes are tender stir in the clams and half-and-half. The clams are added at the very end so they stay nice and tender. Heat through just until soup starts to boil.

Step 5: Thicken the Soup

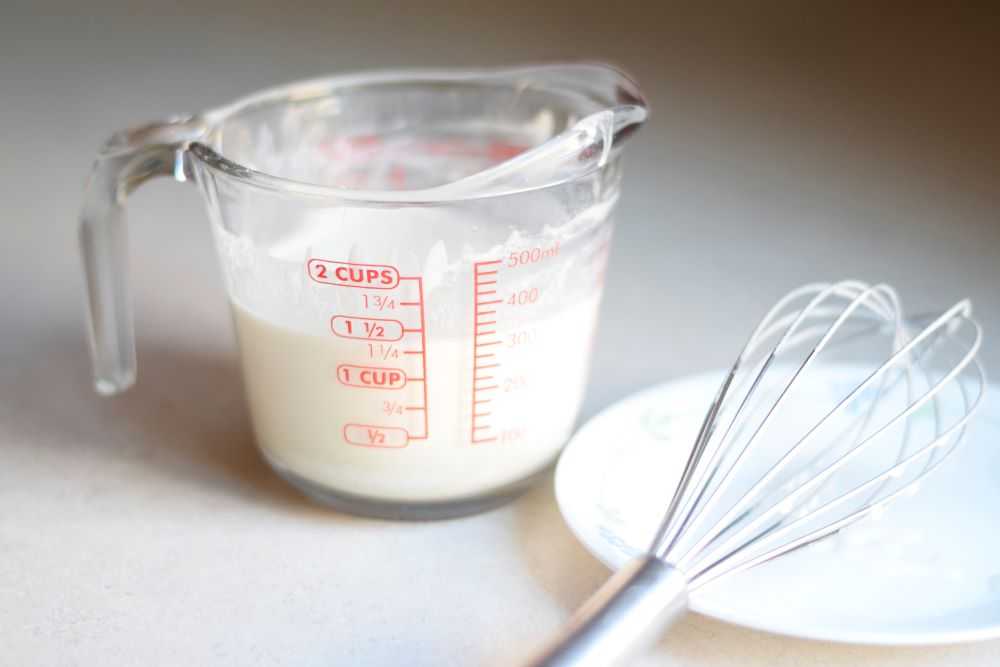
Stir the flour and water together in a small bowl or measuring cup to make a slurry. Whisk vigorously to get out any lumps.

Make a slurry of flour and water to thicken the clam chowder

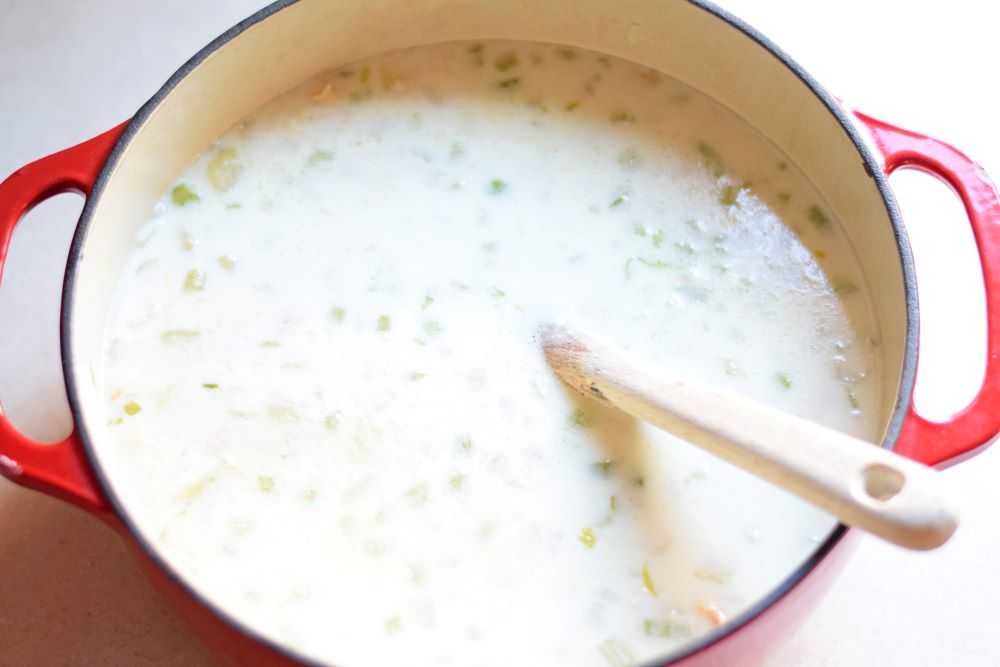
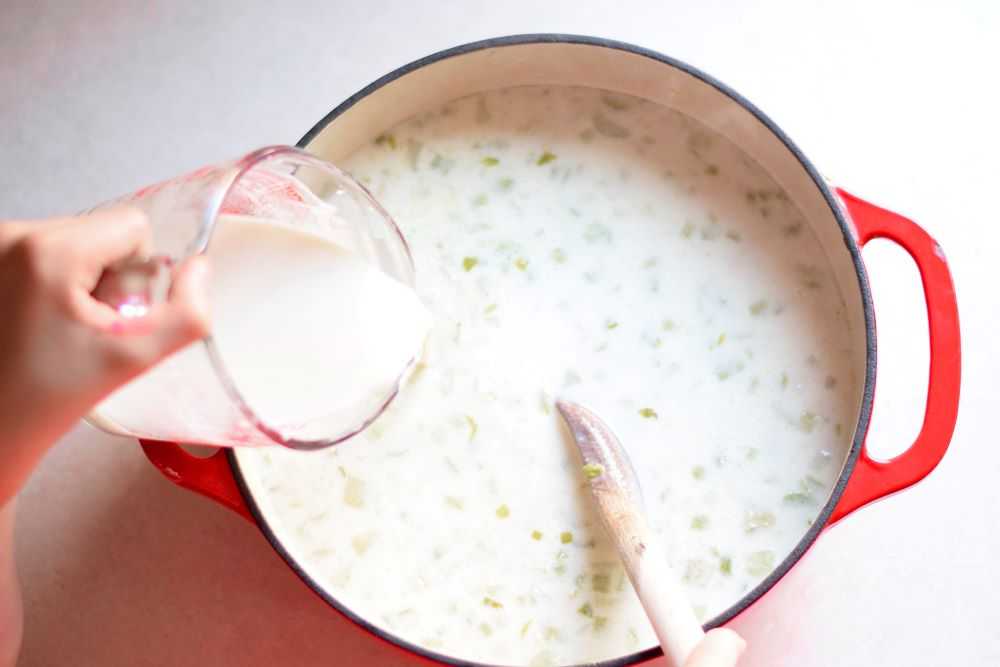
Drizzle the flour mixture into the gently boiling soup, stirring constantly, until the soup has thickened. You may not need too add all of the flour if you like your chowder on the thinner side. Boil gently for one minute to fully cook the flour and then remove from heat.

Add the slurry to thicken the clam chowder

Taste the soup and season with salt and pepper to taste. The clam chowder is now ready to serve!

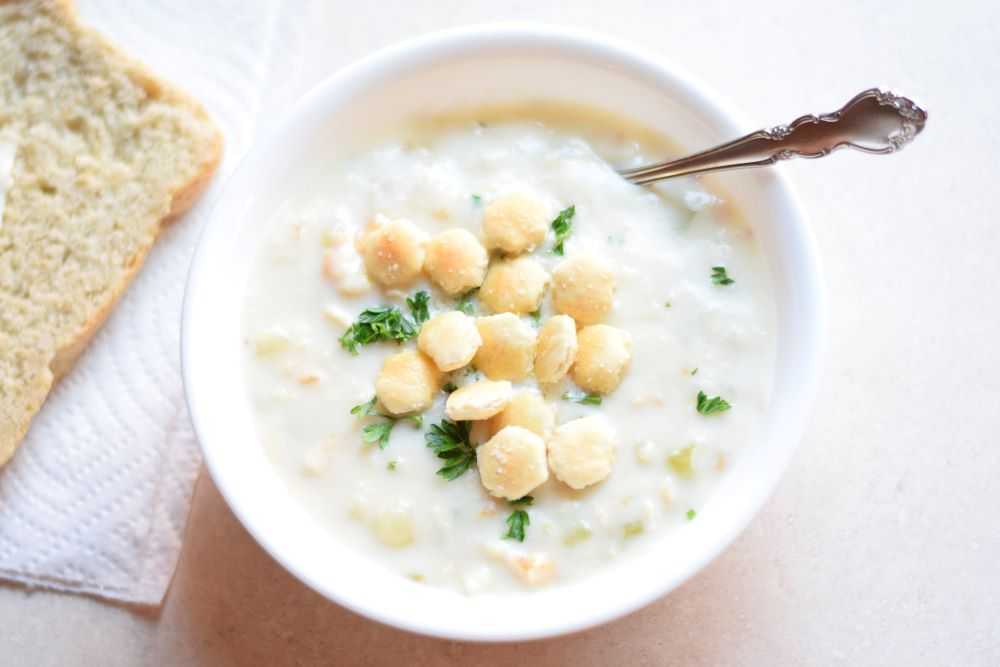
One hour clam chowder

Serve

Ladle the hot soup into bowls and top with butter, oyster crackers, crispy bacon, or whatever you like. Serve with crusty bread if desired. Yum!

One hour clam chowder

Hope you get to try this easy clam chowder soon. Happy Cooking!

One Hour Clam Chowder

Recipe by: Mandy
This thick & hearty New-England style clam chowder is loaded with potatoes, onions, and tender clams. It is easy to make at home and ready in less than an hour!
Prep Time 15 minutes
Cook Time 45 minutes
Total Time 1 hour
Servings 8

Ingredients
  

  • 2 tablespoons butter
  • 1 large onion, chopped
  • 3 stalks celery, finely chopped
  • 2 pounds potatoes, cut into half inch cubes (about 3-4 medium), peeled if desired
  • 1 can chopped clams (51 oz), drained, reserving juice. You should have around 3 cups clam juice and 4-5 loosely packed cups of chopped clams. See recipe notes below.
  • 2 cups half-and-half
  • cup flour, or as needed
  • 1 cup water, or as needed
  • ½ teaspoon salt, or to taste

Instructions

  • Melt the butter in a large pot. Add in the onion and celery and cook over medium high heat for 5 minutes or until they have softened up a bit, stirring occasionally.
  • After the onion and celery are tender, add in the cubed potatoes and reserved clam juice. Bring to a boil then cover and reduce the heat. Simmer for 20 minutes or until the potatoes are tender.
  • When the potatoes are tender stir in the clams and half-and-half. Heat through just until soup start to boil.
  • Stir the flour and a little water together in a small bowl or measuring cup to make a slurry. Whisk vigorously to get out any lumps.
    Slowly drizzle the flour mixture into the gently boiling soup, stirring constantly, until the soup has thickened. You may not need to add all of the flour if you like your chowder on the thinner side. Boil gently for one minute to fully cook the flour and then remove from heat.
  • Taste the soup and season with salt and pepper to taste. Serve the clam chowder topped with butter, oyster crackers, crispy bacon, or whatever you like. Enjoy!

Notes

51-oz cans of chopped clams can be found at Costco, Sam’s Club, restaurant supply stores such as Smart Foodservice, or online at Amazon.  You may also substitute 4-6 of the smaller 6.5 oz cans if you prefer.  

Other recipes you may like:

Soft Garlic Breadsticks

Sausage, Potato, and Kale Soup

bowl of leek and potato soup with bacon

Leek and Potato Soup with Bacon

Spaghetti with Kielbasa, Peppers, and Onions

We make this spaghetti with kielbasa, peppers, and onions often at our house. Basil and fresh garlic give the oil-based sauce a delicious flavor along with the seasoned awesomeness of kielbasa. Everyone loves it and there are no complaints – a win!

This spaghetti is super simple to make and requires only 10 ingredients. It is ready in less than thirty minutes, and the sauce is completely ready by the time the noodles are done cooking! It is perfect for a busy weeknight and also reheats well for lunches during the week.

This will take you through how to make this delicious spaghetti with kielbasa, peppers, and onions step-by-step. Let’s get started!

Ingredients for Spaghetti with Kielbasa, Peppers, and Onions
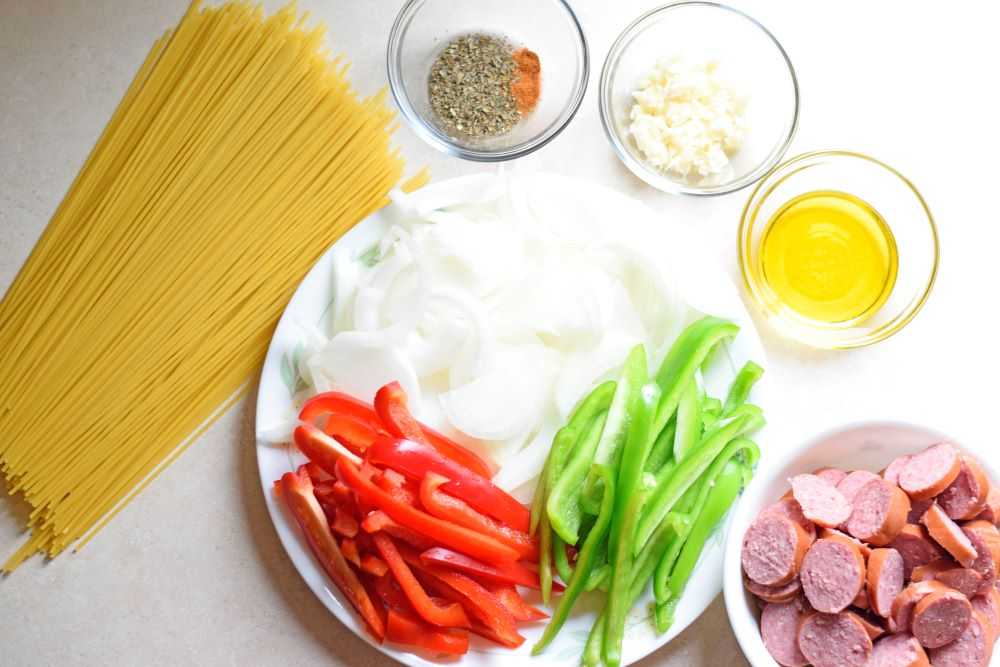
Kielbasa – Use whatever kind of kielbasa you like. Depending on what brand you choose the package size can vary from 12-16 ounces.

Peppers – I like to use a red and green bell pepper but you can also use two green peppers or whatever color you prefer.

Onion – A large onion adds a mild sweetness.

Garlic – This recipe calls for 3 cloves of fresh garlic, and it gives the sauce a lot of its flavor. You can certainly use more than this if you really like garlic!

Basil, Cayenne pepper, and Salt – The basil adds flavor and the cayenne adds a subtle heat. You can adjust these to taste.

Oil – I use olive oil, but any cooking oil will do.

Spaghetti – I usually use plain spaghetti but feel free to experiment with other pasta shapes.

How to Make Spaghetti with Kielbasa, Peppers, and Onions
Step 1: Prepare the Ingredients

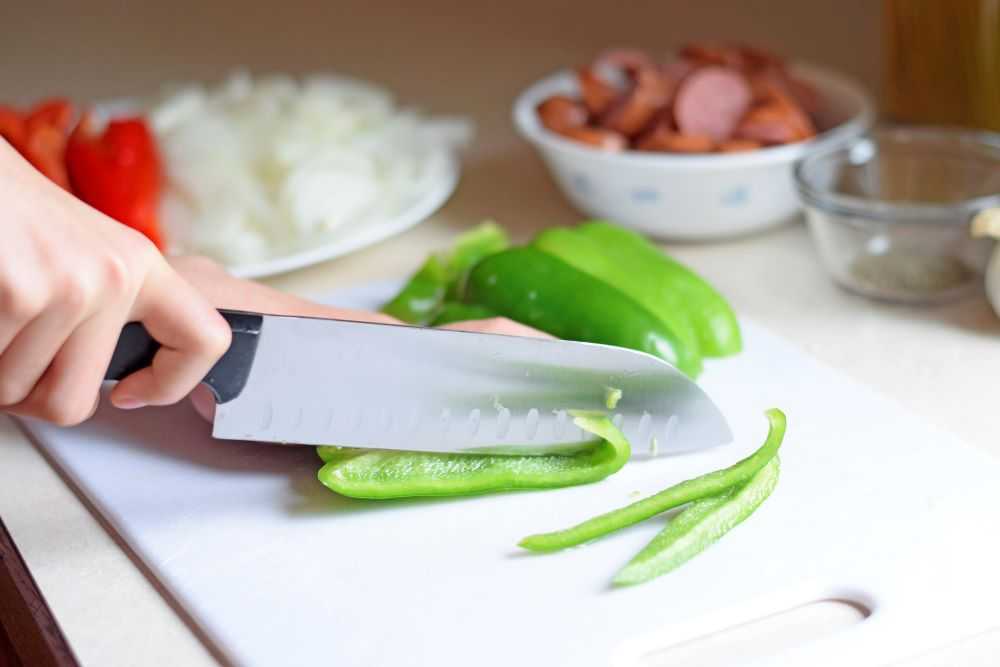
Start by chopping the kielbasa and all of the vegetables. This sauce goes together very quickly so you want to have everything ready to go. While you are doing this, start heating the water for the spaghetti.

Chopping green peppers.

Step 2: Cook the Kielbasa

Add the kielbasa to a large frying pan and cook it until it starts to brown. You may need to add a little oil to the pan if your kielbasa is very lean.

Cook the kielbasa until it starts to brown.

Step 3: Add in the Vegetables and Start Cooking the Spaghetti

Add the spaghetti to the boiling water and cook according to the package directions (usually about 8 minutes).

After you put the spaghetti in, add the remaining ingredients to the kielbasa. Cook over medium high heat for about 5-10 minutes or until the vegetables are tender.

kielbasa peppers and onions
Add in the vegetables and seasonings and cook until tender.

Step 4: Add in the Spaghetti

Drain the spaghetti when it is finished cooking and add to the vegetables in the pan. Mix well so the noodles are thoroughly coated with the delicious oil from the sauce. Taste the spaghetti and add more salt, basil, or cayenne pepper if desired.

spaghetti with kielbasa peppers and onions
Stir in the spaghetti and mix well so the noodles are evenly coated. It is now done and ready to serve!

Serve

Serve the spaghetti topped with a big sprinkling of shredded parmesan cheese and a side of roasted garlic green beans. Yum! Now there’s a quick meal your whole family will enjoy 🙂

spaghetti with kielbasa, peppers, and onions

Hope you get to try this spaghetti with kielbasa, peppers, and onions soon! Happy Cooking!

Spaghetti with Kielbasa, Peppers, and Onions
Recipe by: Mandy
Kielbasa sausage, peppers, onions, and fresh garlic give great flavor to this spaghetti. It is quick and easy to make–perfect for a busy weeknight!
Prep Time 15 minutes
Cook Time 10 minutes
Total Time 25 minutes
Servings 6

Ingredients
  

  • 12 ounces dried spaghetti
  • 1 package kielbasa rope sausage (12-16 ounces depending on the brand)
  • 2 bell peppers, sliced
  • 1 large onion, sliced
  • 3 cloves garlic, minced
  • 3 tablespoons olive oil
  • 1 teaspoon dried basil, or to taste
  • teaspoon cayenne pepper, or to taste
  • ¼ teaspoon salt, or to taste

Instructions

  • Start by chopping the kielbasa and all of the vegetables. This sauce goes together very quickly so you want to have everything ready to go. While you are doing this, start heating the water for the spaghetti.
  • Add the kielbasa to a large frying pan and cook it until it starts to brown. You may need to add a little oil to the pan if your kielbasa is very lean.
  • Add the spaghetti to the boiling water and cook according to the package directions (usually about 8 minutes).
    After you put the spaghetti in, add the remaining ingredients to the kielbasa. Cook over medium high heat for about 5-10 minutes or until the vegetables are tender.
  • Drain the spaghetti when it is finished cooking and add to the vegetables in the pan. Mix well so the noodles are thoroughly coated with delicious oil from the sauce. Taste the spaghetti and add more salt, basil, or cayenne pepper if desired.
  • Serve the spaghetti topped with a big sprinkling of shredded parmesan cheese. Enjoy!

Don’t forget to pin for later!

Spaghetti with kielbasa, peppers, and onions

Refried beans with chips

Super Simple Refried Beans

Refried beans with chips

We have taco night about once a week at our house. Tacos, burritos, nachos and the like are family pleasing favorites. One thing that all of these have in common is a big pot of refried beans!

The name “refried beans” is a little bit of a misnomer because these beans are not actually fried twice as the name would suggest. The term “refried beans” comes from the Spanish word “refrito,” meaning recooked. Refried beans are traditionally boiled until tender and then mashed and cooked again with spices before serving. To keep things simple, we will only cook the beans once and then mash them right in the pan. Easy!

With only three ingredients, the recipe presented here is a “blank slate” that you can customize depending on what you like. You can easily scale this recipe if you are cooking for a large number of people. Read on to learn how simple it is to make these amazingly delicious refried beans at home!

Ingredients to Make Refried Beans

These beans use only three simple ingredients. We will go through them now:

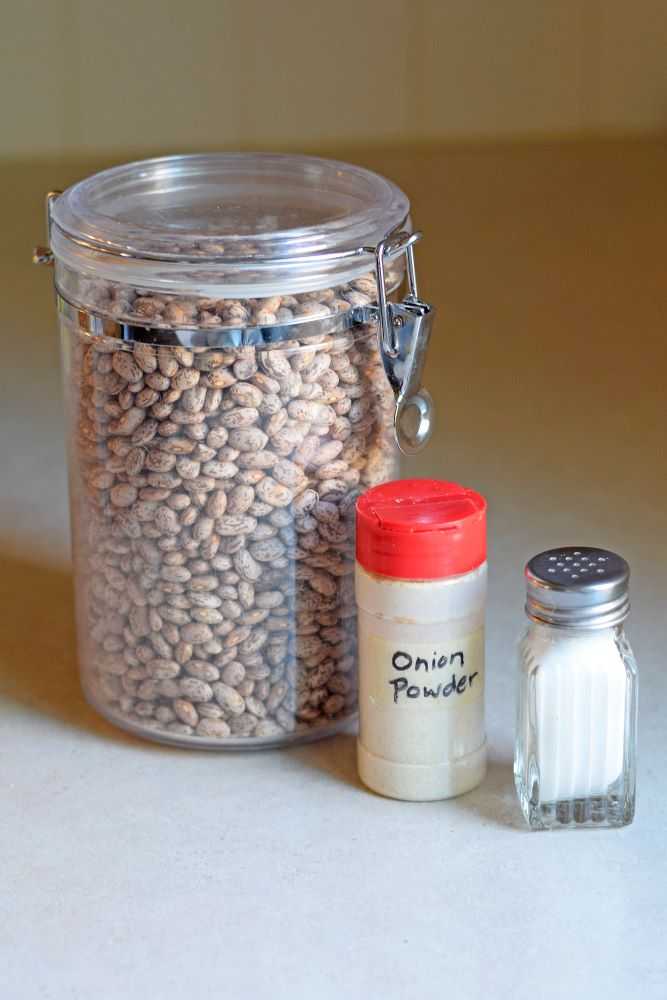
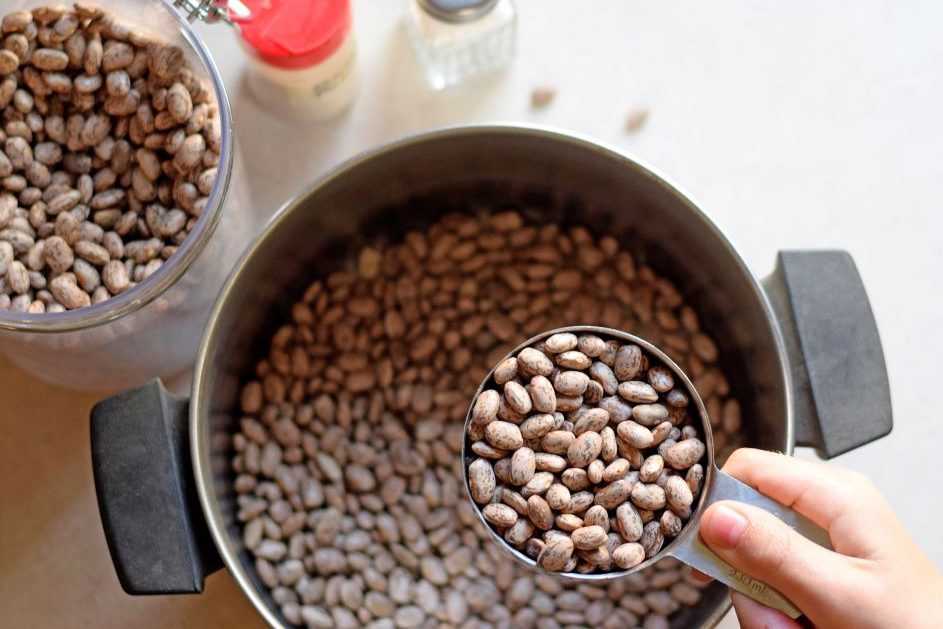
Dried beans – Today I am using dried pinto beans, but you can also use black beans or whatever type you prefer.

Salt – This give the beans some flavor. I use plain old table salt.

Onion powder – Onion powder gives the beans good flavor and a very mild sweetness. I usually buy granulated onion rather than true onion powder because it does not get clumpy in the container. Either will work fine though so use what you have.

How to Make Refried Beans

Step 1: Cook the Beans

Place the beans and salt in a large pot. I like to add the salt in as the beans are cooking because it penetrates the bean and adds a lot of flavor. Add in enough water to cover the beans by at least three inches.

Place the pinto beans in the pot.
Add the pinto beans and salt to the pot. Pour in enough water to cover the beans by about 3 inches.

Cook over high heat until the water start to boil, then reduce heat to low and simmer for 2-3 hours or until beans are tender. Place the lid on the pot but keep it cracked so steam can escape.

Check on your beans often during the cooking process to make sure some water is still covering the beans. If too much water evaporates they will burn and stick to the bottom of the pot and you will have to start over (don’t ask me how I know this 🙂 ) So, if the water level is getting too low, just add in a little more and continue cooking.

Step 2: Mash the Beans

When the beans are tender drain out most of the water. Since you will need some water to help mash the beans it is okay to leave about half an inch or so in the bottom of the pan. After draining most of the water place the pot on the counter.

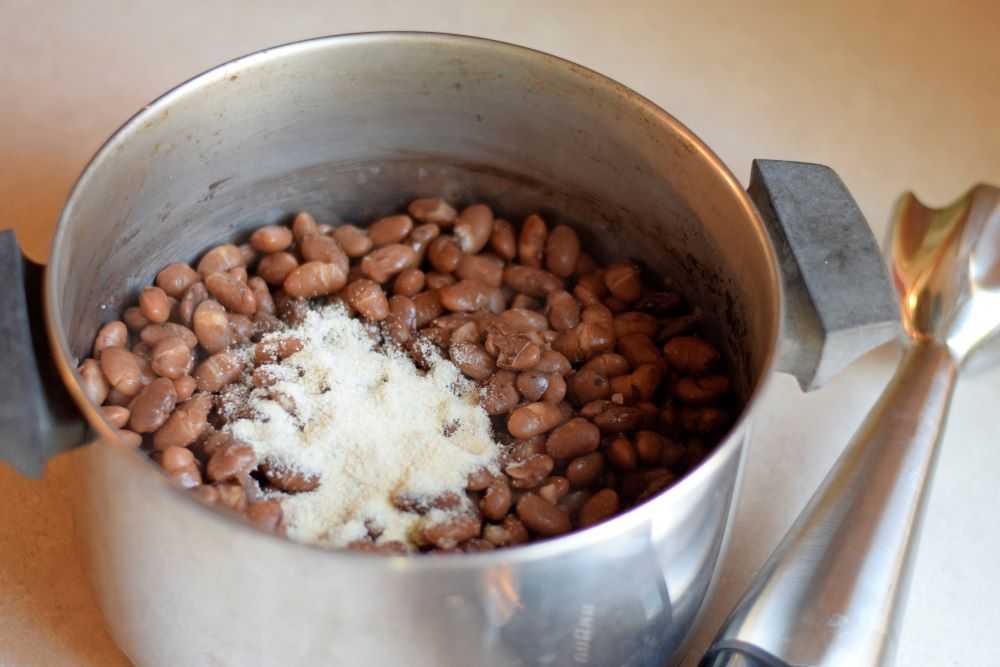
Add the onion powder to the cooked beans.

Next add in the onion powder. I use about a tablespoon, but you can adjust this to taste. Then it is time to get out the immersion blender.

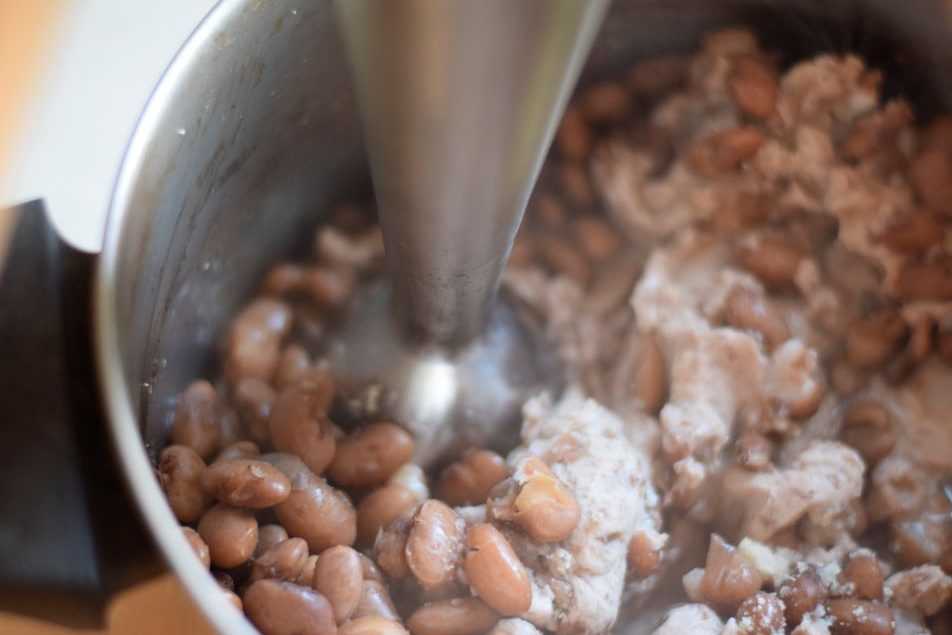
An immersion blender, also called a hand blender, has a small blade that spins. Using this is preferred over a regular blender because the beans can be blended right in the cooking pot! Blend the beans with an up-and-down motion until the desired consistency is reached. You will probably need to add in some additional warm water so the beans are not too thick.

What if you do not have an immersion blender? A potato masher will work just fine. The only difference is that the beans will not be quite as smooth as they would with the immersion blender. They will still taste delicious though!

Mash the beans with an immersion blender.
Mash the beans with an immersion blender until smooth. Add in some warm water to help them blend easier and prevent them from getting too thick.
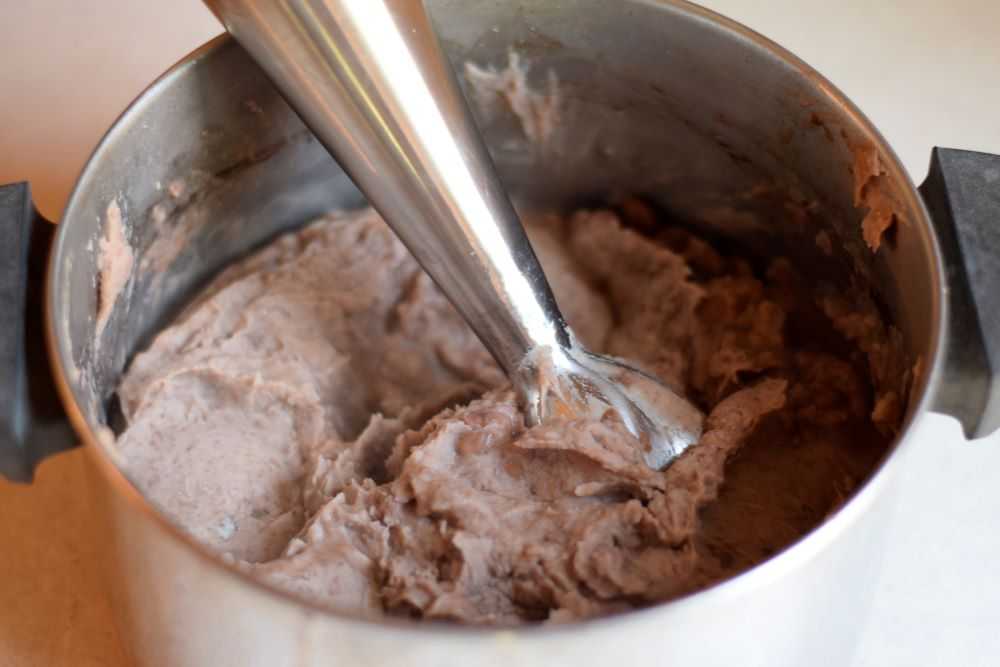
Refried beans made with an immersion blender

Once you are done blending taste the beans and add more salt or onion powder if needed. You can also stir in other spices if you would like. See the variations listed below for some ideas!
Serve

Serve your beans warm. They can be used as a side dish with Mexican food, or as a part of tacos, burritos, or nachos. These are very versatile and the possibilities are endless!

Refried beans with cheese, chips, and salsa

I hope you get to try these refried beans soon. Happy Cooking!

Variations
Are you ready to kick it up a notch? These beans are a “blank slate” and it is very easy to add more seasonings to them. Here are some additions you can add in after they are done blending:


  • Fresh garlic or garlic powder
  • Chopped cilantro
  • Chili powder
  • Cumin
  • Lime juice
  • Cheese
Refried beans with chips

Super Simple Refried Beans

Recipe by: Mandy
With only three ingredients these refried beans are surprisingly easy to make at home. They are a great addition to your family's taco night!
Prep Time 10 minutes
Cook Time 2 hours 30 minutes
Total Time 2 hours 40 minutes
Servings 8

Ingredients
  

  • 1 lb dried pinto beans (around 2½ cups)
  • teaspoons salt
  • 1 tablespoon onion powder
  • water, as needed

Instructions

  • Place beans and salt in a large pot. Add in enough water to cover the beans by at least 3 inches.
  • Cook over high heat until the water starts to boil, then reduce heat to low and simmer for 2-3 hours or until the beans are tender. Be sure to check on the beans often while they are cooking and add more water as needed to keep them covered.
  • When beans are tender, drain most of the water from the pot. Add the onion powder to the beans.
  • Using an immersion blender, blend beans until smooth. If you do not have an immersion blender a potato masher may also be used. As you are blending the beans add in more warm water as needed until the desired consistency is reached.
  • Taste beans, and add more salt or onion powder if needed. You can also stir in other spices if you would like. See the variations listed below for some ideas!
  • Serve warm as desired. Enjoy!

Notes

These beans are a “blank slate” and it is easy to add more to them.  Here are some additions you can stir in after they are done blending:
  • Fresh garlic or garlic powder
  • Chopped cilantro
  • Chili powder
  • Cumin
  • Lime juice
  • Cheese
You can also try using different types of beans, and black beans are especially delicious.  Have fun trying new flavor combinations!

Don’t forget to pin for later!

How to Make Refried Beans

Soft Garlic Breadsticks

We all know why you go to the Olive Garden. No, it is not for the fettuccini alfredo or the endless salad. The reason you go to the Olive Garden is for the breadsticks. The soft, chewy, delicious breadsticks.

But did you know that breadsticks are easy to make at home, only require 8 ingredients, and can be ready in under two hours? Even if you have never made yeast bread before these breadsticks are very simple to make.

This post will teach you how to make soft garlic breadsticks step-by-step. Let’s get started!

Note: This article may contain affiliate links, where I earn a small commission from qualifying purchases with no additional cost to you. I only provide links to products that use personally and recommend highly.

Ingredients for Soft Garlic Breadsticks

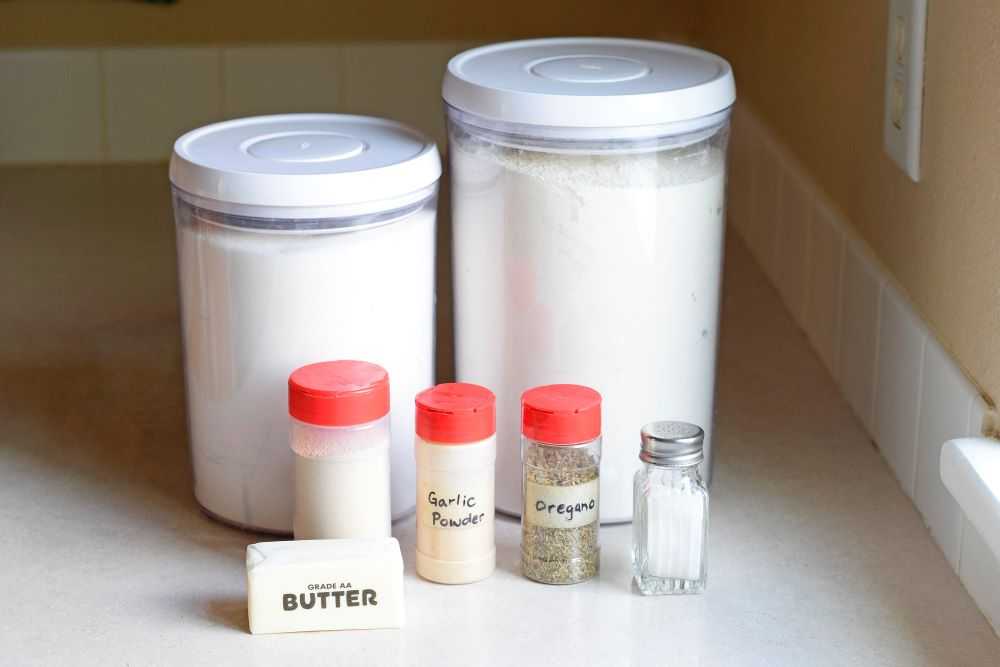
Homemade breadsticks require only 8 ingredients. We will go through them now:

Ingredients for soft garlic breadsticks

Warm water – This recipe uses water as the liquid. Make sure it is around 110 degrees for the yeast to activate properly. This means that the water should feel warm but not burning hot. If you are not sure you can check the temperature with a kitchen thermometer.

Yeast – This is one of the most important ingredients! Yeast is a living organism that helps the bread to rise. In the store yeast is dormant but when warm liquid (in this recipe, water) is added it will “wake up” and start producing carbon dioxide gas. This is what creates holes in the bread and gives it its light and fluffy texture.

You can buy yeast in a strip of three single use packages or you can buy it in bulk for a very reasonable price. If you buy bulk yeast then 2 1/4 teaspoons is equivalent to one package. I usually buy “instant” or “quick rise” yeast because it helps the bread to rise faster.

Butter – This is used in the dough and also brushed on top of the breadsticks before and after they come out of the oven. I prefer salted butter but you can use whatever you prefer.

Sugar – Sugar is needed to give the bread a subtle sweetness. Also, it helps feed the yeast so the dough will rise more quickly.

Salt – Salt gives the bread some flavor. I use regular table salt.

Flour – Flour gives the structure to the dough. There are many types of flour, but for this recipe we will use regular all-purpose flour.

Garlic powder and oregano – These add flavor to the breadsticks. They are called “soft garlic breadsticks” after all!

How to Make Soft Garlic Breadsticks

Step 1: Mix the Dough

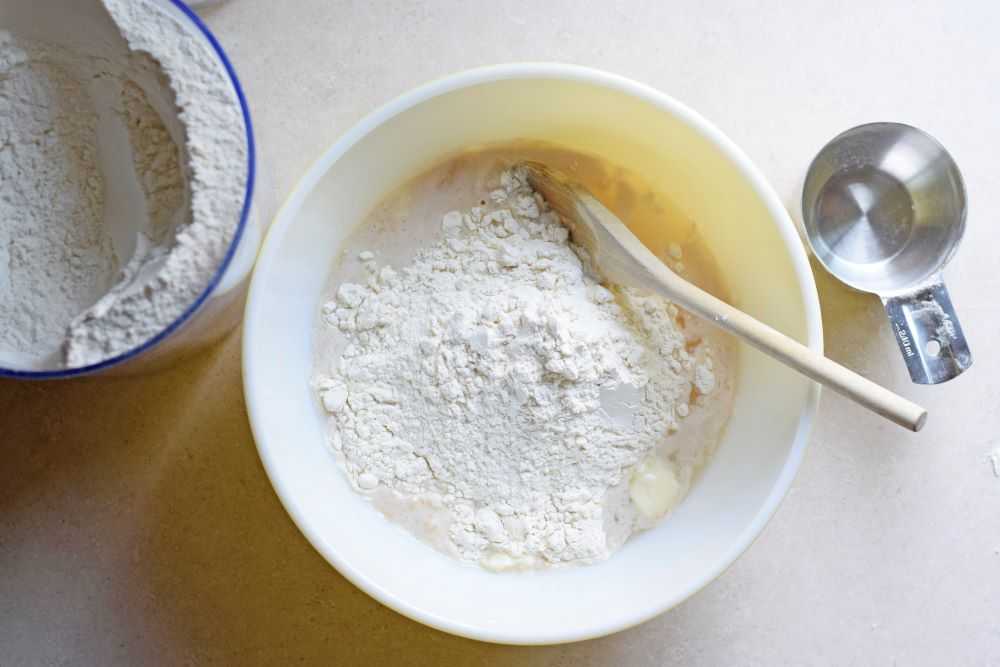
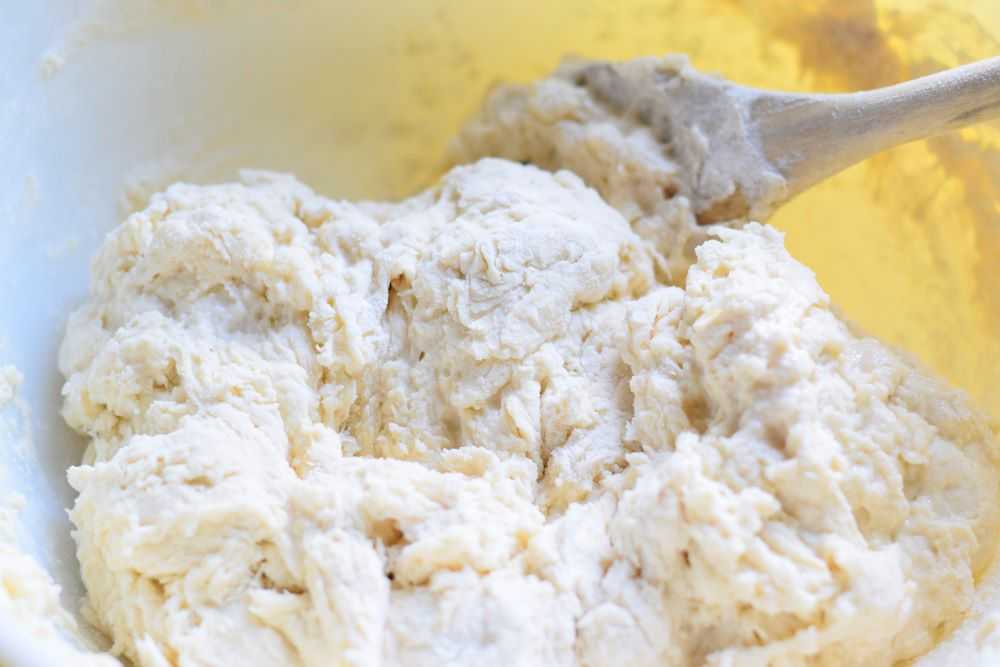
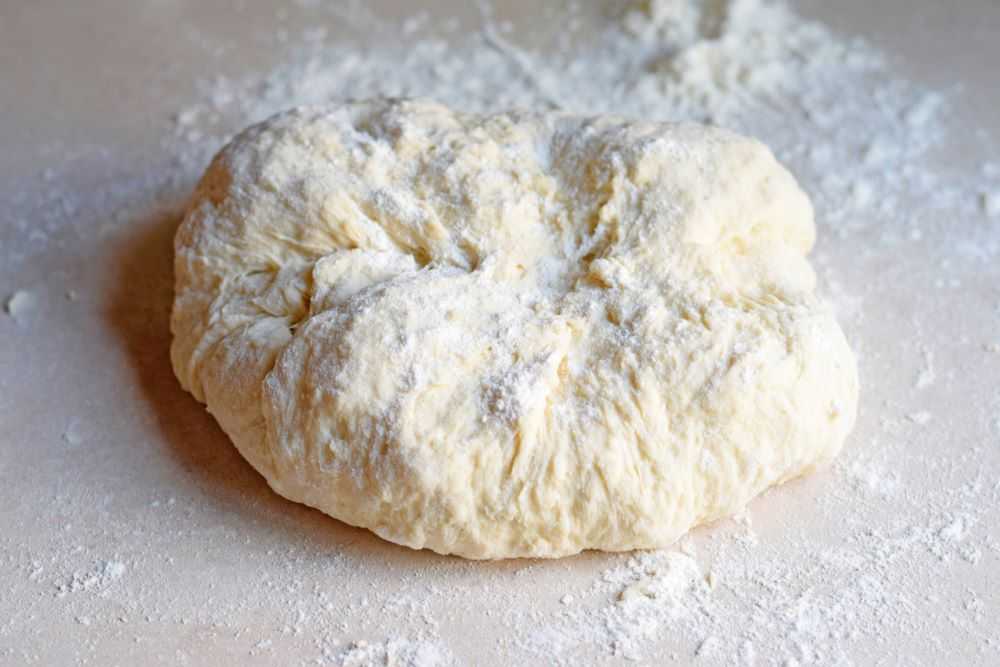
Stir the warm water, yeast, butter, sugar, and salt together in a large bowl. Add about 3 1/2 cups of the flour and mix well. Stir in enough additional flour to make a soft dough that forms a ball and pulls away from the sides of the bowl.

Stir the ingredients together in a bowl
Stir the ingredients together in a large bowl.
Add in enough flour so the dough forms a ball
Add in enough flour so dough forms a ball and pulls away from the side of the bowl.

Step 2: Knead the Dough

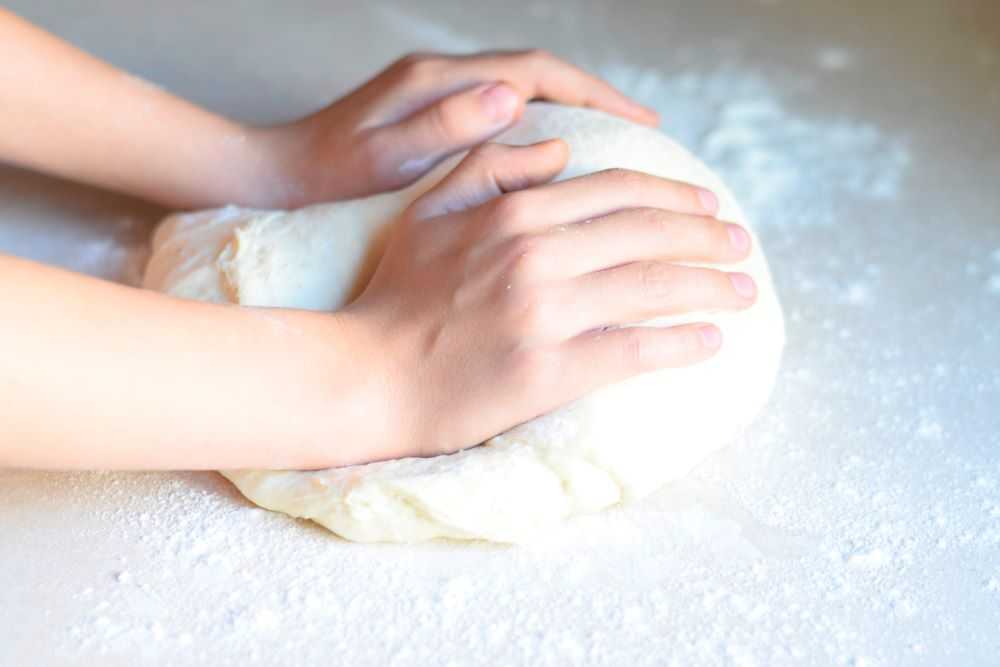
Turn the dough out onto a lightly floured surface and knead until smooth. Kneading the dough helps develop the gluten. Gluten is a protein that gives structure to the dough. It is what makes bread elastic and chewy.

Everyone has their own way of kneading dough, and you need to find a rhythm that feels good to you. Here are the basic steps:

  • Push the heel of your hand into the center of the dough.
  • Turn the dough a quarter of a turn.
  • Fold the dough in half.
  • and repeat…

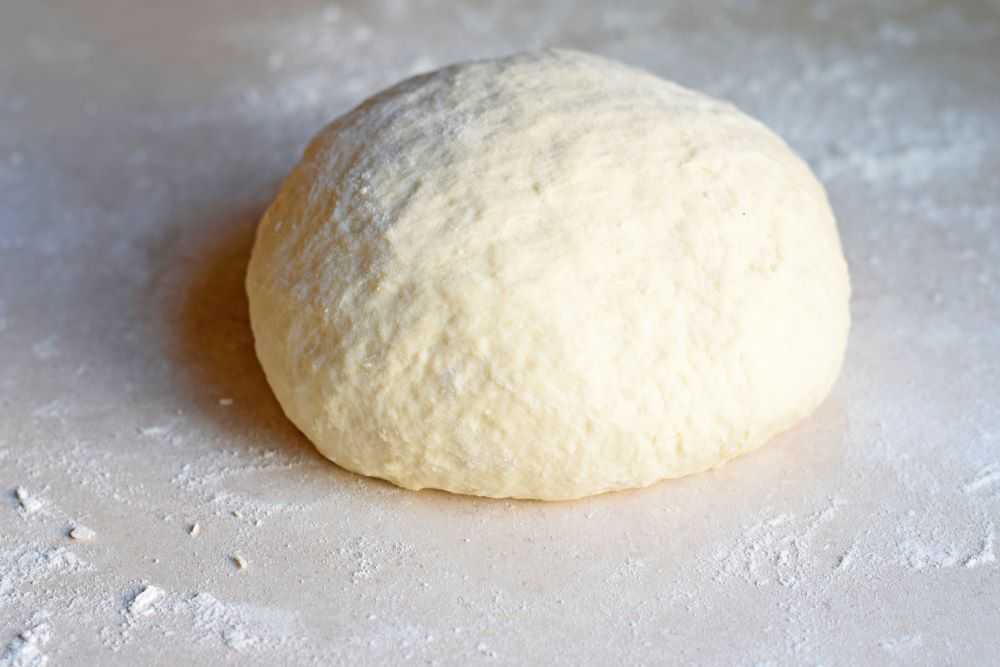
Add in more flour, a little at a time, to keep the dough from sticking. The dough is ready when it is smooth and elastic. The outside will not be as rough textured as it was, and it should spring back when you poke it gently with your finger.

Knead the dough for soft garlic breadsticks

Step 3: Let the Dough Rest

After the dough is relatively smooth cover it with a clean kitchen towel and let it rest on the countertop for 15 minutes. This will help the gluten relax a bit so it will be easier to shape in the next step.

Cover the soft garlic breadstick dough with a towel and let rise.

Step 4: Shape the Dough

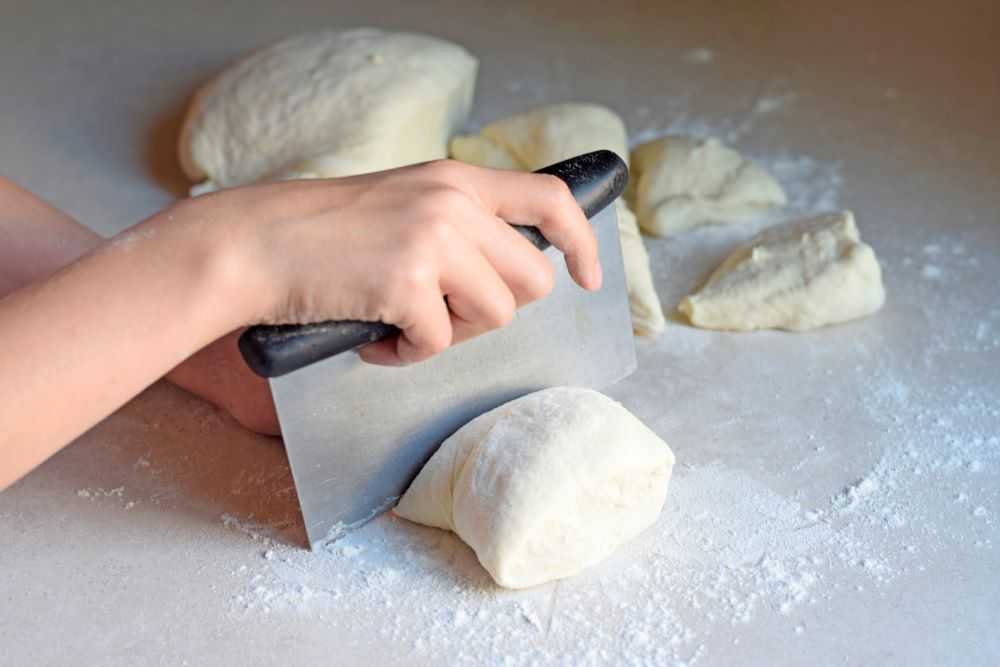
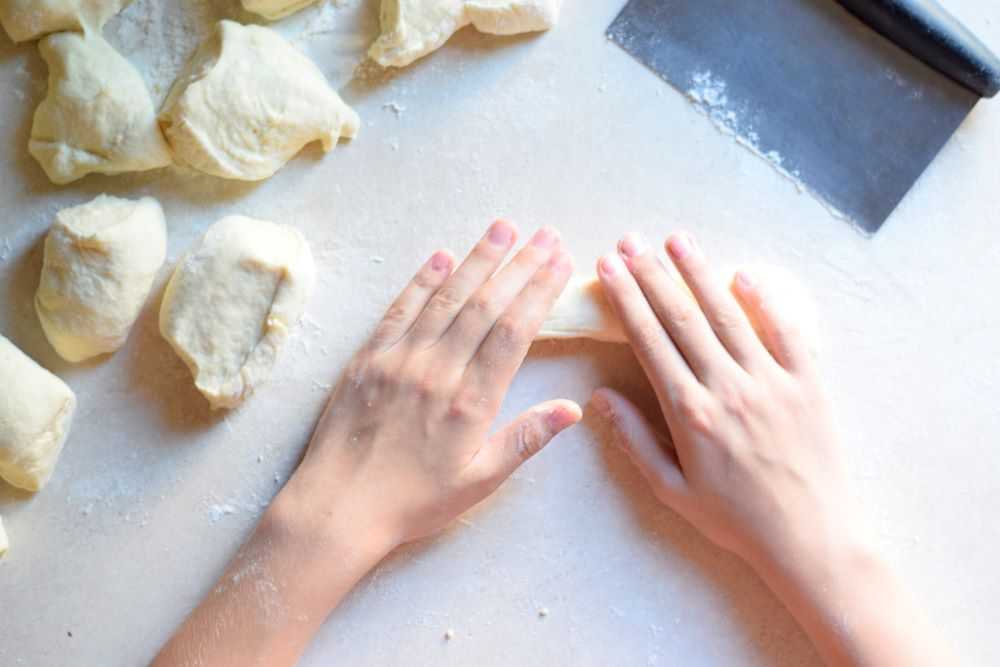
Divide the dough into 16 pieces. I like to use a dough scraper for this (affiliate link). Using your hands, roll each piece into a 7-inch long breadstick. Place the breadsticks a few inches apart on a greased baking sheet.

Divide the breadstick dough into 16 pieces.
Divide the dough into 16 pieces.
Roll the dough into a breadstick 7 inches long
Roll each piece into a breadstick about 7 inches long.
Place the soft garlic breadsticks on a pan and let rise
Place the dough on a greased baking sheet.

Step 5: Let the Dough Rise

Cover the breadsticks with your clean kitchen towel and let rise in a warm place for 45 minutes. The dough is ready when it looks puffy and has almost doubled in size.

Step 6: Bake the Breadsticks

Towards the end of the rising time heat the oven to 400 degrees. When the dough has finished rising brush the breadsticks some melted butter. Bake at 400 degrees for 10-15 minutes, or until the bottoms are lightly browned.

The top of the breadsticks will remain light colored even after they are done baking. This is a good thing because it means that they will stay soft and chewy! Checking the bottoms is the best way to tell if they are done.

Brush the breadsticks with melted butter
Brush the breadsticks with melted butter before baking.

Step 7: Brush the Breadsticks again and Sprinkle with Herbs

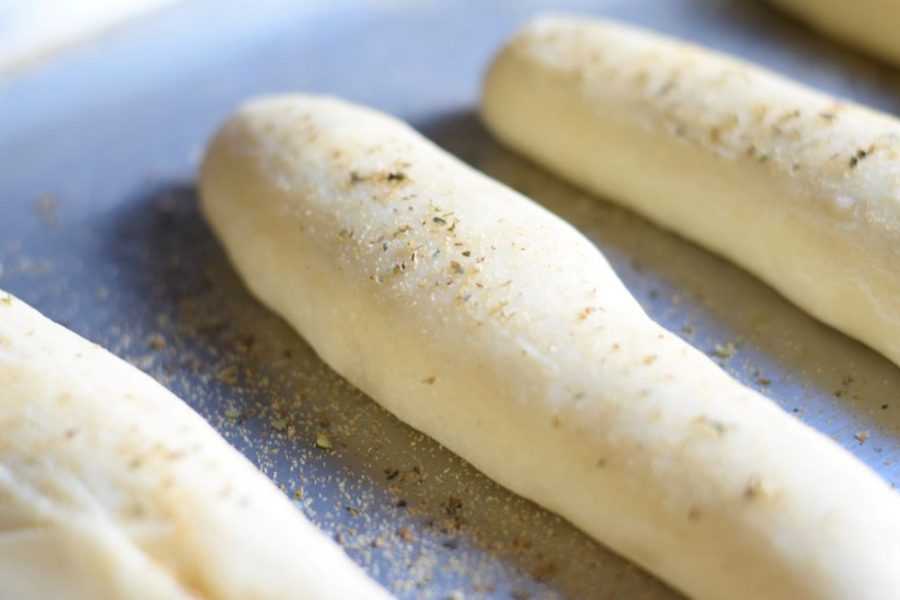
Remove the breadsticks from the oven and brush again with melted butter. Immediately sprinkle with garlic powder and oregano to taste. Transfer to a wire rack to cool.

Soft garlic breadsticks
After removing the breadsticks from the oven, brush them again with butter and sprinkle them with herbs.

Serve

Serve these breadsticks warm out of the oven. They are especially delicious with a bowl of homemade soup! Enjoy!

Serve breadsticks with homemade soup

Hope you get to try these soft garlic breadsticks soon. Happy Cooking!

Soft Garlic Breadsticks

Recipe by: Mandy
These will remind you of the breadsticks at Olive Garden. They are especially delicious with a bowl of homemade soup!
Prep Time 30 minutes
Cook Time 15 minutes
Total Time 1 hour 30 minutes
Servings 16 breadsticks

Ingredients
  

Breadsticks

  • cup warm water (around 110 degrees)
  • 1 package instant yeast (about 2¼ teaspoons)
  • 2 tablespoons softened butter
  • 2 tablespoons sugar
  • 1 tablespoon salt
  • cups flour, or as needed

Topping

  • ¼ cup melted butter
  • Garlic powder, as needed
  • Oregano, as needed

Instructions

  • Stir the warm water, yeast, softened butter, sugar, and salt together in a large bowl. Add in about 3½ cups of flour and mix well. Stir in enough additional flour to make a soft dough that forms a ball and pulls away from the sides of the bowl.
  • Turn the dough out onto a lightly floured surface and knead until smooth. Add in more flour, a little at a time, to keep the dough from sticking. The dough is ready when it is smooth and elastic.
  • Cover the dough with a clean kitchen towel and let it rest on the countertop for 15 minutes. This will help the gluten relax a bit so it will be easier to shape in the next step.
  • Divide the dough into 16 pieces. Using your hands, roll each piece into a 7-inch long breadstick. Place the breadsticks a few inches apart on a greased baking sheet. 
  • Cover the breadsticks with a clean kitchen towel and let rise in a warm place for 45 minutes. The dough is ready when it looks puffy and has almost doubled in size.
  • Towards the end of the rising time heat the oven to 400 degrees. Brush the breadsticks with melted butter and then bake for 10-15 minutes, or until the bottoms are lightly browned.
  • Remove the breadsticks from the oven and brush again with melted butter. Immediately sprinkle with garlic powder and oregano to taste. Transfer to a wire rack to cool.
  • Serve these breadsticks warm out of the oven. They are especially delicious with homemade soup! Enjoy!

Don’t forget to pin for later!

Sausage, Potato, and Kale Soup

Fall is here and that means that it’s soup season! One of my very favorite soups to make is sausage, potato, and kale soup.

You may recognize this soup as Zuppa Toscana from the Olive Garden. But you are in for a treat because the homemade version is so much better!

This soup is loaded with sausage, potatoes, and fresh kale. One thing that I like about this recipe is that it makes a lot! The soup reheats well and we eat it for lunches during the week. It requires only 10 ingredients and is ready in less than an hour.

This post will take you through how to make this delicious sausage potato and kale soup step-by-step. Let’s get started!

Ingredients for Sausage, Potato, and Kale Soup

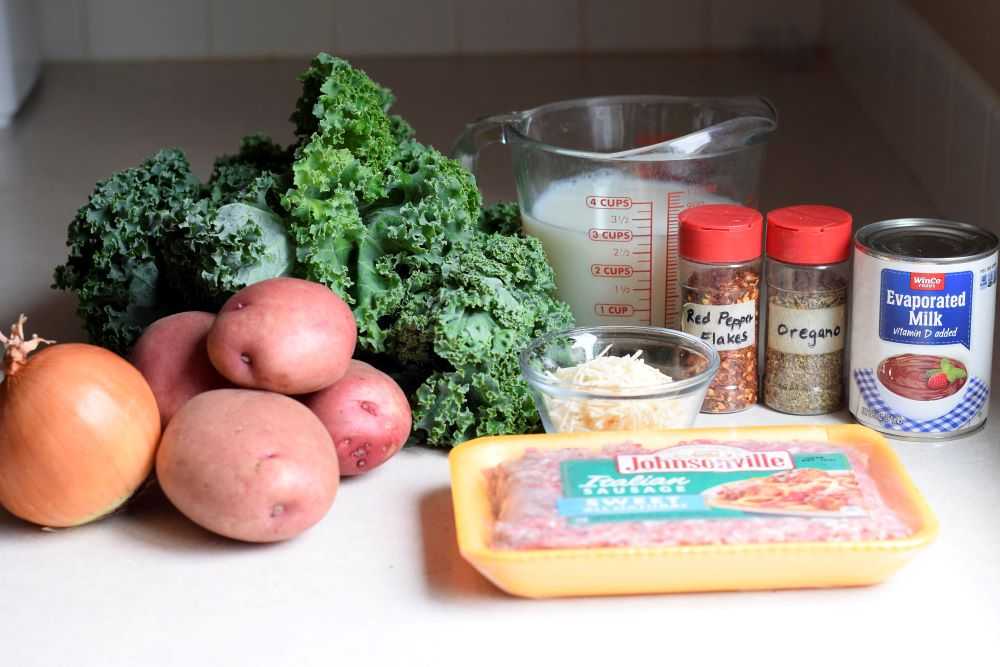
Sausage, potato, and kale soup only requires 10 ingredients: Italian sausage, onion, water, potatoes, milk, evaporated milk, oregano, red pepper flakes, kale, and parmesan cheese for the top. We will go through the ingredients now:

Ingredients for sausage potato and kale soup, zuppa tosana

Italian Sausage – Italian sausage is made with fennel and herbs that adds a lot of flavor to the soup. I choose the mild Italian sausage (also called sweet Italian sausage) because of my kids but spicy Italian sausage would be delicious as well!

Onion – This adds flavor to the soup. Use a yellow or white onion so it does not change the color of the broth.

Potatoes – My favorite potatoes to use in this soup are red potatoes or yukon gold potatoes because they have an amazing flavor. Since they have thin skin, I usually do not peel them.

If you don’t have yukon gold or red potatoes, russets work great too! You may want to peel them though because they have a slightly thicker skin.

Kale – I LOVE kale in this soup! Unlike spinach or other greens, kale keeps its integrity, even when the soup is reheated for leftovers the next day. This recipe calls for a lot of kale (two bunches!) and it will look like it will be too much. However, you will be surprised by how much it cooks down.

Milk – Adding some milk gives the soup some richness. You can use whatever milkfat you prefer.

Evaporated Milk – Evaporated milk is sold in a can and is quite simply milk that has had some water removed. Do NOT get sweetened condensed milk because it is not the same thing!

Evaporated milk is heated during the canning process which gives it is a slightly darker color than fresh milk. It also has a richer flavor, which I really like in this soup!

You can also use half-and-half or cream instead of the evaporated milk if you prefer, but wait to add it until the end. After the kale is done cooking remove the soup from the heat, stir in the cream, and serve.

Oregano and Red Pepper Flakes – These add flavor to the soup. Adjust the amounts to taste.

Parmesan cheese – I like to sprinkle parmesan cheese on top of the finished soup. This is optional but delicious!

How to Make Sausage, Potato, and Kale Soup

Step 1: Prepare the Ingredients

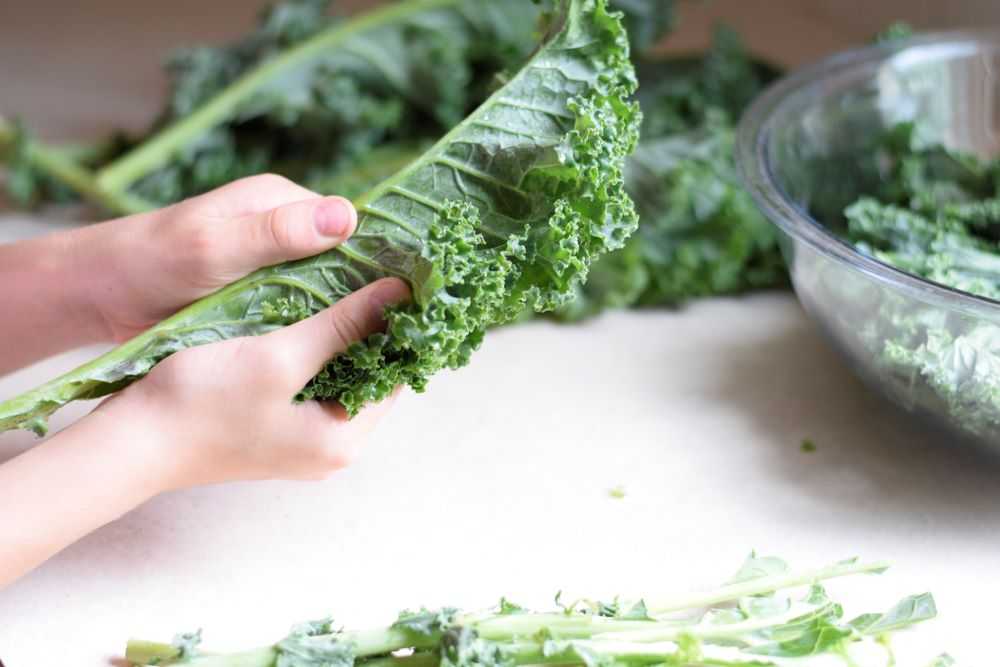
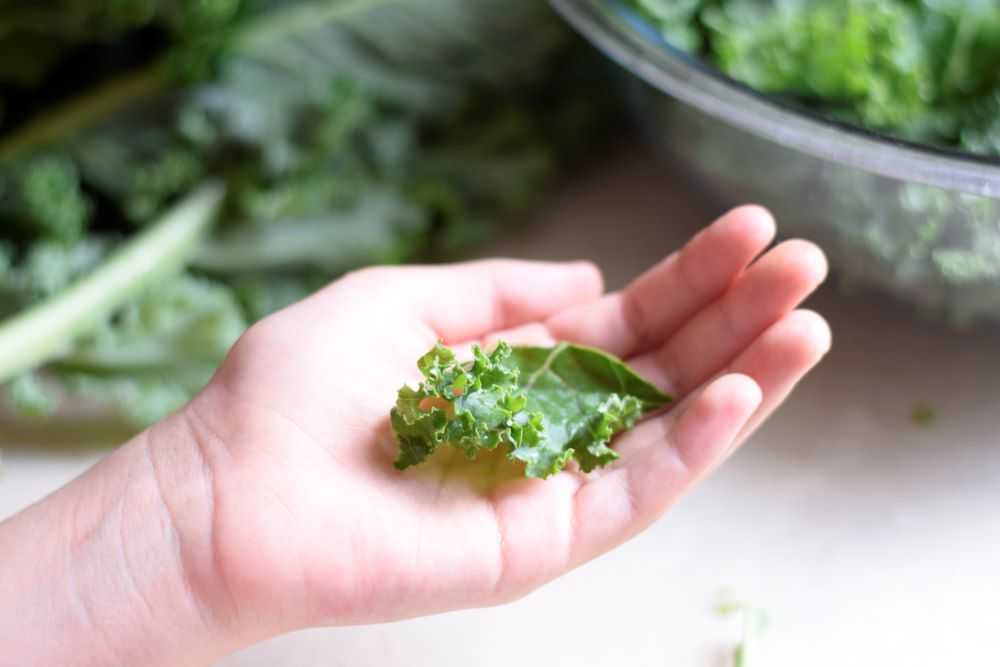
Start by washing the kale thoroughly, making sure to wash any dirt out of the curly leaves. Holding the kale stem in one hand, gently tear the leaves away. Cut or rip the leaves into bite sized pieces and place them in a large bowl. Throw away the stems (they are too tough to eat) and set the leaves aside.

Also wash and chop the onion and potatoes so everything is ready to go.

Tear the kale leaves from the stem
Tear the kale leaves away from the stem and then tear or chop them into bite-sized pieces.
Tear the kale into bite sized pieces

Step 2: Cook the Sausage and Onion

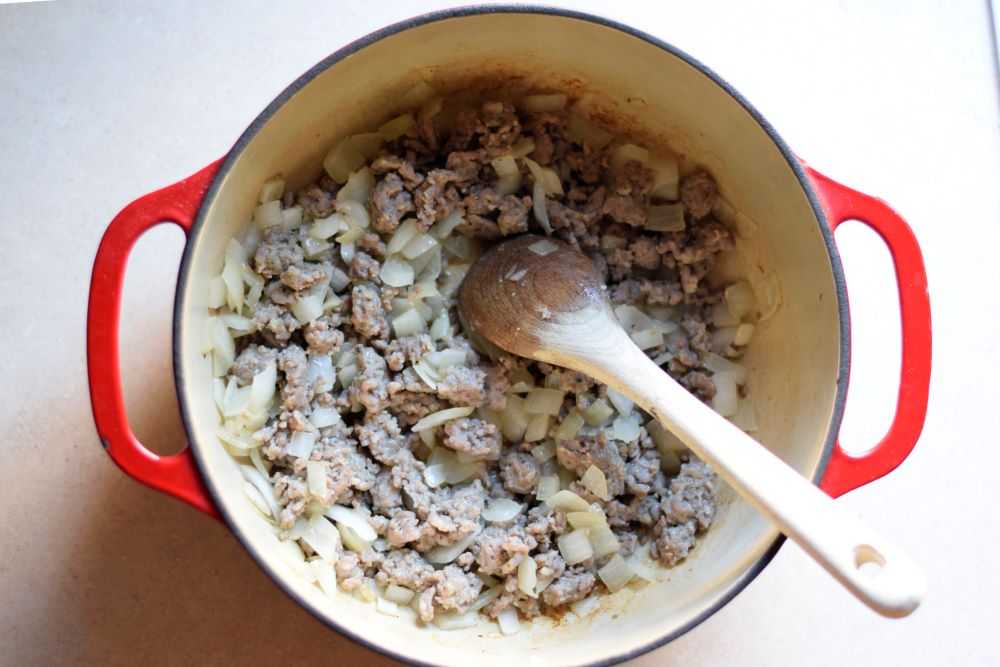
Cook the sausage and onion in a large pot. Break the sausage up into bite sized pieces as it is cooking. Cook the sausage until it is done and the onion is tender.

cook the sausage and onions until the sausage is cooked and the potatoes are tender

Step 3: Add the Potatoes

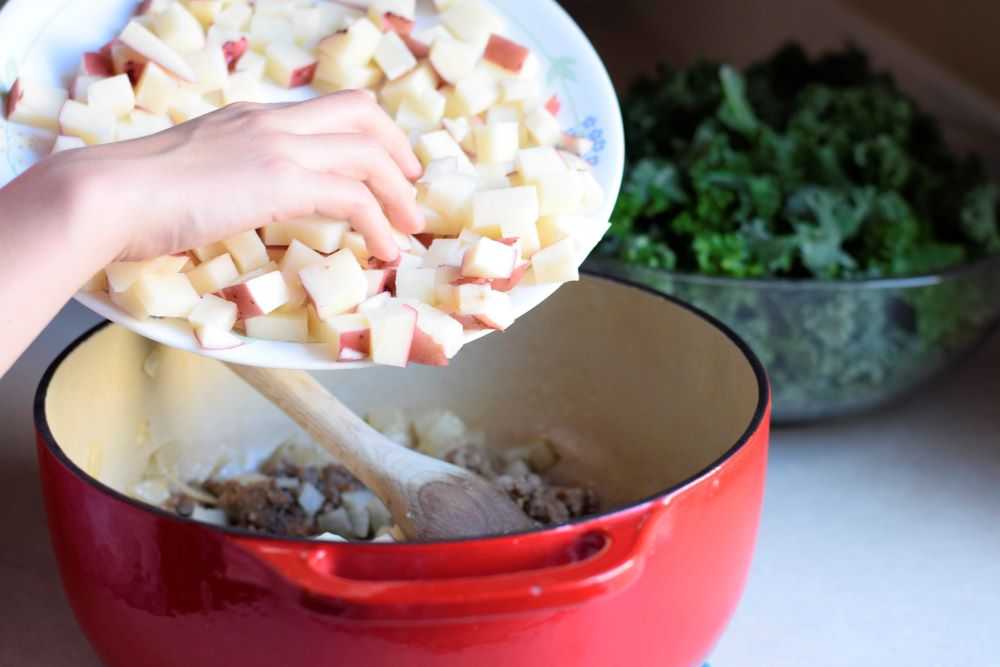
Add in the cubed potatoes and two cups of water. Bring to a boil, cover, and simmer for 20 minutes, or until the potatoes are tender.

Add potatoes to the sausage potato and kale soup

Step 4: Add in the Milk and Kale

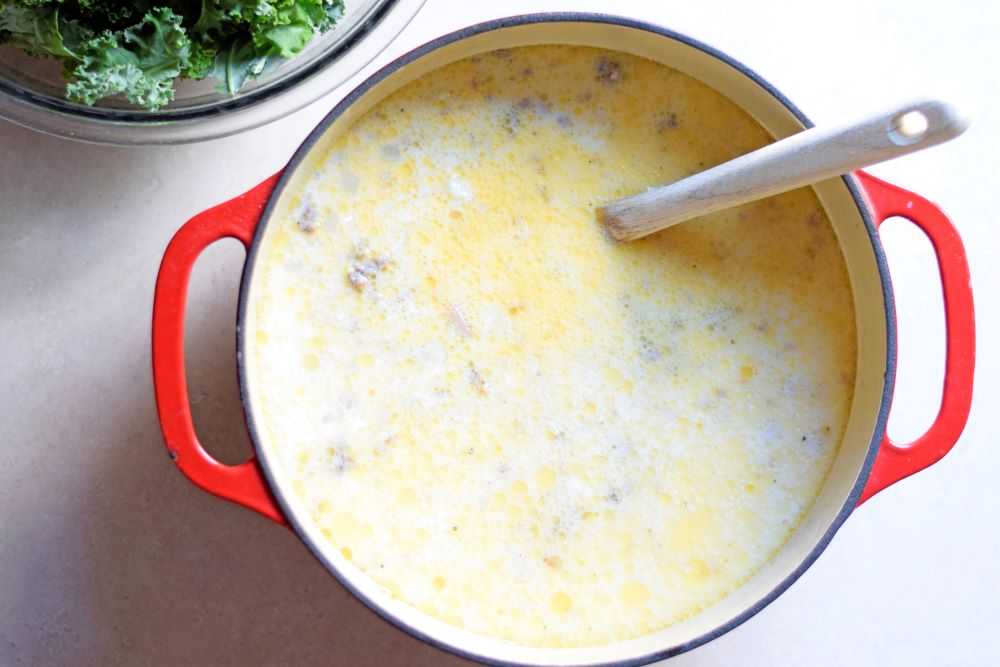
Stir in the milk, evaporated milk, oregano, and red pepper flakes and bring to a gentle boil.

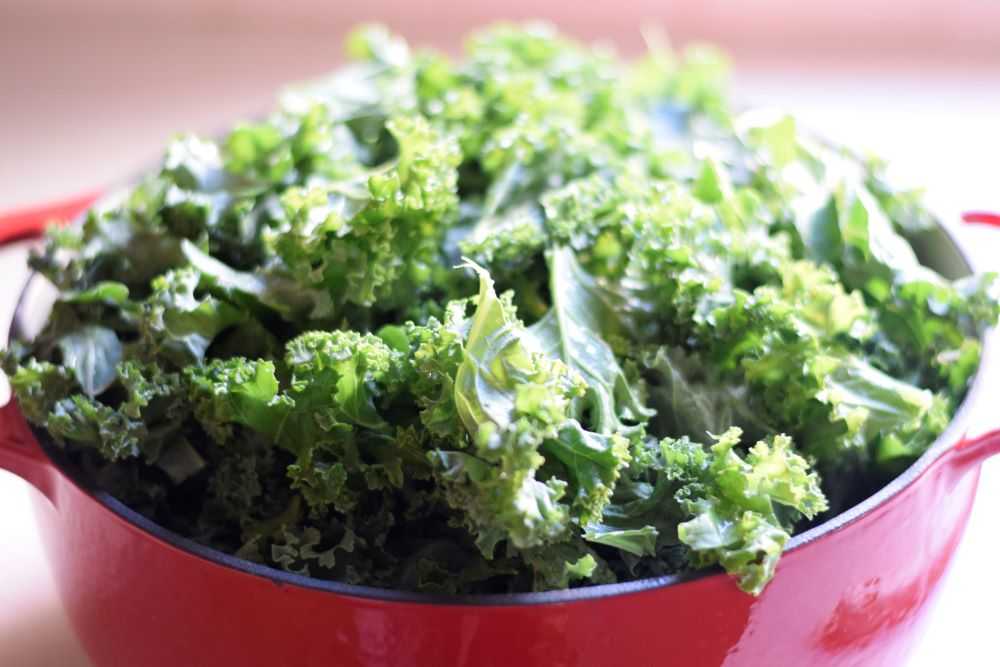
Add in the kale and cook for 10 minutes, or until the kale is tender. At first the kale will be quite fluffy and not all fit! Cover the pot to help trap the steam. Every few minutes uncover the pot and and gently push the kale down into the broth using the back of a spoon. This will help it to soften more quickly.

The kale might not all fit in the pot
The kale might look like it will not fit. Don’t worry–it will cook down!

After the kale is tender taste the soup and add salt and pepper to taste. The soup is now done!

Sausage potato and kale soup, zuppa toscana with breadsticks
Sausage, potato, and kale soup. Yum!!!

Serve

Ladle the hot soup into bowls and sprinkle with shredded parmesan cheese if desired. For the Olive Garden experience, serve with some soft breadsticks. Yum!

Sausage potato and kale soup, zuppa toscana

Hope you get to try this delicious sausage, potato, and kale soup soon. Happy Cooking!

Sausage, Potato, and Kale Soup

Recipe by: Mandy
This soup will remind you of Zuppa Toscana from the Olive Garden. It is delicious with homemade breadsticks!
Prep Time 10 minutes
Cook Time 45 minutes
Total Time 55 minutes
Servings 8 servings

Ingredients
  

  • 1 lb mild Italian sausage
  • 1 onion, chopped
  • 2 pounds potatoes, cut into ½ inch cubes (about 3-4 medium)
  • 2 cups water
  • 3 cups milk
  • 1 can evaporated milk (12 oz)
  • ½ teaspoon oregano
  • teaspoon red pepper flakes, or to taste
  • 2 bunches kale, stems removed and leaves torn or chopped into bite-sized pieces
  • ¾ teaspoon salt, or to taste
  • Shredded parmesan cheese for serving (optional)

Instructions

  • Cook the sausage and onion together in a large pot until the sausage is done and the onion is tender.
  • Add in the cubed potatoes and the water and bring to a boil. Reduce heat, cover, and simmer for 20 minutes or until the potatoes are tender.
  • Stir in the milk, evaporated milk, oregano, and red pepper flakes. Bring to a gentle boil.
  • Add in the kale and cook for 10 minutes or until it is tender. At first the kale will be quite fluffy and it might not all fit in the pot. Cover the pot to help trap the steam. Every few minutes gently push the kale down into the broth using the back of a spoon to help it soften more quickly.
  • After the kale is tender remove from heat. Taste the soup and add salt and pepper to taste.
  • Serve hot with shredded parmesan cheese sprinkled on top. Enjoy!

Don’t forget to pin for later!

bowl of leek and potato soup with bacon

Leek and Potato Soup with Bacon

I discovered leeks later in life. I had never purchased them at the grocery store because I did not know what to do with them. Are they an onion? How do you cook them? Why are they so big? So. Many. Questions. And then one day I tried them in this leek and potato soup and the rest is history! I have been cooking them regularly ever since.

If you have never tried leeks before you are in for a treat! Leeks have a mild onion taste and they give this soup a subtle sweetness. Bacon is sprinkled on top to give a satisfying salty crunch. Yum!

This soup is now a favorite around our house. With only five ingredients, it is incredibly easy to make and is ready in less than an hour. Continue reading to learn how to make this delicious leek and potato soup at home!

Ingredients to Make Leek and Potato Soup with Bacon

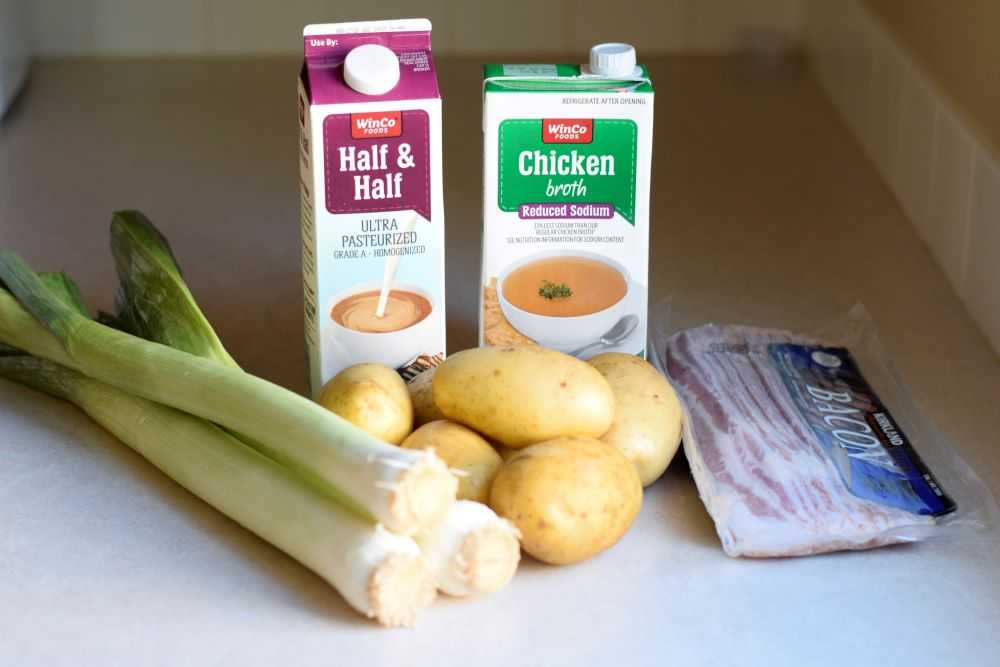
Leek and potato soup only requires 5 ingredients: leeks, potatoes, chicken broth, half and half, and bacon.

ingredients for leek and potato soup
Leek and potato soup only requires five ingredients.

What are Leeks?

Leeks are a member of the onion family, and they look like a giant green onion. Leeks have a mild onion flavor and when cooked they become slightly sweet. They give a great taste to this soup!

What type of Potatoes Should I Use?

My favorite potatoes to use in this soup are yukon gold potatoes because they have an amazing flavor. Since they have thin skin, I do not peel them for this soup.

If you don’t have yukon gold potatoes, russets work great too! You may want to peel them though because they have a slightly thicker skin.

How to Make Leek and Potato Soup with Bacon

Step 1: Prepare the Leeks

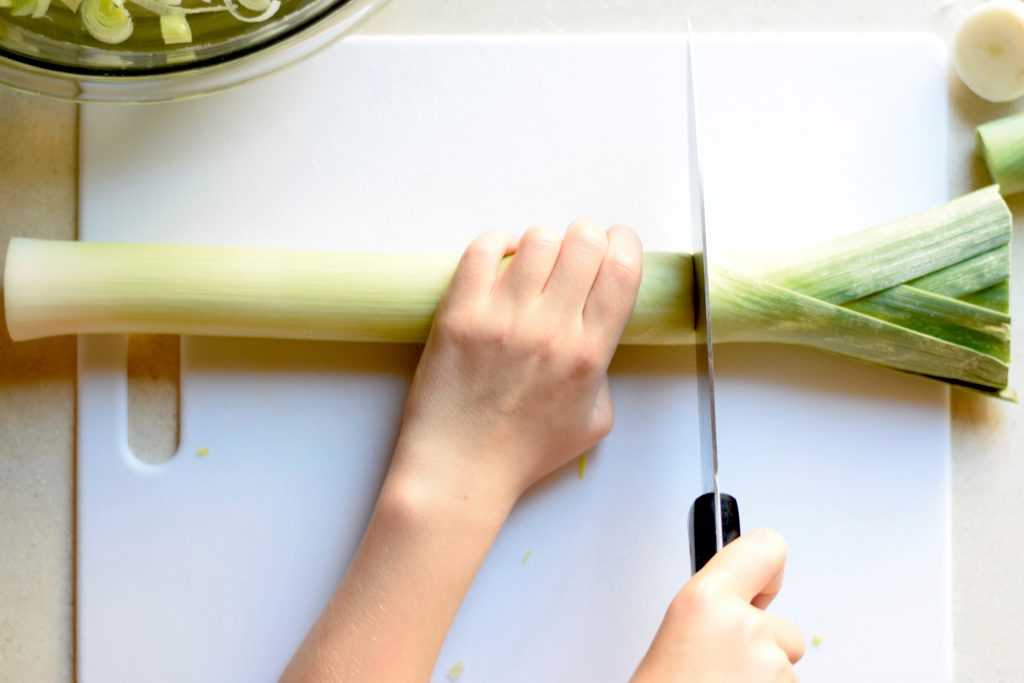
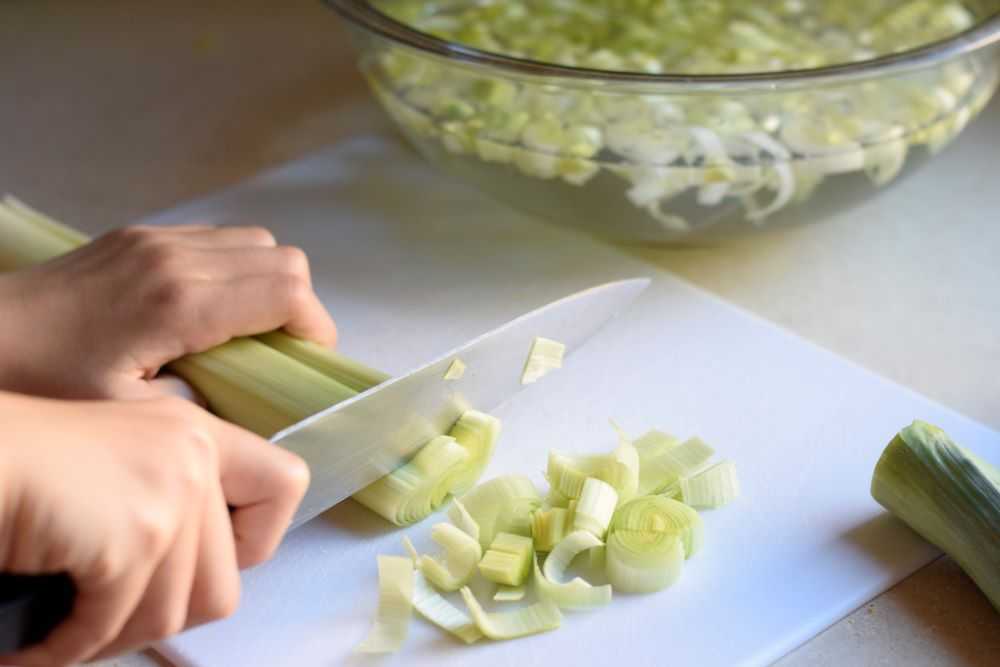
Start by cutting the root off of the leeks. Also cut off the dark green leaves at the top because they can be quite tough. Slice the leeks in half lengthwise, and then cut them crosswise in quarter inch slices.

how to cut leeks
Start by cutting the root off of the leek. Also remove the dark green leaves because they can be quite tough.
how to cut leeks
Slice the leek in half lengthwise and then cut into quarter inch slices. Wash the leeks in a big bowl of water to help remove any dirt trapped between the layers.

Place the leeks in a big bowl of water and use you fingers to move them around a bit. Leeks can be very dirty so this is the best way to remove dirt and sand that gets trapped between the layers. Once the leeks are ready, set them aside.

Step 2: Cook the Bacon

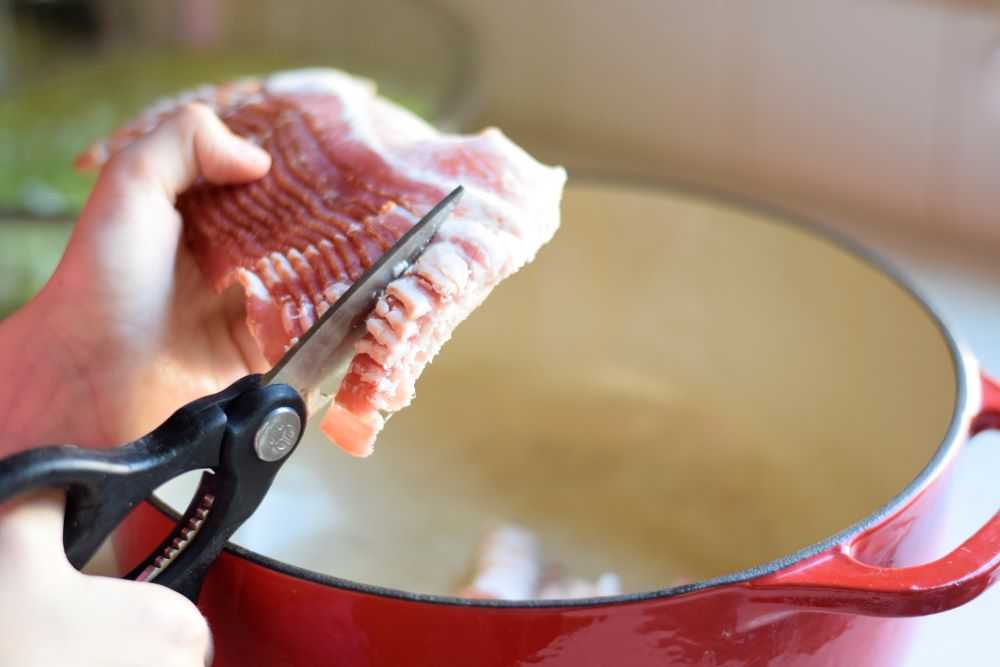
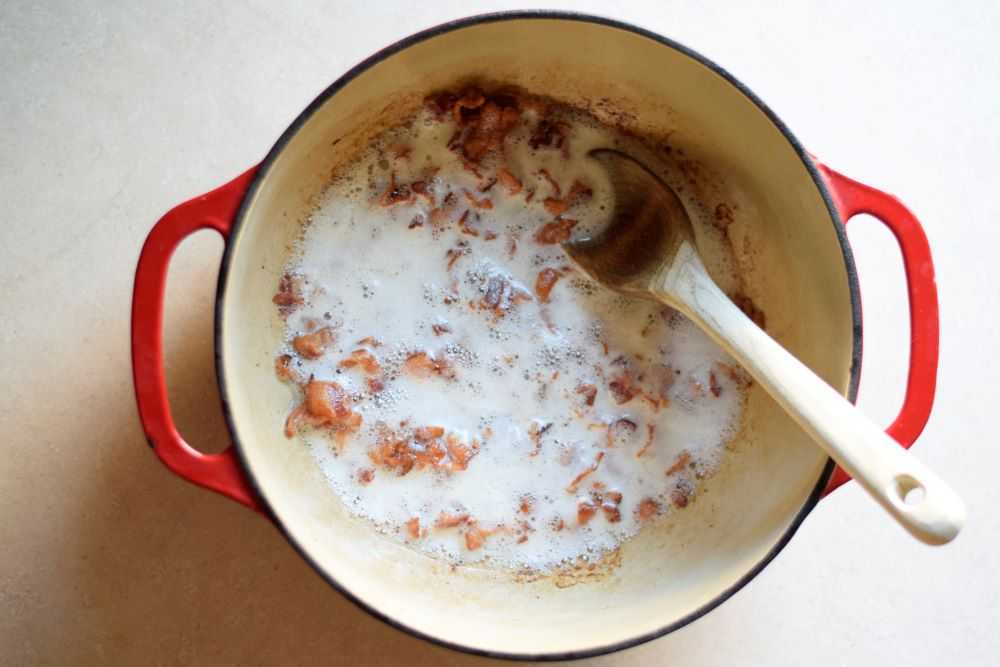
Cut the bacon into quarter inch thick slices. I like to use kitchen shears and cut the bacon directly into the pan. Cook the bacon until it is crispy and then transfer it to a bowl lined with paper towels to drain. Set aside.

Step 3: Add the Leeks

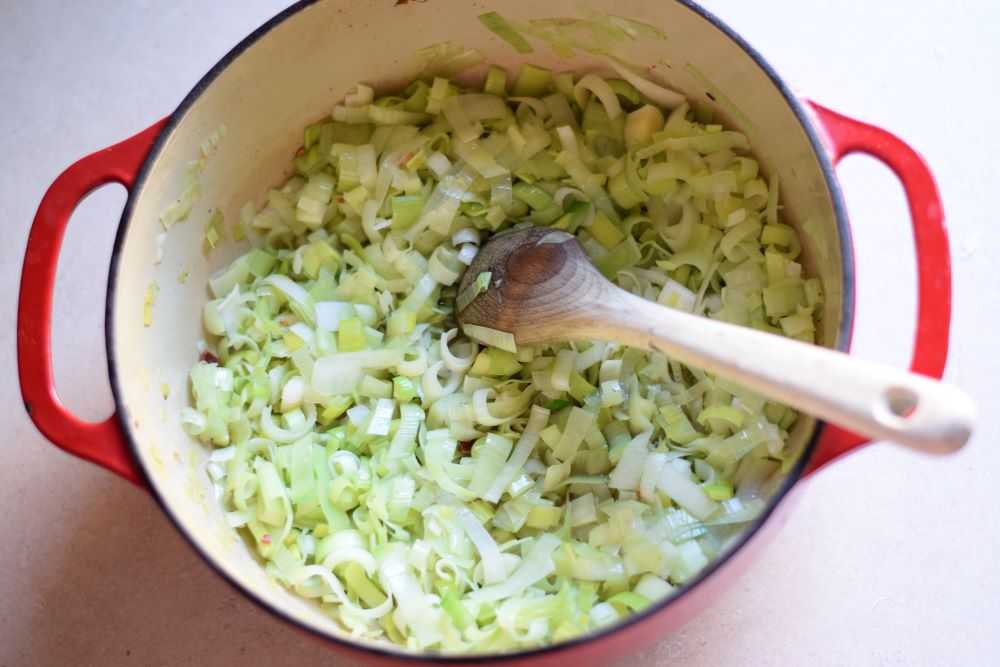
Drain away most of the bacon grease, reserving 1-2 tablespoons in the bottom of the pan. Add in the sliced and washed leeks. Cook them for 5 minutes or until they soften up a bit, stirring occasionally.

Cook the leeks for five minutes or until they soften up a bit, stirring occasionally.

Step 4: Add the Potatoes and Broth

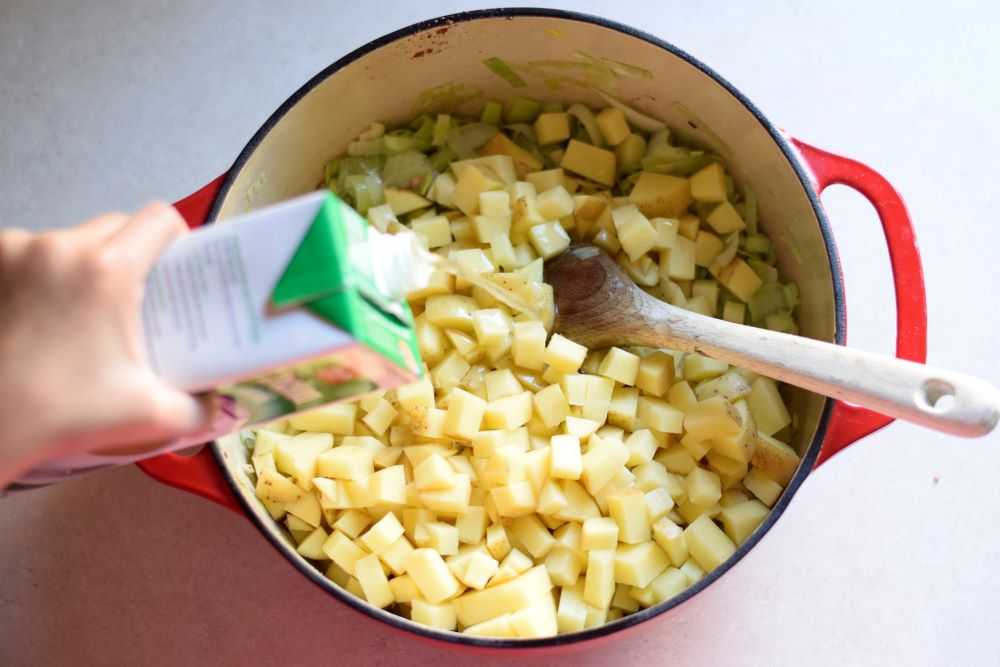
Add in the cubed potatoes and chicken broth. Bring to a boil, cover, and simmer for 20 minutes, or until the potatoes are tender.

pour chicken broth into soup
Add the chopped potatoes and chicken broth. Simmer until the potatoes are tender.

Step 5: Stir in the Half-and-Half

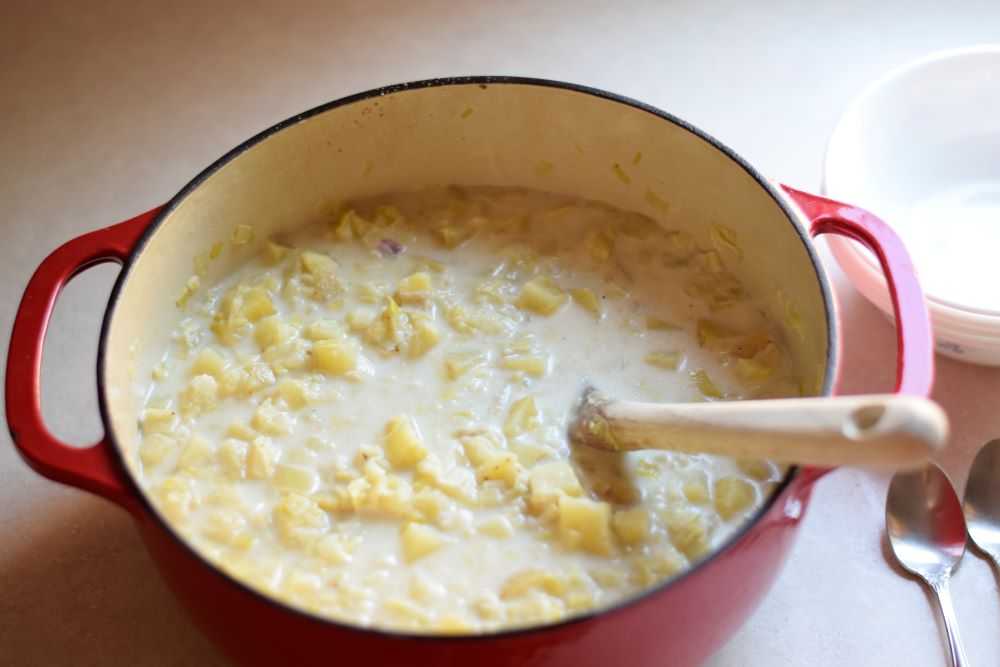
Stir in the half-and-half and remove from heat. Taste the soup and then add salt and pepper to taste.

leek and potato soup with bacon
Add the half and half and then season with salt and pepper to taste.

If a slightly thicker soup is desired, use a potato masher to lightly mash some of the potatoes. Your soup is now ready to serve!

Serve

Ladle the hot soup into bowls and sprinkle the reserved bacon on the top. Serve with crusty bread if desired. Yum!

bowl of leek and potato soup with bacon
Serve the soup hot topped with the reserved bacon. Yum!

Hope you get to try this delicious leek and potato soup soon. Happy Cooking!

Recipe Tips

  • This soup is also delicious with ham instead of bacon! Use about a pound of ham, cut into bite-sized pieces. You may not need to add additional salt because the ham is so salty already.
  • This soup may be fully pureed for a smoother consistency. An immersion blender works great for this because the soup can be blended directly in the pan.
  • You can use full whipping cream instead of the half-and-half to make this soup even creamier. Yum!
bowl of leek and potato soup with bacon

Leek and Potato Soup with Bacon

Recipe by: Mandy
This creamy leek and potato soup is topped with bacon for a satisfying salty crunch. With only 5 ingredients, it can be ready in less than an hour!
Prep Time 15 minutes
Cook Time 35 minutes
Total Time 50 minutes
Servings 8 servings

Ingredients
  

  • 1 bunch leeks (about 2-3 large)
  • 1 package bacon, cut into ¼ slices
  • pounds potatoes, peeled and cut into ½ cubes
  • 4 cups chicken broth
  • 1 cup half-and-half cream
  • salt and pepper, to taste

Instructions

  • Prepare the leeks by cutting off the root and dark green leaves. Slice them in half lengthwise and then crosswise into ¼ inch slices. Place the leeks in a big bowl of water and move them around a little with your fingers to remove any dirt trapped between the layers. Set aside.
  • In a large pot, cook the bacon until crispy. After it is done transfer the bacon to a bowl lined with paper towels to drain. Set aside.
  • Drain away most of the bacon grease, leaving about 1-2 tablespoons in the bottom of the pan. Add in the sliced and washed leeks. Cook for about 5 minutes or until they soften up a bit, stirring occasionally.
  • Add in the cubed potatoes and chicken broth. Bring to a boil and simmer for 20 minutes, or until the potatoes are tender.
  • Stir in the half-and-half and remove from heat. Taste the soup and then add salt and pepper to taste. If a slightly thicker soup is desired, use a potato masher to lightly mash some of the potatoes.
  • Serve hot with the reserved bacon sprinkled on the top.  Enjoy!

Notes

  • This soup is also delicious with ham instead of bacon! Use about a pound of ham, cut into bite-sized pieces. Leftover ham is great for this soup, too. You may not need to add additional salt because the ham is so salty already.
  • This soup may be fully pureed for a smoother consistency. An immersion blender works great for this because it can be blended directly in the pan.
  • You can use full whipping cream instead of the half-and-half to make this soup creamier.

Be sure to pin for later!

Powered by WordPress & Theme by Anders Norén