Tag: flowers

January Garden Checklist

The weather is cold but there is still plenty to do in the garden! Here are some tips and ideas for your garden this month.

The new year is here! Here in Oregon the weather is often very cold and wet in January which makes it difficult to get outside. Luckily there is still plenty to do indoors on these rainy days!

January is a great time to focus on planning, indoor projects, and maintenance tasks so you will be well prepared for the season ahead. The list below is based on my garden in zone 8, and you may need to adjust timing based on your specific climate and geographic location. Here are this month’s chores:

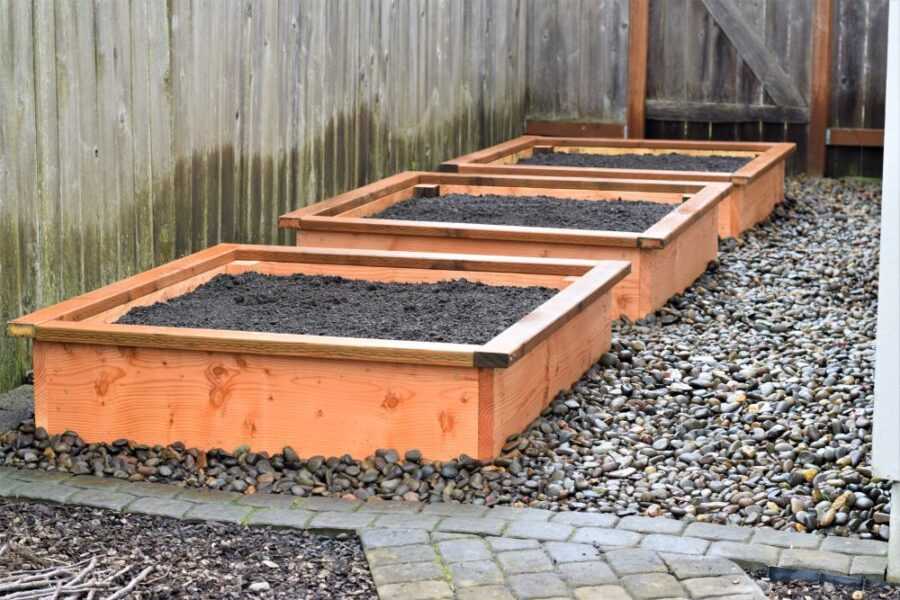
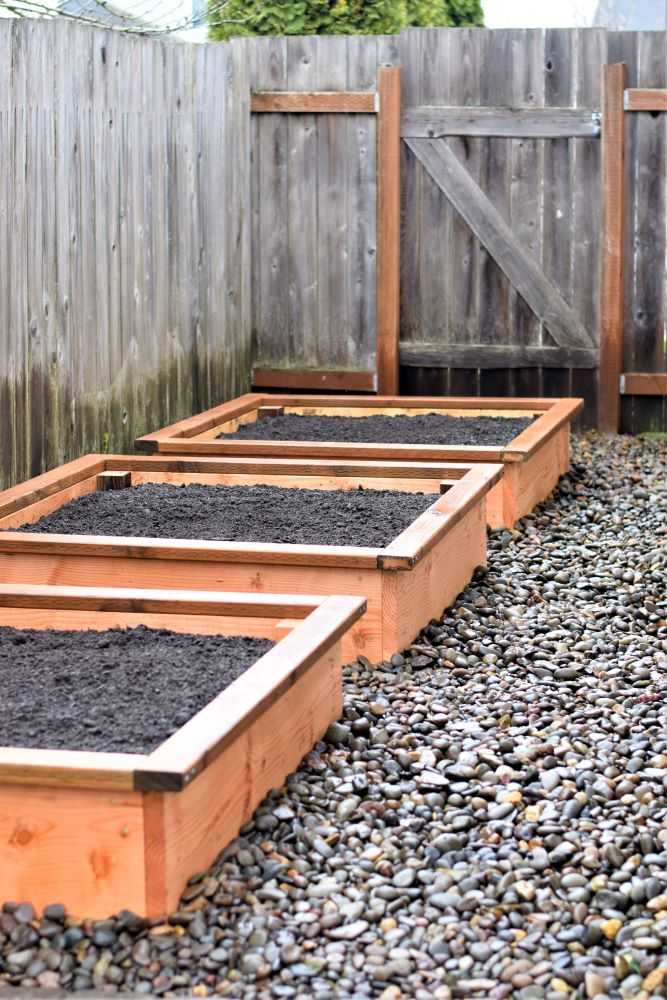
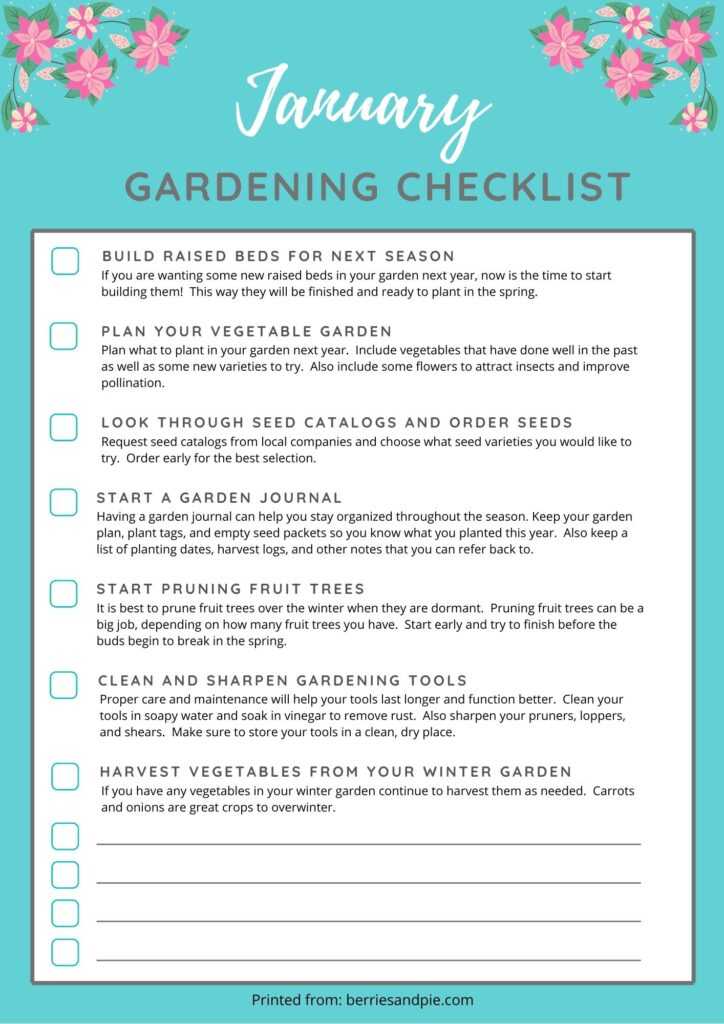
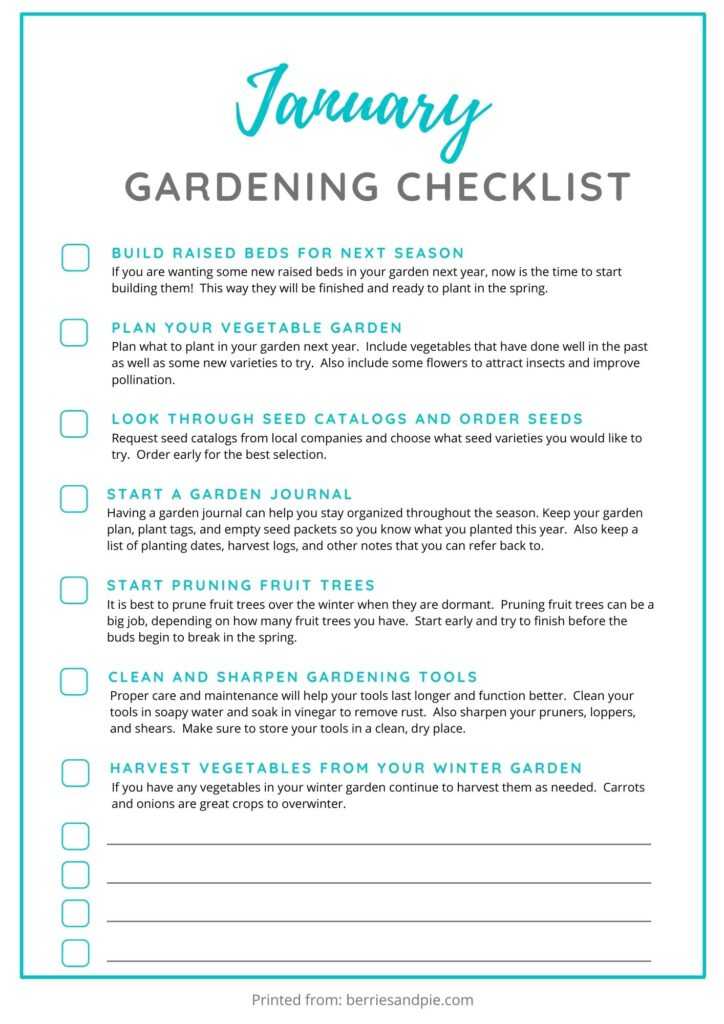
1. Build raised beds for next season

If you are wanting some new raised beds in your garden next year, now is the time to start building them! This way they will be finished and ready to plant in the spring.

raised garden beds

2. Plan your vegetable garden for next year

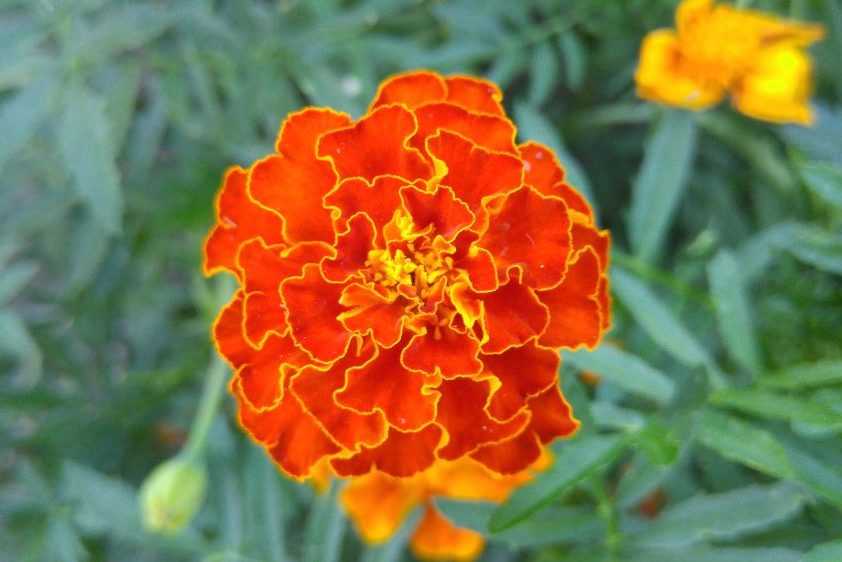
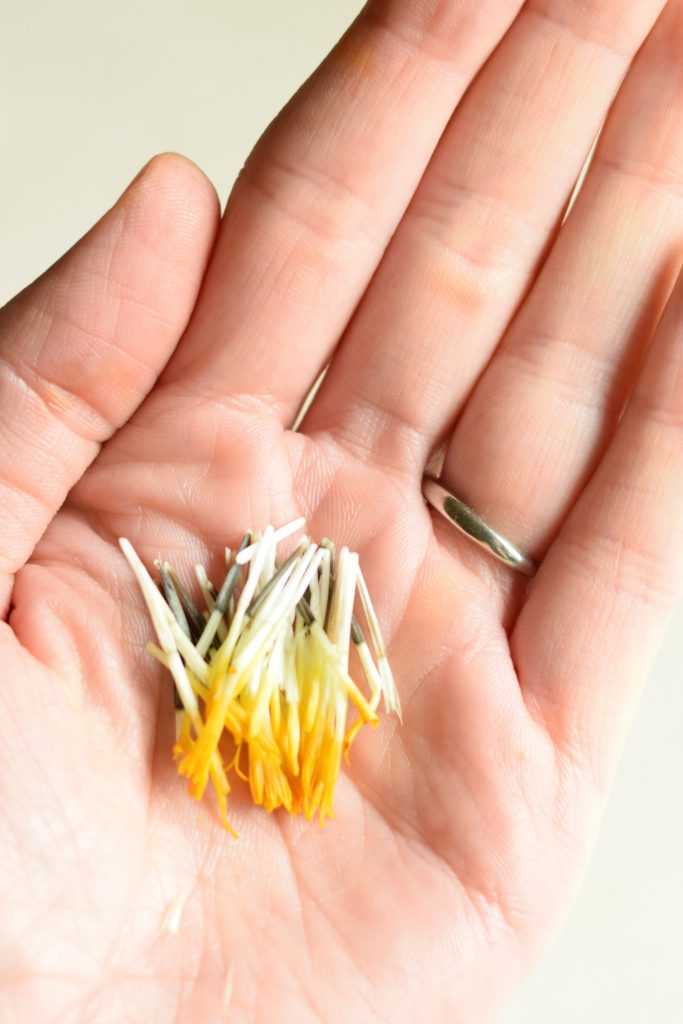
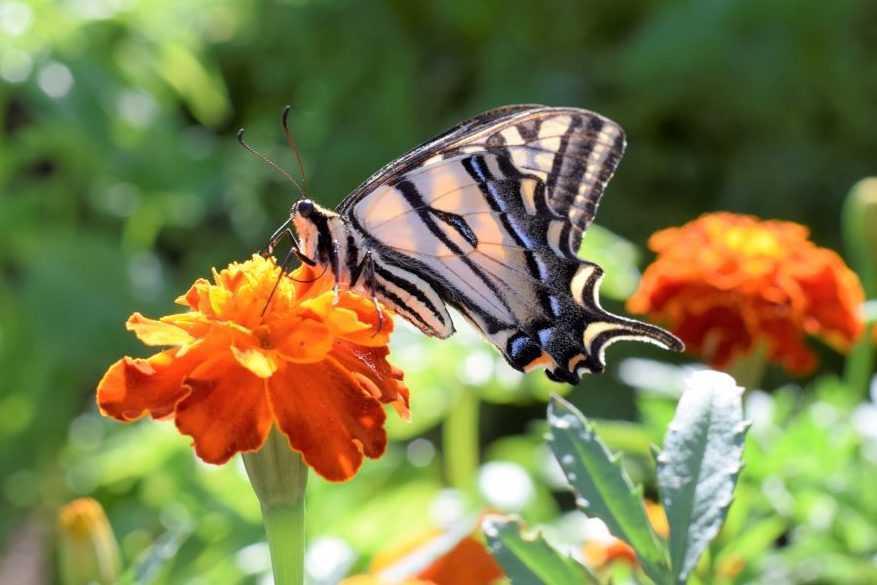
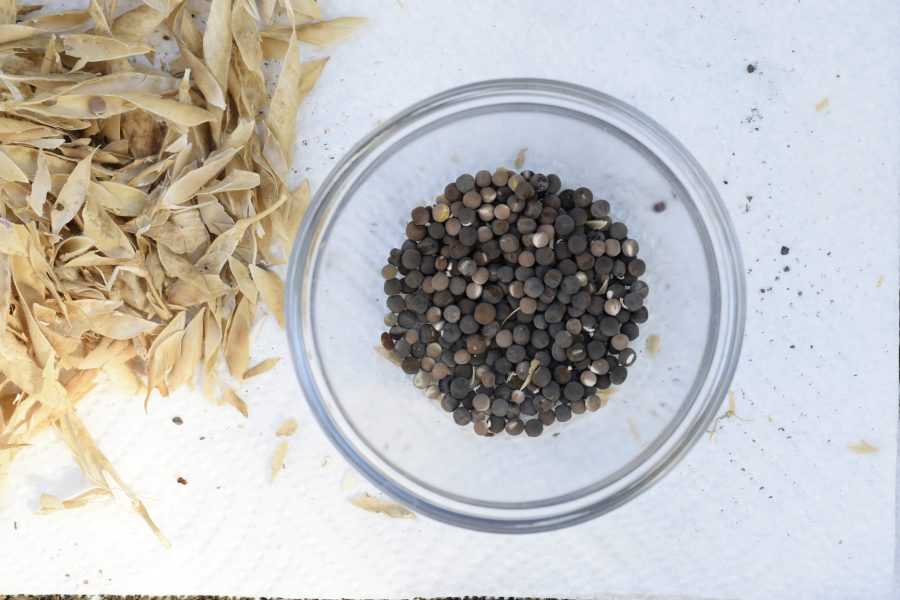
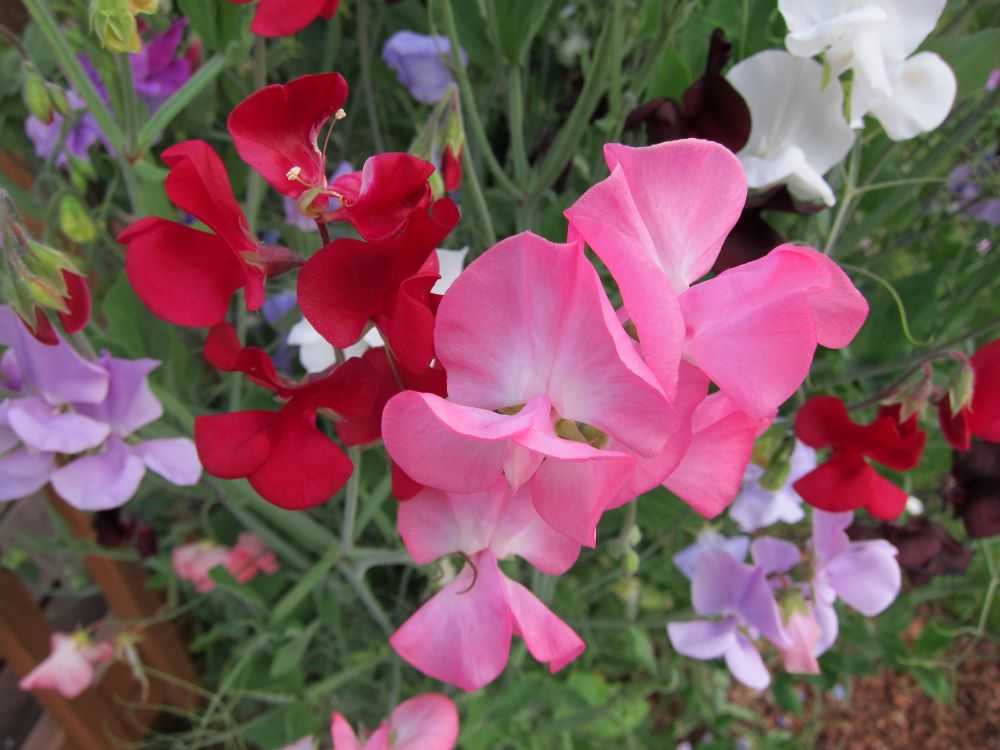
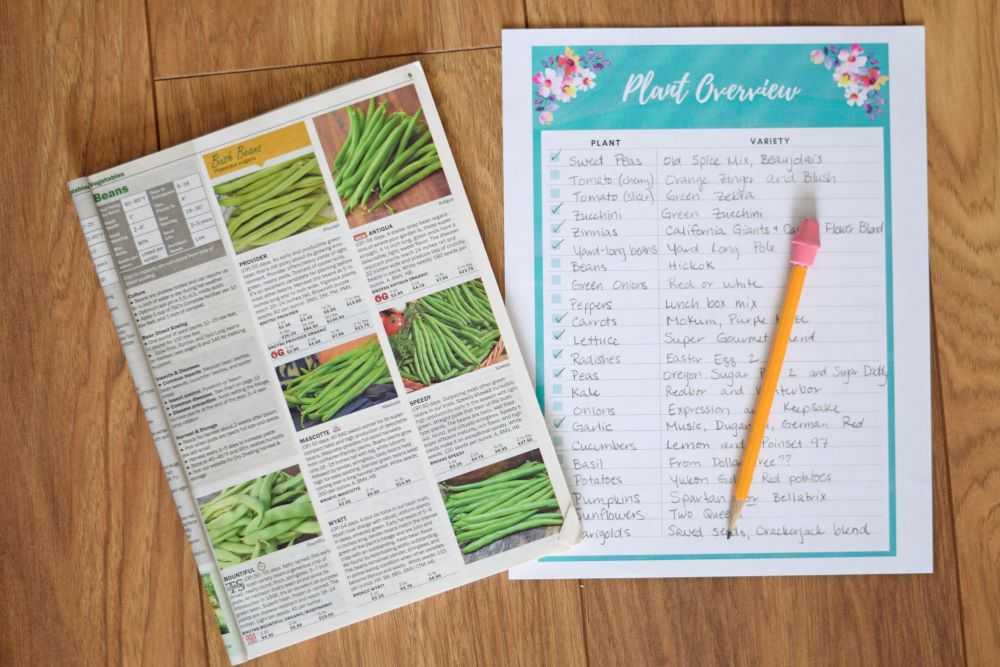
Now is the time to start planning what you want to include in your garden next year! Plan to include vegetables that have done well in the past as well as some new varieties that you will like to try. Also include flowers such as marigolds to help attract bees and other beneficial insects to improve pollination.

I usually plan my garden on a piece of graph paper. I always work in pencil because my plans are sure to change! After you are done place it in a plastic page protector. This will help to keep it clean and dry when you take it outside to plant your garden in the spring.

garden plan on graph paper

3. Look through seed catalogs and order seeds

Nothing beats the winter doldrums better than getting a seed catalog in your mailbox! Many seed companies will send you a free catalog if you request one on their website.

My absolute favorite seed catalog is from Territorial Seed because they are located in Oregon where I live. They carry varieties that do well in my specific climate and I have had great success with seeds I have purchased from them. Other popular seed companies are Park Seed, Burpee Seed, Botanical Interests, and Johnny’s Selected Seeds.

Enjoy going through the catalog and dreaming about what seed varieties you want to try. Be sure to order early for the best selection.

Look through seed catalogs and make a list

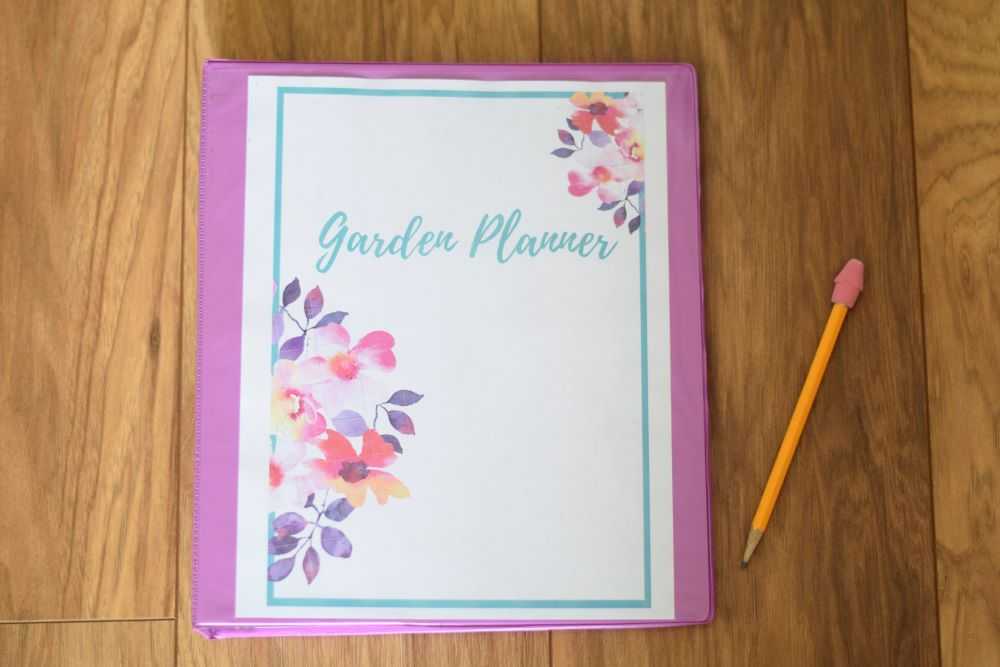
4. Start a garden journal

Having a garden journal can help you stay organized throughout the season. Keep your garden plan, plant tags, and empty seed packets so you know what you planted this year. Also keep a list of planting dates, harvest logs, and other notes that you can refer back to. Next year you can look back at what went well and what you learned.

Start a garden journal by finding a notebook that you like. I like to use a 3-ring binder so I can easily add and remove pages. Record whatever information you find the most useful. Use dividers to help keep everything organized.

Use a 3 ring notebook as a garden journal

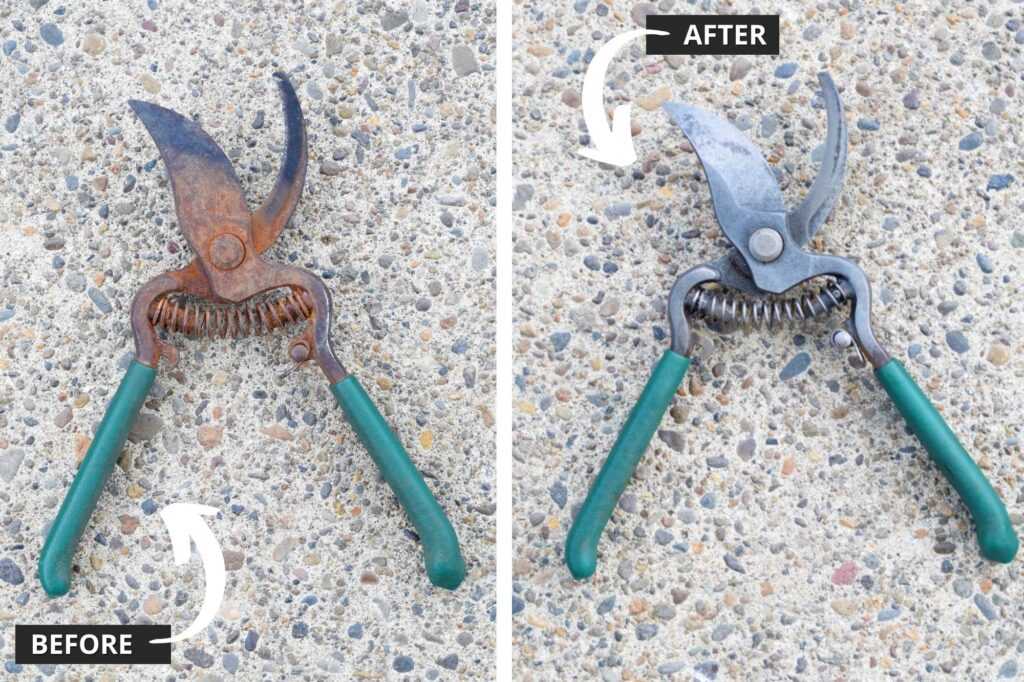
5. Clean and sharpen gardening tools

Now is a great time to clean and sharpen your garden tools so they are ready for the season ahead. Proper care and maintenance will help your tools last longer and function better.

Clean your tools in soapy water and soak in vinegar to remove rust. Also sharpen your pruners, loppers, and shears. Make sure to store your tools in a clean, dry place.

Related Post: How to easily clean rusty pruners

How to easily clean rusty pruners

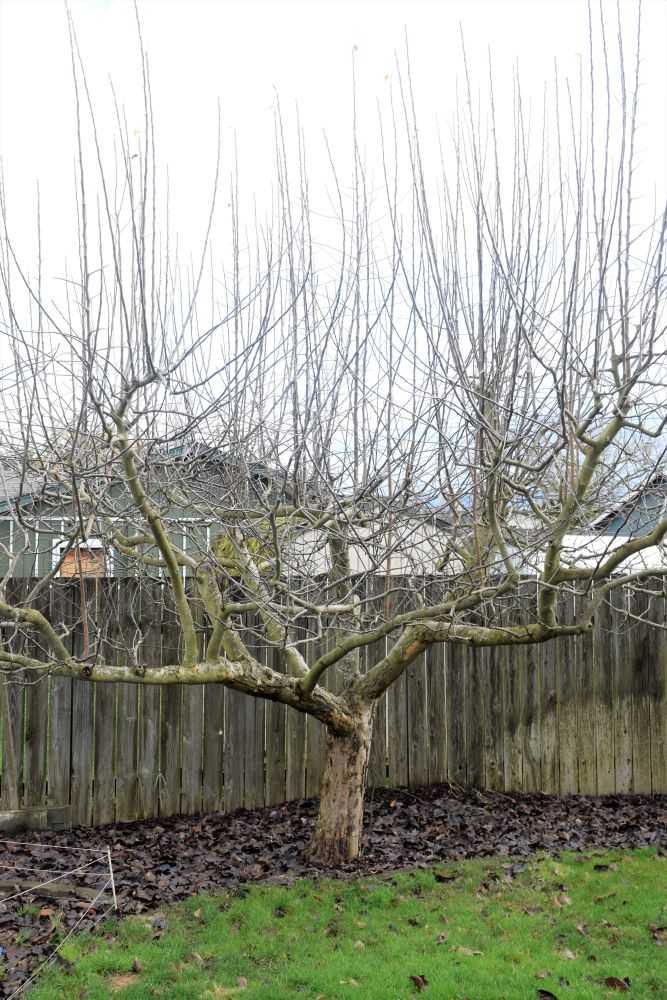
6. Start pruning fruit trees while dormant

Regular yearly pruning will help develop a strong structure so your trees can handle the load of heavy fruit. It will also help to keep the trees healthy and improve fruit quality.

The best time to prune fruit trees is in the winter months when they are dormant. Winter pruning is easier on the tree and also easier for you because you can better see the framework of the tree without the all the leaves in the way. Pruning fruit trees can be a big job, depending on how many fruit trees you have. Start early and try to finish before the buds begin to break in the spring.

an apple tree that needs to be pruned

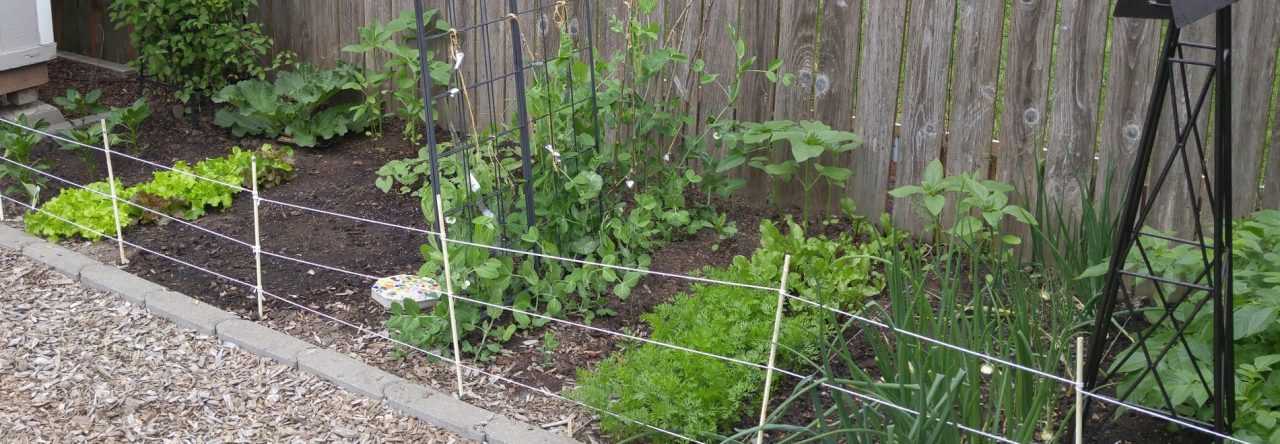
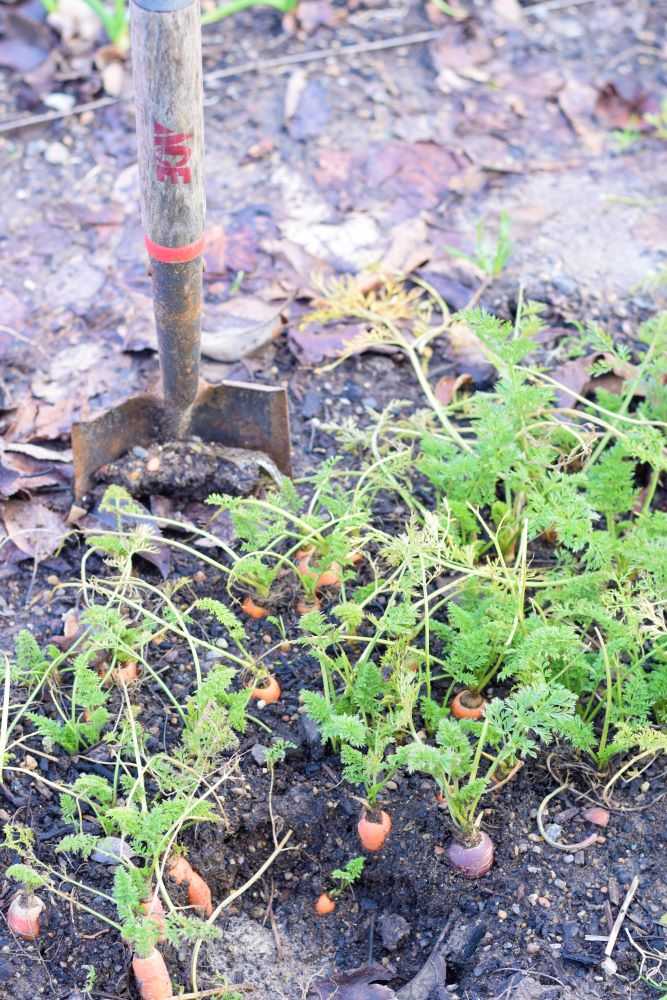
7. Harvest vegetables from your winter garden

If you have any vegetables in your winter garden continue to harvest them throughout the season as needed. Carrots, onions, beets, turnips, and other root crops can be stored in the ground and harvested throughout the winter as long as the ground temperature stays above 20-25 degrees or so. The tops will die back but the roots will be crunchy and sweet. Make sure to dig all your root crops before spring because the quality will start to decline when growth begins again.

Harvest carrots throughout the winter

Final Thoughts

Hope you find some time to get in the garden this month! Print the checklist below to help keep you on track. There are also some blank areas so you can add your own items to the list. Happy gardening!


Free Printables:

January Garden Checklist (color version)

January Garden Checklist

January garden checklist

You may also like:

How to easily clean rusty pruners

How to Easily Clean Rusty Pruners

Chickadee bird on DIY sunflower birdfeeder.

How to Make a DIY Sunflower Bird feeder

I always have a row of sunflowers along the back fence in my garden. One of the joys of having sunflowers in your garden is watching the birds eat the sunflower seeds. We get pretty chickadees, blue stellar jays and yellow goldfinches. But sometimes I need to pull out the sunflowers (or they fall over!) before the birds are done eating all of the seeds. What to do? Cut off the seed heads and make a DIY sunflower bird feeder!

Bird on a sunflower birdfeeder.
Birds love these birdfeeders because it is easy for them to reach the seeds.

Birds like these sunflower bird feeders because they are are level and it is easy for them to reach the seeds. And since the sunflowers are hanging up off the ground few pests will bother them.

This DIY sunflower bird feeder is very easy to make and requires just a few materials. It also makes a nice gift to a friend who doesn’t have sunflowers in their garden. Let’s go through how to make a DIY sunflower bird feeder step-by-step.

This post may contain affiliate links, where I earn a small commission from qualifying purchases. I only provide links to products that I use personally and recommend highly.

Materials List

Sunflower heads and twine to make sunflower birdfeeders.
Twine and sunflower seed heads are all that you need to make these bird feeders.

Twine or Cotton String – You will use this to hang the sunflower seed heads. You will need four pieces of string for each bird feeder, each about 3 feet long. You may need to make these a little longer if you have an especially large seed head. I like to use this cotton twine and it works very well.

Sunflower Seed Heads – Larger seed heads will make it easier for the birds to land on. Make sure that the seed heads have mature seeds for the birds to eat.

How to Make a DIY Sunflower Bird Feeder

Step 1: Cut the Stems off the Sunflowers

Turn the sunflower seed head over and cut the stem 1-2 inches from the back of the sunflower head. It is best to leave it a little long rather than cut it too short so it is easier to tie the string in the next step.

Cut the stem off the back of the sunflower.
Cut the stem 1-2 inches from the back of the sunflower head.
Make sure you don’t make it so short so it is easier to tie the string to it in the next step.

Step 2: Tie the String to the Sunflower

Cut the string or twine into four pieces that are each about 3 feet long and gather them together neatly. Holding the ends of all the strings together, tie them tightly to the stem at the base of the sunflower head. Double knot this to make it strong.

Tie string to the sunflower stem.
Tie all of the strings to the stem of the sunflower head. Double knot this to make it strong.

Spread the strings out in a cross and then carefully turn the sunflower head over. Adjust the strings so they come out evenly around the edges of the sunflower. Now you are ready to knot the strings together on the front side!

Spread the strings out and then carefully turn the sunflower head over. Adjust them so they are even around the edges of the sunflower.

Step 3: Knot the Strings Together

Holding the sunflower level, tie all four strings together in a slip knot about a foot or two above the sunflower head. Do this loosely at first. If the sunflower is not level, loosen the knot and try again. The slip knot will make a nice loop to hang up your sunflower.

Step 4: Hang the Sunflower Bird Feeder Outside!

Try to hang your bird feeder where it will not get super wet because this could cause the seeds to mold. You can hang it in a tree or on a hook somewhere in your yard.

Three sunflower birdfeeders hanging in the garden.

Have fun watching the birds this fall! Enjoy!

A chickadee bird eating seeds on a sunflower birdfeeder.

How to Make a DIY Sunflower Bird Feeders

Are you removing your sunflowers before the birds are done with the seeds? Cut off the seed heads and make these cute DIY sunflower bird feeders! These also make great gifts to share with friends and family.
Active Time10 minutes
Total Time10 minutes
Author: Project by: Mandy

Materials

  • Sunflower Seed Heads
  • Twine or Cotton String
  • Scissors

Instructions

  • Turn the sunflower head over and cut the stem about 1-2 inches from the back of the sunflower head. It is best to leave it a little long rather than cut it too short so it is easier to tie the string in the next step.
  • Cut four pieces of string that are each 3 feet long and gather them together neatly. Holding the ends of all the strings together, tie them tightly to the stem at the base of the sunflower head. Double knot this to make it strong.
  • Spread the strings out in a cross and carefully turn the sunflower head over. Adjust the strings so they come out evenly around the edges of the sunflower.
  • Holding the sunflower head level, tie all four strings together in a slip knot about a foot or two above the sunflower head. Do this loosely at first. If the sunflower is not level, loosen the knot and try again.
  • Hang your sunflower bird feeder outside for the birds to find! Have fun!

Be sure to pin for later!

Taking marigold seeds out of seed heads

How to Save Marigold Seeds

Marigolds are wonderful flowers to include in your garden! They repel bugs, are easy to grow, are drought tolerant, and bloom continually over a long season. It is September now and my marigolds are about done blooming for the year. Read on to learn how easy it is to save marigold seeds for beautiful blooms year after year.

Marigold flower
Marigolds are an easy-to-grow garden favorite!

When to Harvest Marigold Seeds

Marigold seeds are ready to harvest as soon as the seed heads are fully dry, and this can happen as early as August. However, I usually wait until September or October to collect my seeds because a larger number of seed heads will have formed. Try to harvest the seed heads before the heavy fall rains arrive because wet seeds will not last as long.

How to Harvest Marigold Seeds

Collect the dry seed heads from your marigold plants and put them on a work surface. Be sure to look deep in the plant because some may be hiding among the leaves. Remove the dried petals and then carefully pull the seeds out of the seed head and place them in a small bowl. The bottom of the seeds should be hard and black. Discard any seeds that are soft or light colored because these are not fully mature and they will not germinate properly.

Taking marigold seeds out of seed heads
Harvest the seeds by removing the orange petals and then pulling the seeds from the base.
Spread your seeds out on a paper towel for a few days so they can dry. It is surprising how many seeds each plant can produce!

After you have collected all of your seeds spread them out on a paper towel and let them sit there for a few days so they can dry. After they have dried completely they will be ready for storage.

Seed Storage Tips

There is one thing that will ruin your marigold seeds and that is mold caused by too much moisture. I learned this the hard way a few years ago when I stored my seeds in a plastic zip-top bag when they were not fully dry. In the spring my seeds were a black moldy mess and completely ruined. It was so disappointing!

Now I recommend storing your seeds in a brown paper lunch bag after they are done drying on the paper towels. Since the paper bag can breathe, moisture can escape and the seeds will last longer. Fold the top of the bag down and seal it with a piece of tape. Store the seeds in a cool, dark, dry place until you are ready to plant them in the spring.

Paper bag of marigold seeds 2020
Store your seeds in a sealed paper bag. Since the paper is breathable excess moisture can escape.

When to Plant Your Seeds

Marigolds are very easy to grow from seed. Plant them in mid-spring around March or April. In my experience, marigolds planted from seed are much more vigorous than those planted from transplants. If your marigolds last year were a hybrid variety, the plants that grow this year may or may not look exactly like the parent plants. Either way, they will add a bright and sunny pop of color to your garden!

Butterfly sitting on marigold flower

Hope you get to enjoy these beautiful flowers in your garden again next year. Happy Gardening!


Be sure to pin for later!

Sweet Pea Seeds

How to Save Sweet Pea Seeds

Sweet peas are a beautiful flower to have in your garden. They bloom early in the spring, produce flowers over a long season, and smell amazing! It is early September now and my sweet peas are finally done for the year. Read on to learn how easy it is to save your sweet pea seeds for beautiful blooms year after year.

Pink and red sweet pea flowers.
Sweet peas are a beautiful flower to grow in your garden!

When to Harvest Sweet Pea Seeds

Sweet peas seeds are ready to harvest when the pods are fully dry. For me this happens around late August to early September. The pods will turn brown and brittle and you may even be able to hear the seeds rattling around inside.

Make sure you harvest your sweet pea seeds as soon as most of the pods look ready. If you wait too long, the pod will split open and the seeds will scatter on the ground.

How to Harvest Sweet Pea Seeds

Collect the dry pods from the plant and place them on a work surface. With your fingers carefully open up each pod, remove the seeds, and drop them into a small bowl. The seeds should be large, hard, and dark brown or black in color. Discard any seeds that are soft or white because these are not fully mature and will not germinate properly.

Removing sweet pea seeds from seed pod.
Open the pods and empty the seeds in a bowl.
Sweet pea seed pod held in hand.
The seeds should be large, hard, and black. Discard any that are soft or white because they will not germinate properly.

When to Plant Your Seeds

Your sweet pea seeds can either be planted in the late summer/early fall if you plan to overwinter them or they can be saved and planted the following spring. Since we rarely have harsh winters here in Oregon, I usually plant my seeds in mid to late September. The peas are able to grow about a foot tall before going dormant for the winter. In the spring they have a head start on the season and start blooming earlier.

Store Your Seeds

If you choose to store your sweet pea seeds keep them in an airtight container. This could be a zip top bag or a mason jar with a tight fitting lid. Keep them in a dark and cool place and plant them in the spring as soon as the soil can be worked.

Hope you get to include these beautiful flowers in your garden again next year. Happy Gardening!


Be sure to pin for later!

pink four o'clock flowers

How to Grow Four o’Clock Flowers

Pink four o'clock flowers
Four o’clock flowers are an easy-to-grow garden favorite.

Many people have never heard of four o’clock flowers. Until about four years ago, I had never heard of them either. Then my mom gave a packet of seeds to my son, and we have been growing them ever since.

Why are they named four o’clock flowers you may ask? Four o’clocks have a very unique blooming habit. While most flowers are open during the day and close up at night, four o’clock flowers are the opposite. They are closed during the heat of the day and open in the late afternoons. The flowers remain open all night long and close in the early morning.

Four o’clock flowers come in a variety of colors such as magenta, light pink, purple, yellow, and white. The bushy plants grow 2-3 feet tall and are covered with hundreds of small flowers that are a favorite of hummingbirds and butterflies. Four o’clock flowers are easy to grow from seed and are a fun plant for kids to grow.

Planting Four o’clock flowers

Four o’clock flowers are easy to start from seed. Plant the large black seeds about 1/4 to 1/2 inch deep in full sun to partial shade in the spring. Space the seeds about 6 inches apart and thin to 1-2 feet between plants.

Saving seeds

Four o’clock flowers produce large black seeds that are easy to collect. Save them and plant them next year or give them to a friend. Four o’clocks readily reseed themselves. In some areas they are a perennial plant and will make a carrot-like taproot which will grow and bloom again the following year.

Hopefully you will try four o’clocks in your garden next year. Happy Gardening!

Yellow swallowtail butterfly on pink four o'clock flowers

Be sure to pin for later!

Powered by WordPress & Theme by Anders Norén