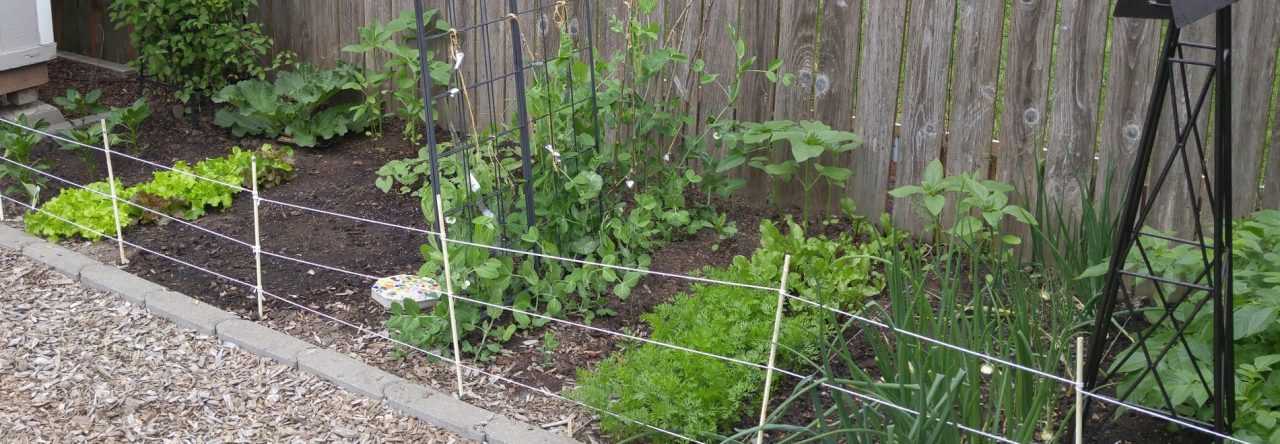
The new year is here! It has been a challenge to get outside this month in between rain storms but luckily we have had some nice days too. Most of my time has been spent on planning, pruning, and other maintenance tasks. Here is what is going on in the garden this month:
Peas
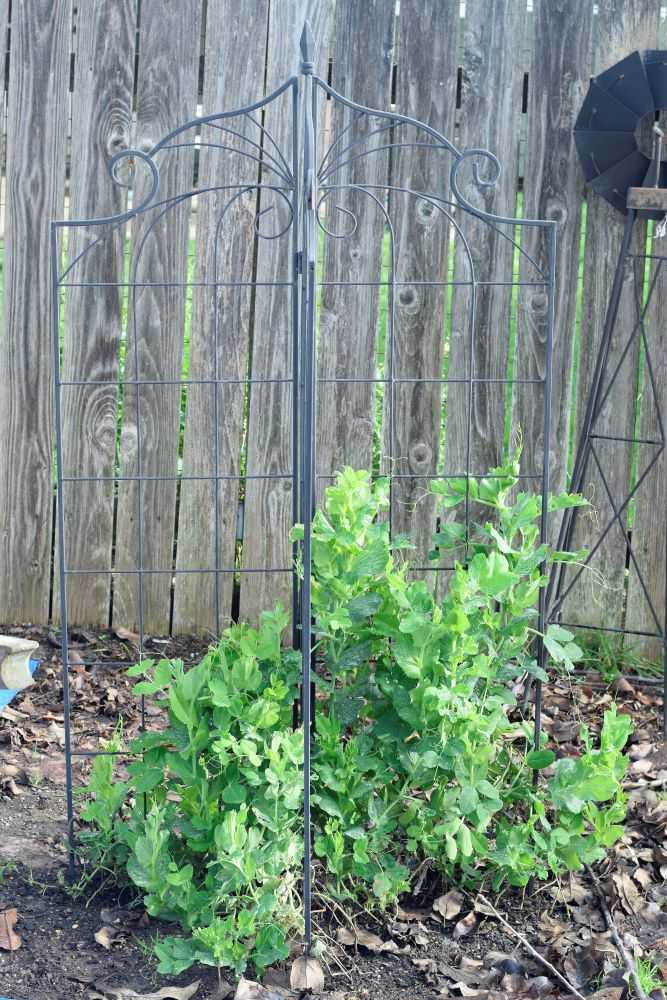
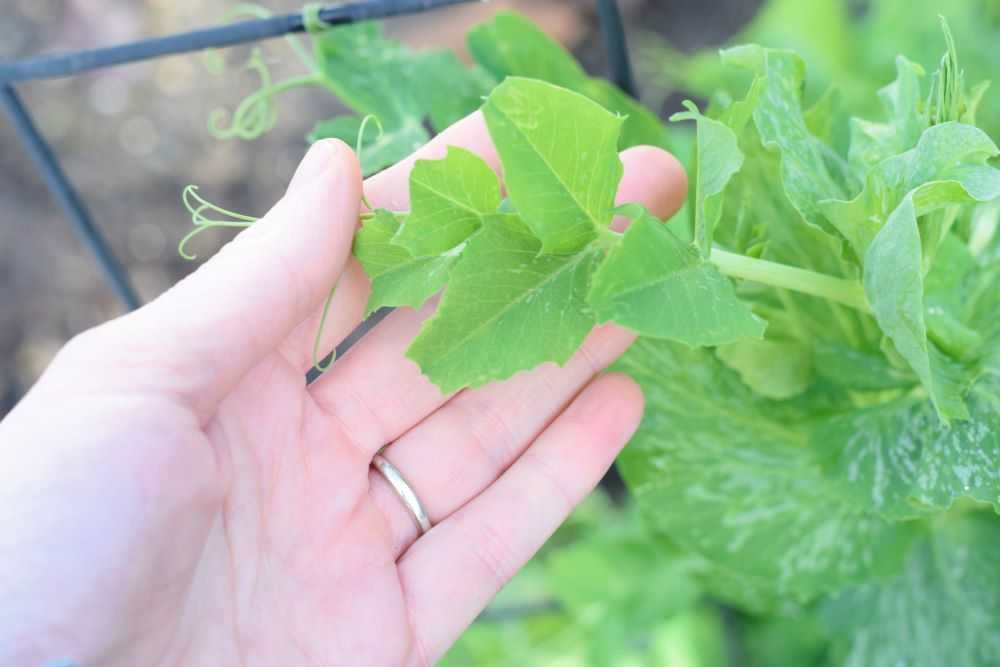
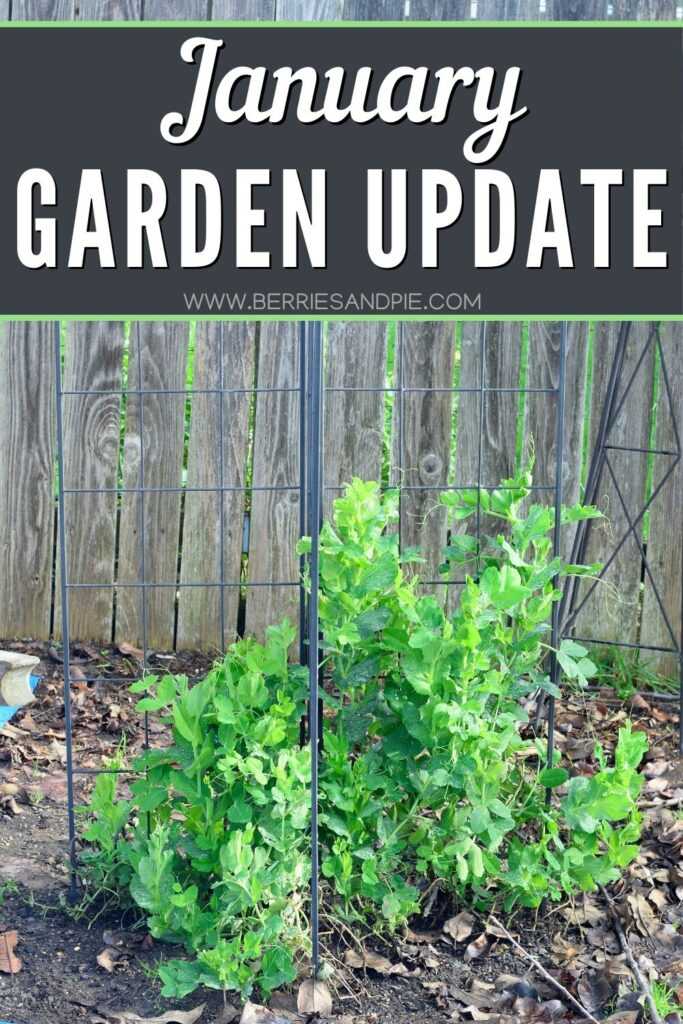
My peas are still doing well! I planted them last fall and they continue to grow and look very healthy. The birds have been pecking at them but luckily the damage is minor since the plants are well established. If the peas were still small seedlings the damage would be much more severe. I am looking forward to fresh peas in the next few months!
My peas are healthy and continue to grow!The birds have been pecking the edges of some of the leaves. Luckily the plants are large enough to withstand this damage.
Garlic
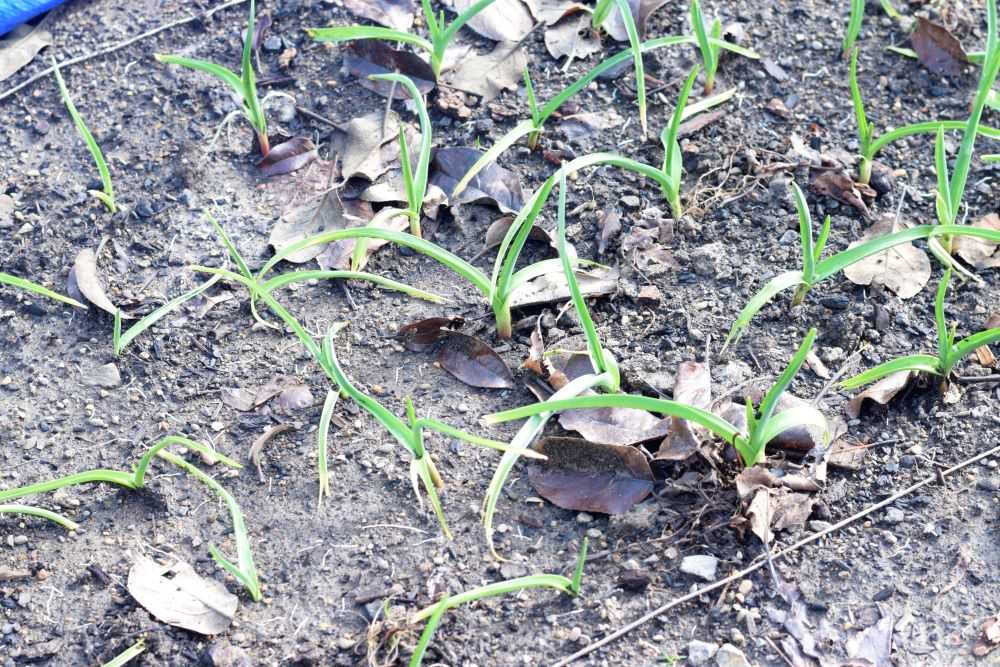
My garlic is still doing well after planting it last fall. Since we have been having mild weather this month, I was able to remove the mulch covering the garlic. The leaves greened up nicely and they are now 5-6 inches tall.
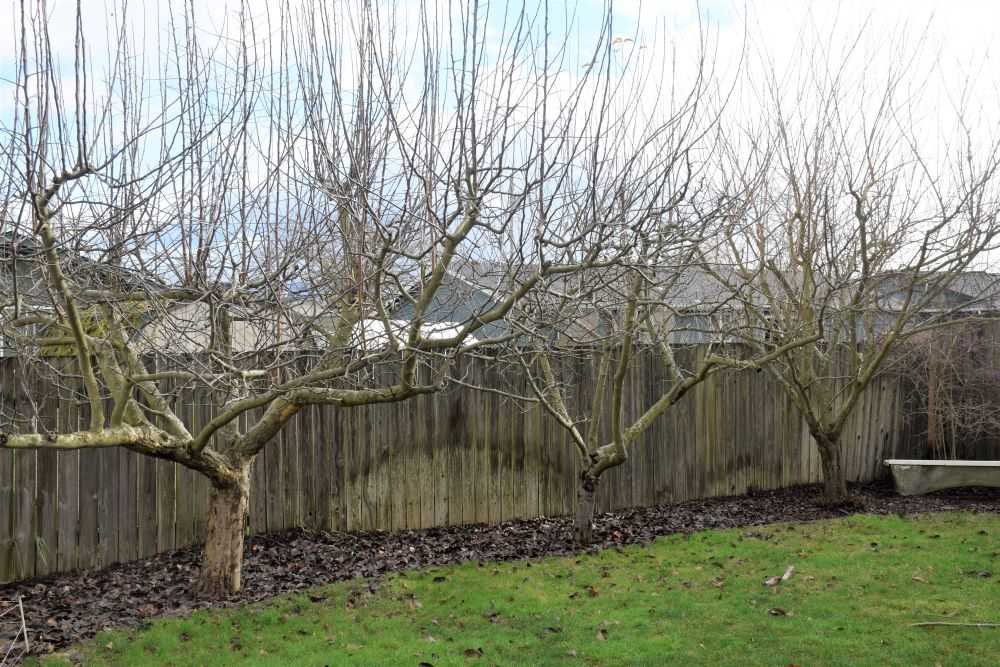
We have two apple trees, a plum tree, and two cherry trees. I have been pruning them over the last month, a little at a time between rain storms 🙂 My trees are 11 years old now and always put on a large amount of growth during the season. This makes pruning a big job. But this is what it takes to keep the trees open, healthy, and productive. I am looking forward to our fruit harvests this summer!
My fruit trees this winter before pruning. My trees usually put on a lot of growth during the season so pruning is a big job!
Strawberries
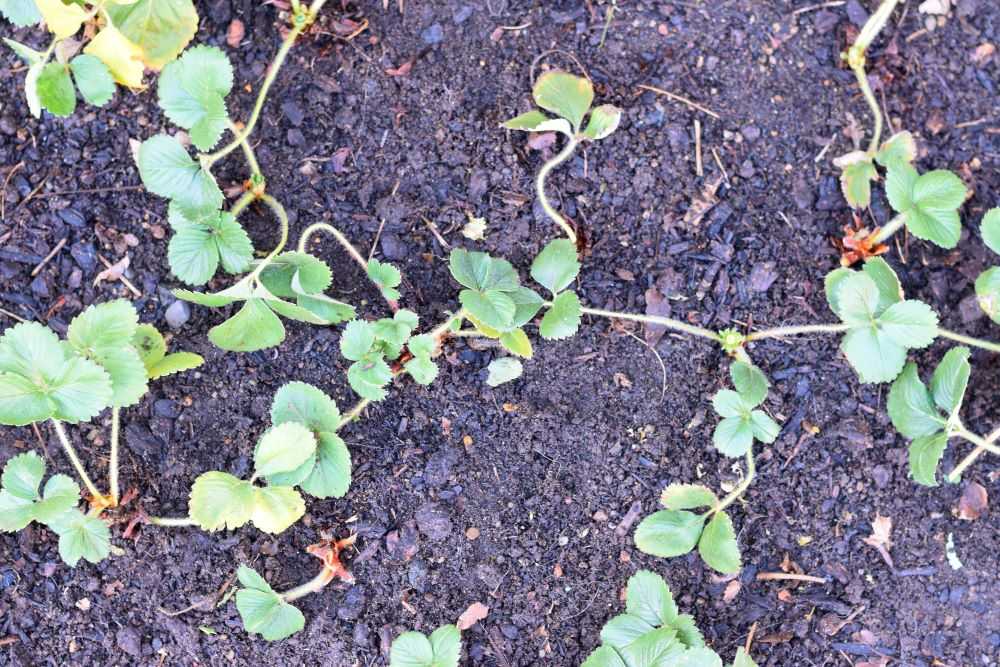
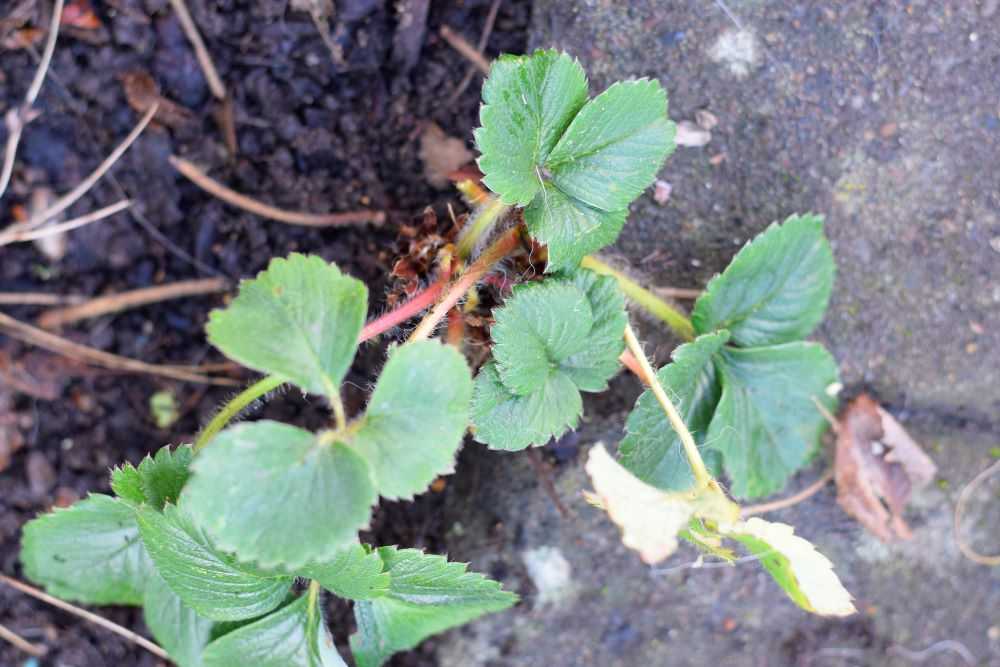
I cleaned up my strawberry patch earlier this month. It was very crowded from last year’s vigorous summer growth. I removed dead plants, dead leaves, and runners. I also adjusted the spacing on plants that were too close together. I am looking forward to a large harvest of sweet strawberries this spring!
Before pruning my strawberries were a tangled mess.Afterwards they were spaced appropriately with all dead leaves and runner removed. Now the plants will be much healthier and productive!
Flowers
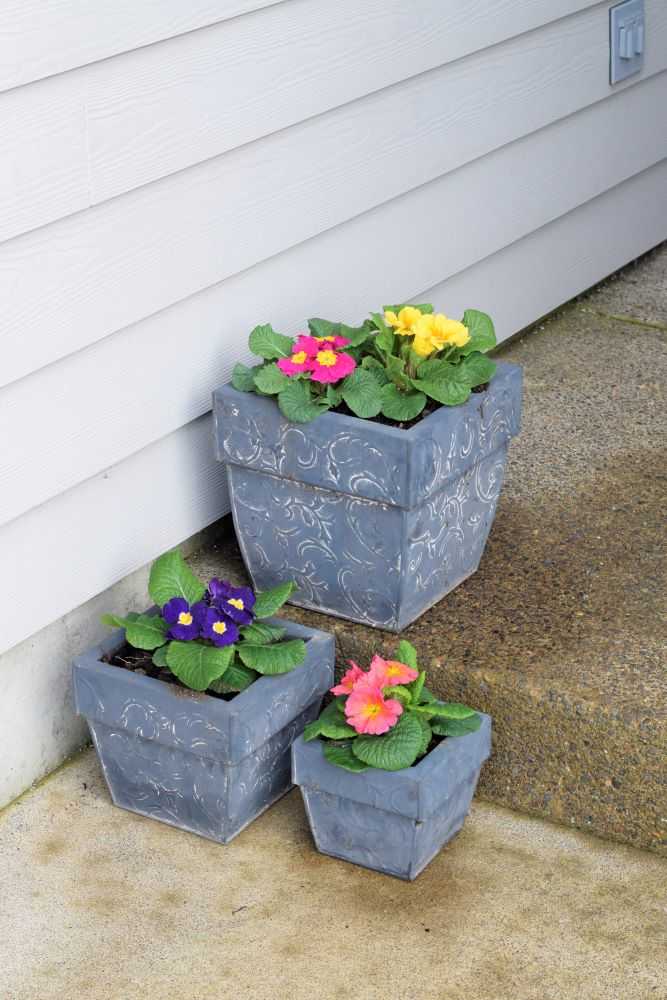
Last weekend I planted some primroses out front. Primroses are very cold hardy which makes them an excellent choice for this time of the year. I love the cheery colors!
Cheery primroses add some color to our front porch.
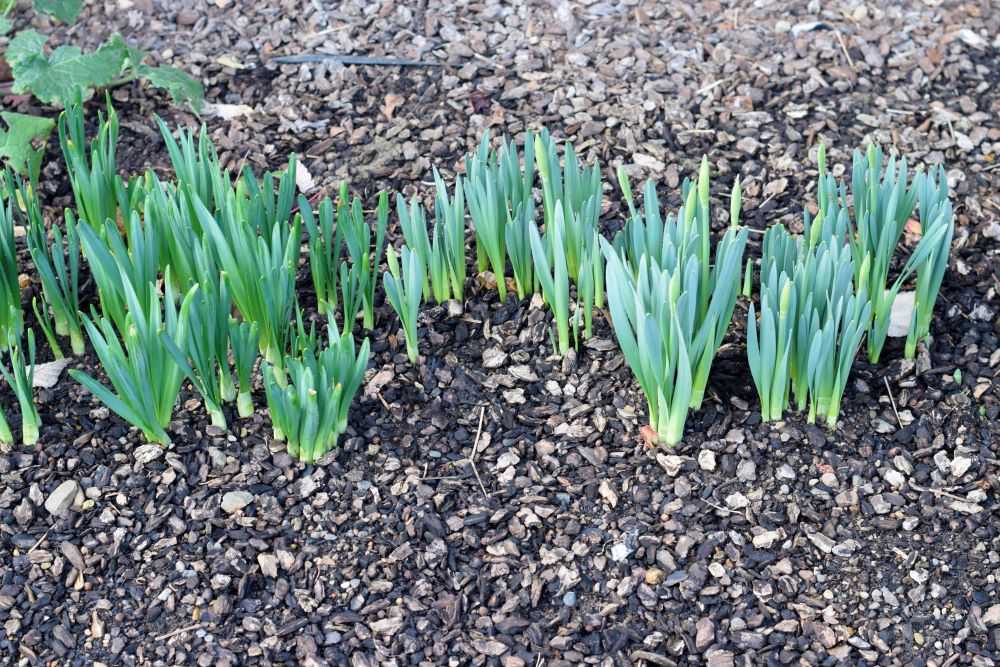
My daffodil bulbs are also starting to come up in my flower beds. This is a sign that spring is on it’s way!
Our daffodils are starting to emerge. Spring will be here soon!
Final Thoughts
Well, that’s it for January! It is hard to believe that spring will be here in only two short months 🙂 What have you been up to in your garden this month? Let me know in the comments below!
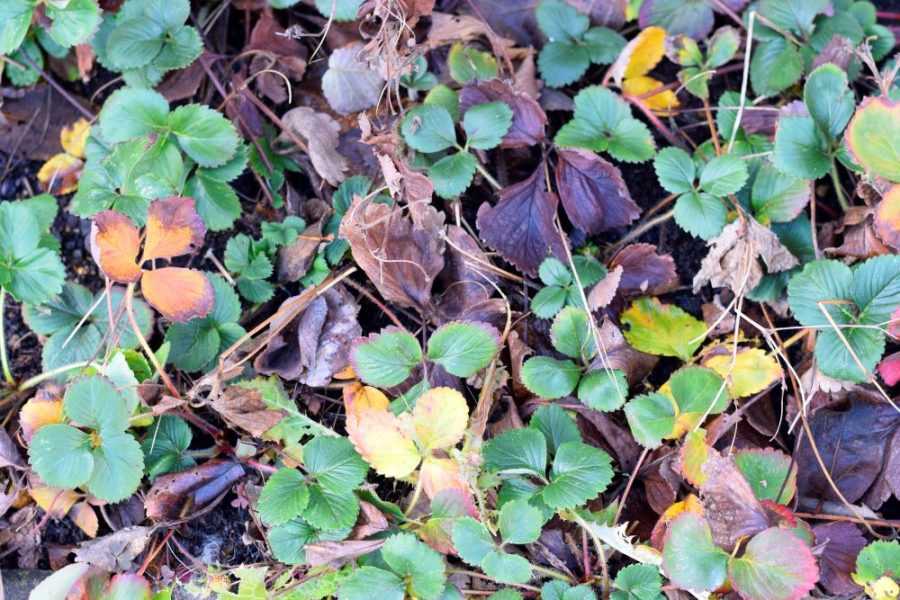
Strawberries are a wonderful plant to include in your home garden! With proper care they can produce sweet juicy strawberries for many years. However, strawberry plants can take a beating over the winter. Leaves die and if you did not prune your runners the previous summer your berry patch can easily become a tangled mess like the picture below:
Strawberry plants can easily become a tangled mess over the winter. Cleaning them out before growth starts will help to keep the plants healthy and maximize yields the following spring.
Today I will show you how to clean up your strawberry beds so they are ready for growth in the spring. Let’s get started!
Why to Clean Up Your Strawberry Beds
There are several reasons to clean up your strawberry beds before growth starts in the spring:
Old leaves and plant materials left behind can propagate diseases.
Snails and slugs can become a problem when there are a lot of dead leaves and places for them to hide.
Dense plantings compete for light and nutrients, which will decrease productivity and lead to smaller berries.
Pruning increases air circulation which will reduce the chance of diseases to spread.
When to Clean Up Strawberry Beds
One of the best times to prune strawberries is in the summer, right after the final harvest of the year. However, since leaves may die over the winter months, strawberries should be cleaned up and pruned a second time in late winter. This is past when any damage will occur due to cold weather but before they put on lush spring growth. Late January through early March is generally a good time.
How to Clean Up Strawberry Beds
Step 1: Pull up old plants
Strawberry plants die for a number of reasons and they need to be removed from your strawberry bed. You can recognize these plants because the leaves are dead and there is no green growth at the crown. Since strawberry plants naturally decline in productivity after about three years, also pull up any plants that are hard and woody and show little new growth.
This plant has brown, dead leaves and no green growth at the crown. Pull it up and remove it from your strawberry bed.
Step 2: Prune away dead leaves, runners, and flower stalks
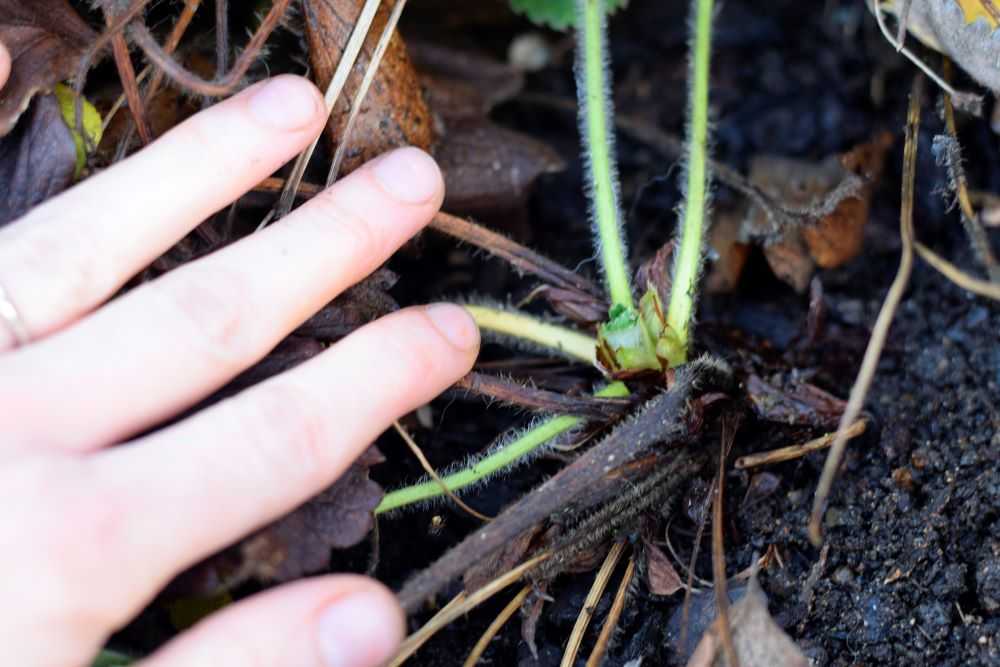
Dead leaves are of no benefit to the plant and can spread diseases. They also give a place for snails, slugs, and other pests to hide. Prune these off at their base, being careful not to damage the crown of the plant. Also remove older leaves that are very long and dull, or leaves that are red or yellowed. Leave the healthy green leaves growing close to the crown of the plant.
Prune away dead leaves at their base. Leave healthy green leaves and be careful not to damage the crown of the plant.
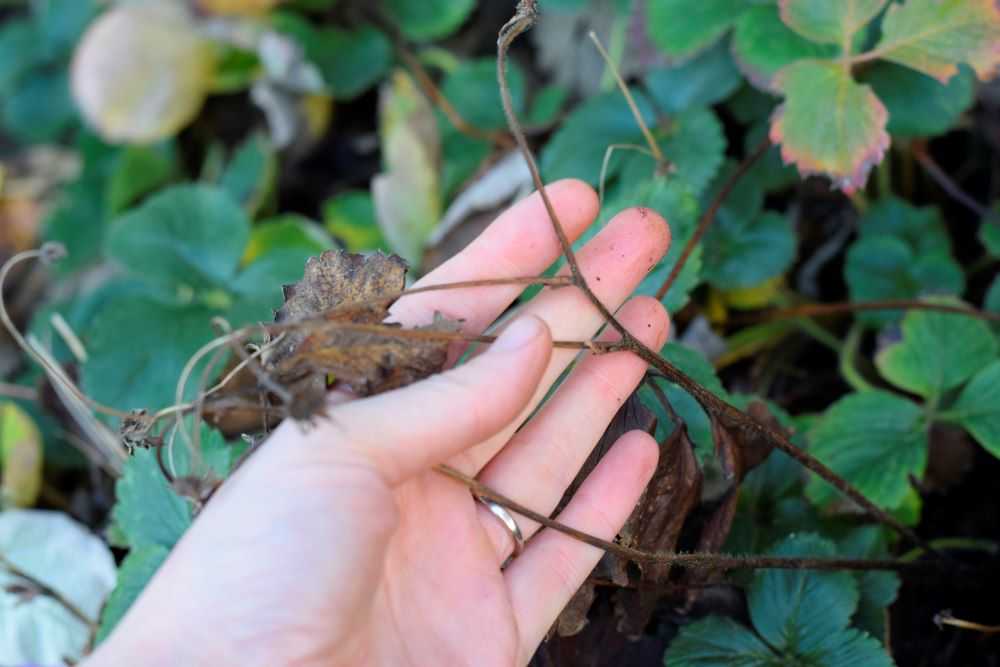
Sometimes old flower stalks are still attached to the plant. They serve no purpose at this point so make sure to remove them as well.
Also remove runners, or the stems that go between plants, as these can become rather tangled. If the daughter plants are rooted and healthy, I usually leave these in the ground but take them out if they look unhealthy or if they have not rooted properly.
Remove old flower stalks as well as the runners that go between plants.
Step 3: Pull up plants that are overcrowded or not where you want them
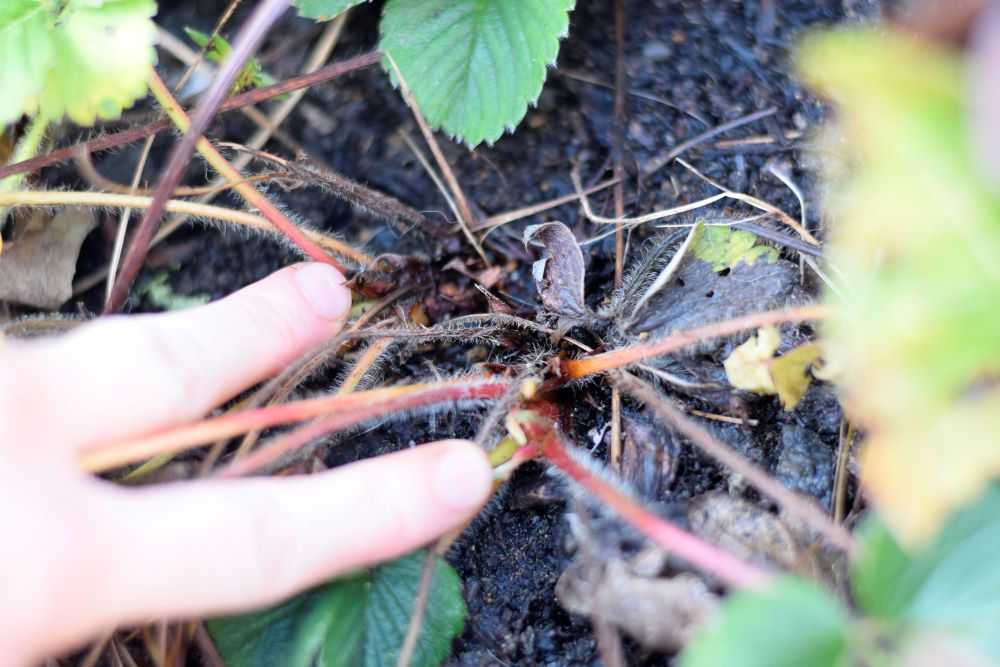
In the summer months strawberries send out a multitude of runners in every direction. If not pruned off these take root and form a new plant. Sometimes these runners end up in a good location, and sometimes they are not where you want them. Do not be afraid to dig these up and transplant them elsewhere in your planting bed. For example, the strawberry plant below ended up too close to my walkway so I carefully dug it up and moved it to a different location.
Although this strawberry looks very healthy, it is too close to my walkway. In this location, it will not be able to develop a full root system. I carefully dug it up and replanted it elsewhere in my bed.
Also remove strawberry plants that are too close to each other. Strawberries that are too close together they will compete for light and nutrients which will decrease productivity and lead to smaller berries. Dense plantings also reduce air circulation, trap moisture, and spread diseases.
How should your strawberry plants be? Plants should be spaced at least 6 inches apart so they have plenty of room to grow.
If you find plants too close together carefully remove one of them. If the plant looks healthy you can move it to another location in your strawberry bed. Or, you can plant it in a pot or share it with a friend.
These two plants are too close together. I kept one and moved the second plant to a new location.
Eventually this is what we want to end up with: healthy strawberry plants, spaced at least 6 inches apart, with dead leaves and runners removed. This is such a big difference from where we started out!
After pruning strawberries are spaced appropriately with unhealthy plants, dead leaves, and runners removed.
Growing Tips
Now that your strawberry beds are cleaned up, here are a few more growing tips:
Add Mulch
When you are finished cleaning up your strawberry bed you can add some mulch around the base of your strawberry plants. This will help to keep the soil moist, prevent disease from spreading as easily, regulate the soil temperature, and keep the berries off of the dirt. Clean straw works well for this.
Water Regularly
Spring rains usually provide enough water for your strawberries but make sure to water them if you have a dry spell. The soil should be kept moist but not overly soggy. Strawberries need about an inch of water per week.
Wait to Fertilize Until After Harvest
As tempting as it is, now is not the best time to give strawberry plants a big dose of fertilizer. This can lead to too much leafy growth and poor berry production in the spring. The best time to fertilize your berry patch is after they are done producing berries for the year in June or July.
Final Thoughts
There you have it! Now that you know how to clean up your strawberry beds you will be rewarded with beautiful sweet strawberries in the spring. They are perfect for eating fresh, strawberry shortcake, or homemade strawberry jam! As always, Happy Gardening!
Strawberry plants put on lush new growth in the spring.Enjoy your sweet strawberries!
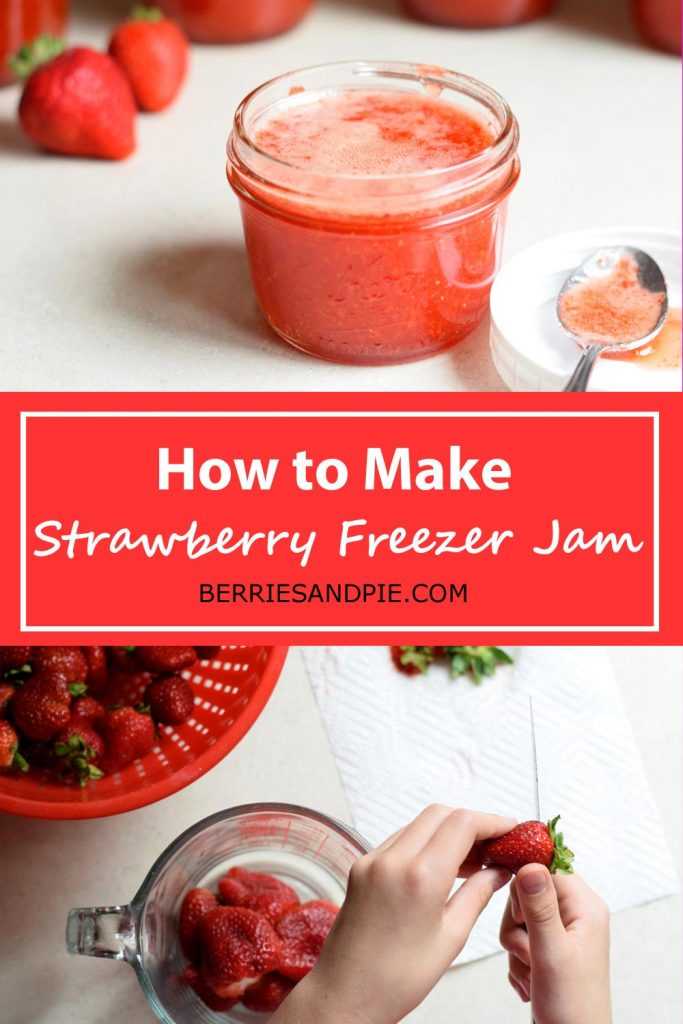
I have not bought jam at the grocery store in many years. Years. Why? Because the store does not sell freezer jam, which is my absolute favorite type of jam in the whole wide world. For those of you who have not tried freezer jam you are in for a treat! Since the fruit in freezer jam is never cooked it keeps its fresh fruit taste. It’s like summer in a jar. Yum!!!
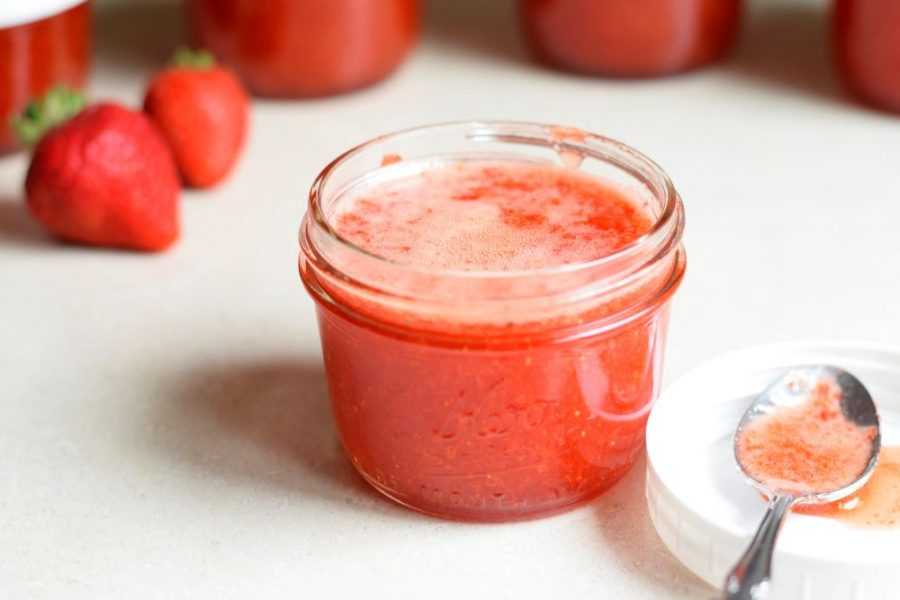
Strawberry freezer jam is one of my favorite types of freezer jam. It is easy to make at home, requires only four ingredients, and can be made in under an hour. This article will take you through how to make strawberry freezer jam, step-by-step. Let’s get started!
Strawberry freezer jam – YUM!
Note: This article may contain affiliate links, where I earn a small commission from qualifying purchases with no additional cost to you. I only provide links to products that are similar to what I use personally.
Equipment for Strawberry Freezer Jam
You need some basic equipment to make strawberry freezer jam. We will go through the list now:
Jars
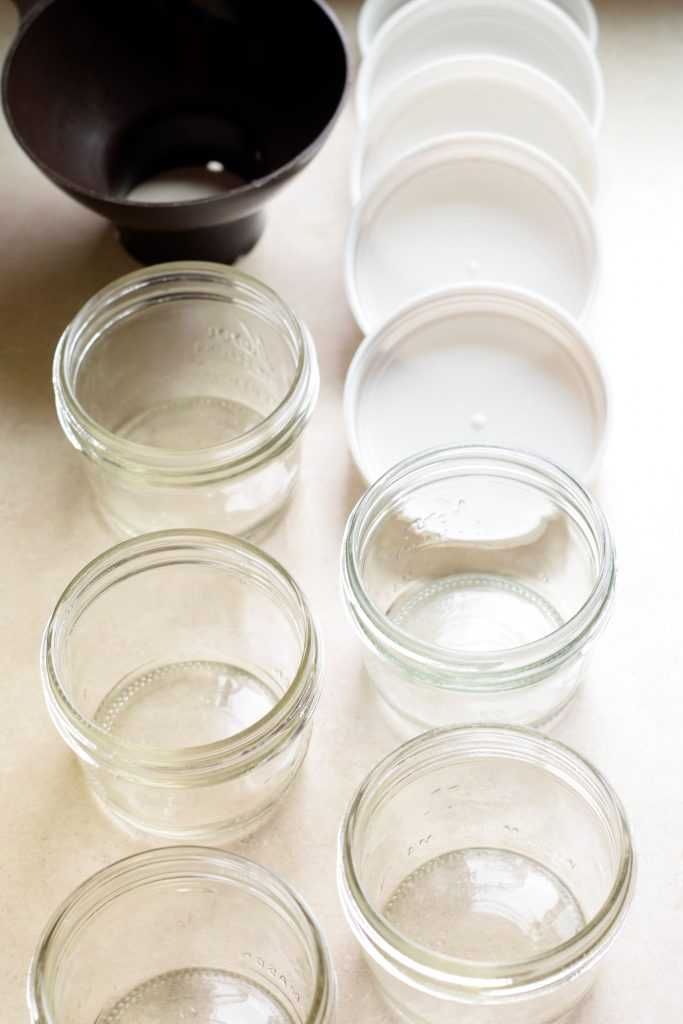
You need containers to hold about 6 cups of finished jam. Some people prefer plastic containers for freezer jam but I usually use half pint mason jars (one cup capacity). I prefer wide mouth jars so the jars are easier to fill. Jars similar to what I use can be found here (affiliate link). I use these plastic jar lids (affiliate link) so the containers are easier to open and close.
Make sure that your jars or containers are cleaned in hot soapy water before use and allowed to air dry. I run the jars and lids through the dishwasher and they are ready to go!
Jar Funnel
This makes it SO MUCH EASIER to fill your jars. If you do not have a jar funnel you can purchase one similar to the one I use here (affiliate link).
Clean your jars and lids so they will be ready when you need them. A jar funnel makes filling the jars much easier.
Immersion Blender or Potato Masher
You need some way to crush the fruit for the jam. I prefer to use an immersion blender (or regular blender) to puree the fruit most of the way. If you don’t have a blender you can also use a potato masher or even a fork to crush the berries, especially if you like your jam a little on the chunky side.
Measuring Cups
I use a standard measuring cup for the sugar but I like a glass measuring cup for the strawberry puree because it is easier to measure and pour.
Other items needed: A large bowl, a small saucepan, a whisk, and a ladle.
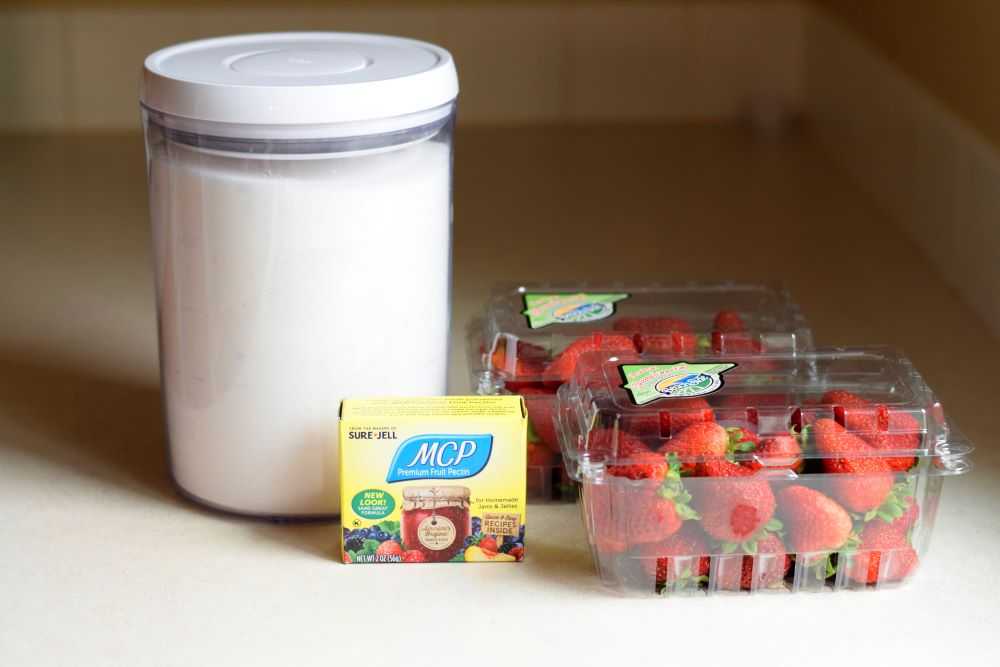
Ingredients for Strawberry Freezer Jam
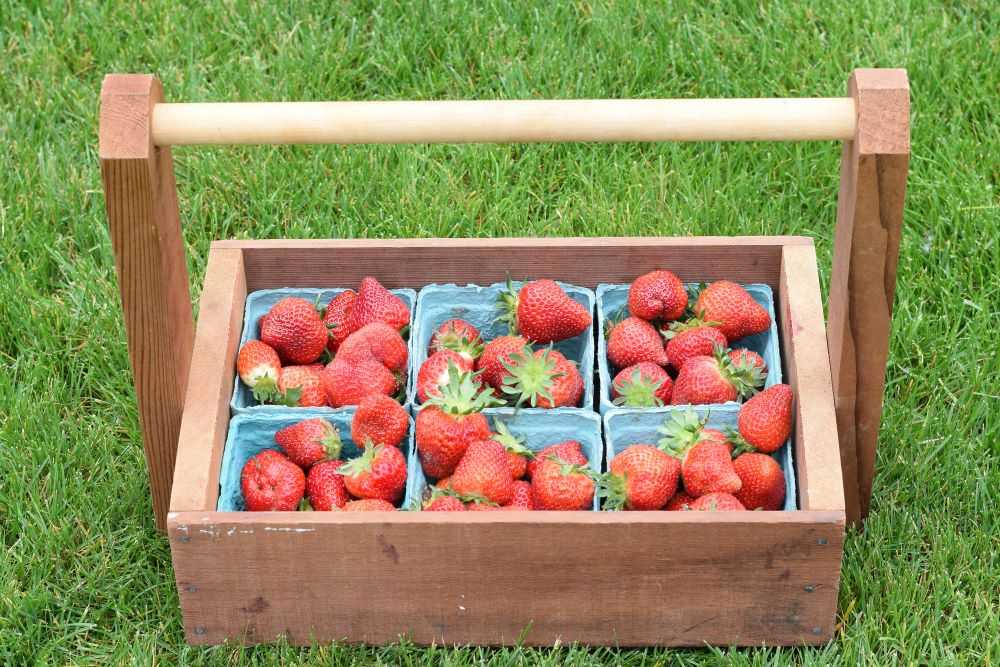
Fresh Strawberries
For fresh strawberry taste you need to start with fresh strawberries! You can use strawberries out of your garden or strawberries from the store. Both taste great in this jam!
You need less fruit than you may think for jam, only about 2 cups of crushed or pureed fruit. One pound of fresh strawberries is probably enough but I always purchase an extra carton to make sure that I have what I need.
Sugar
Jam takes a LOT of sugar. About 4 cups of it to be exact! Plain old granulated sugar is what you want here. Do not try to reduce the amount of sugar or use a sugar substitute because the jam will not thicken properly.
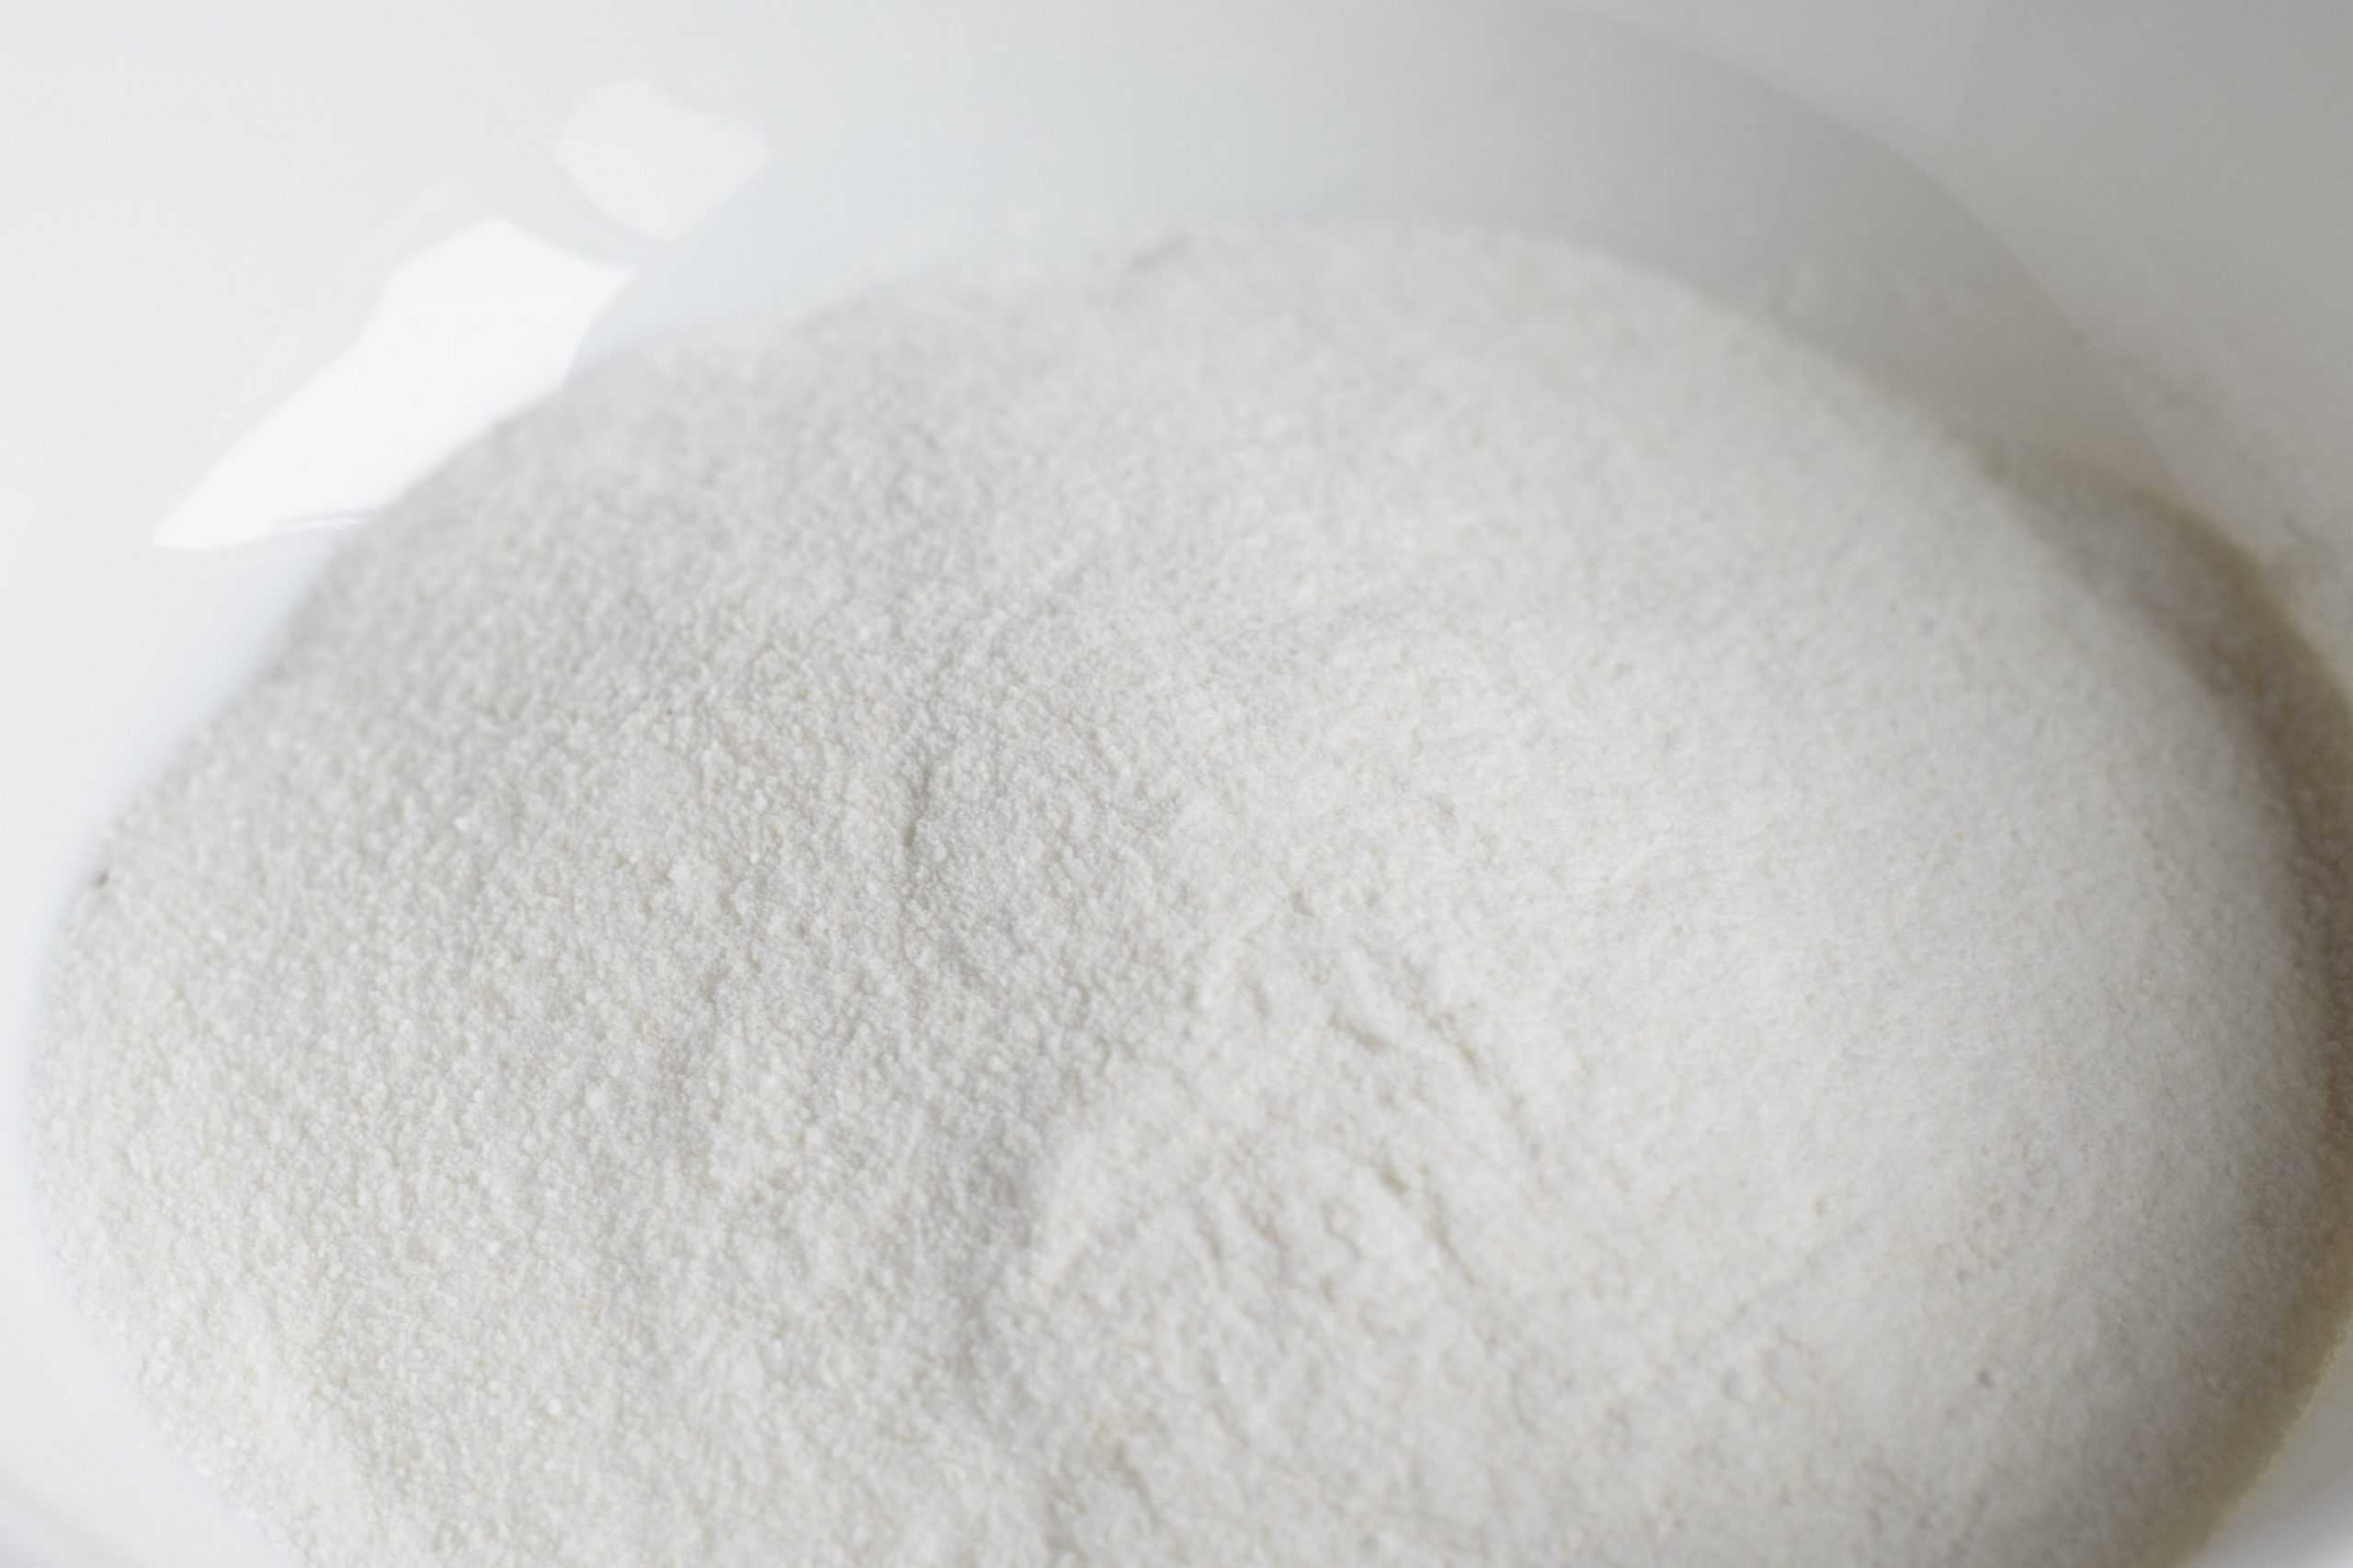
Pectin
Pectin is very important for making jam. It is what makes the jam gel and become thick. Many people have never bought or used pectin before, so we will now learn more about it.
Pectin is a type of fiber most commonly made from green apples or citrus fruits. It comes in a powdered form and is what makes jam thicken.
What is pectin? Pectin is a type of fiber that is usually made from green apples citrus fruits. Some dextrose and citric acid is also added to the powdered pectin so it tastes sour if you try it. This sour taste is good though because it helps to counter all the sweetness from the sugar and bring out the taste of the fruit. When heated along with with sugar and acid the pectin will gel and give the jam the correct texture.
What types of pectin should I buy? This recipe calls for powdered pectin that comes in a small box, usually 1.75 to 2 ounces depending on the brand. Make sure that you purchase regular pectin and not the type formulated for low sugar recipes.
Where can I find pectin? Pectin usually comes in a single-use box but you can also buy it in bulk on Amazon. Pectin is sold in many grocery stores in the summer months, when many people are making jam. If you can’t find it at your grocery store try looking at Bi-Mart or a farm store.
Pectin differs a little between brands and you may have more success with some brands than others. Today I am using MCP pectin (fun fact: MCP stands for Modified Citrus Pectin) but I have also used Mrs. Wages pectin in the past with great results. I do not have a favorite brand and usually buy what is on sale 🙂
Now that that you have everything you need, let’s go through the process of making homemade strawberry freezer jam!
How to Make Strawberry Freezer Jam
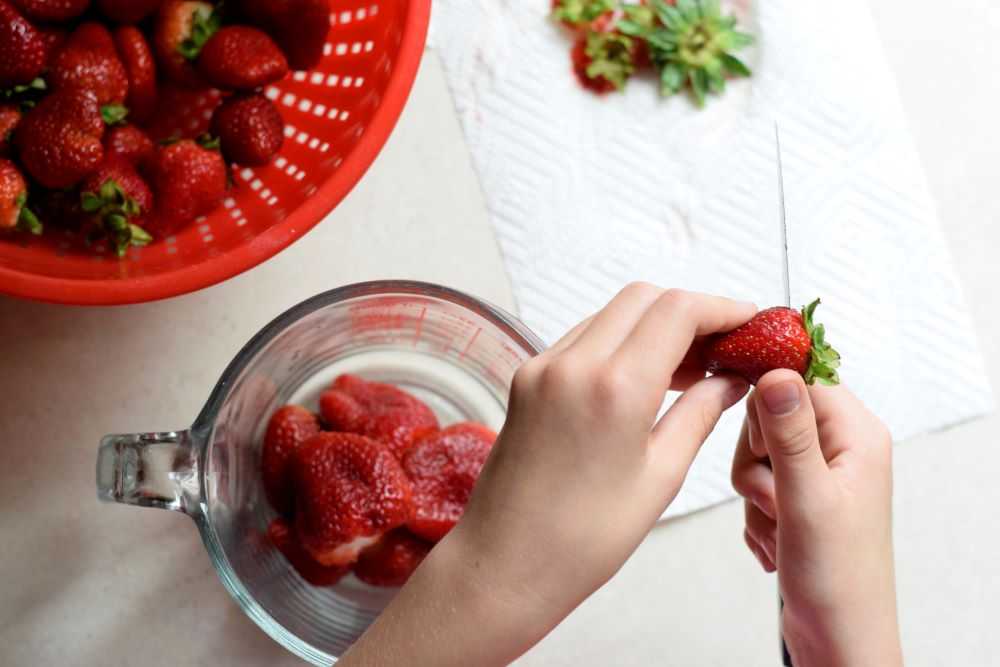
Step 1: Prepare the Fruit
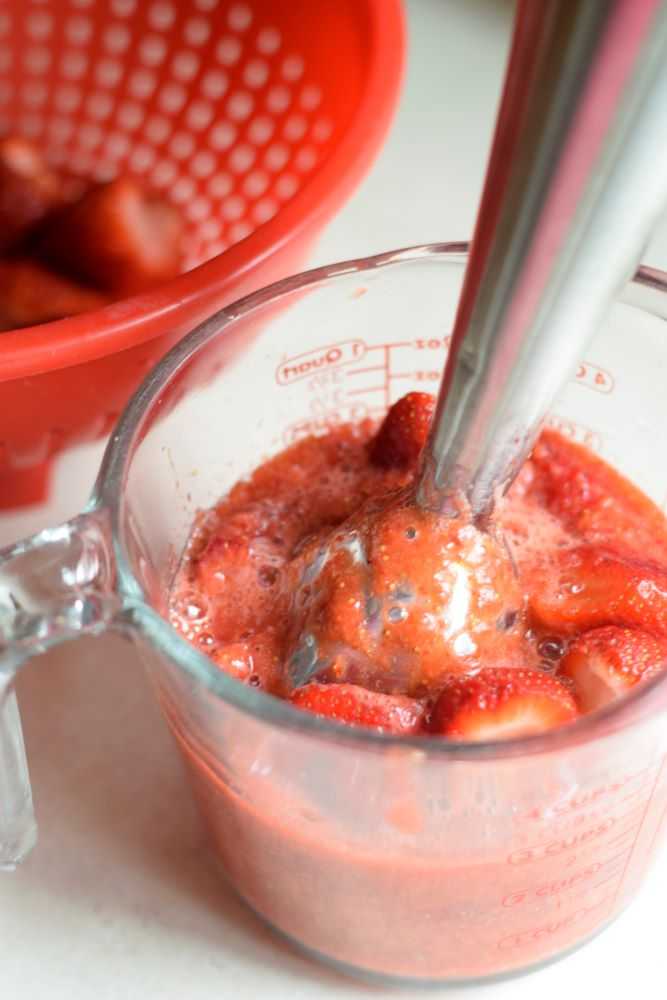
Start by washing the strawberries and removing the stems. Then puree or mash the fruit until the desired consistency is reached.
There are several ways to crush the berries. Some people spread the fruit into a 9×13 inch pan and mash them with a potato masher. I prefer to put the strawberries in a four cup glass measuring cup and use my immersion blender to puree them most of the way, leaving a few small pieces here and there. You can leave your fruit a little chunky or puree it until it is perfectly smooth. The choice is up to you!
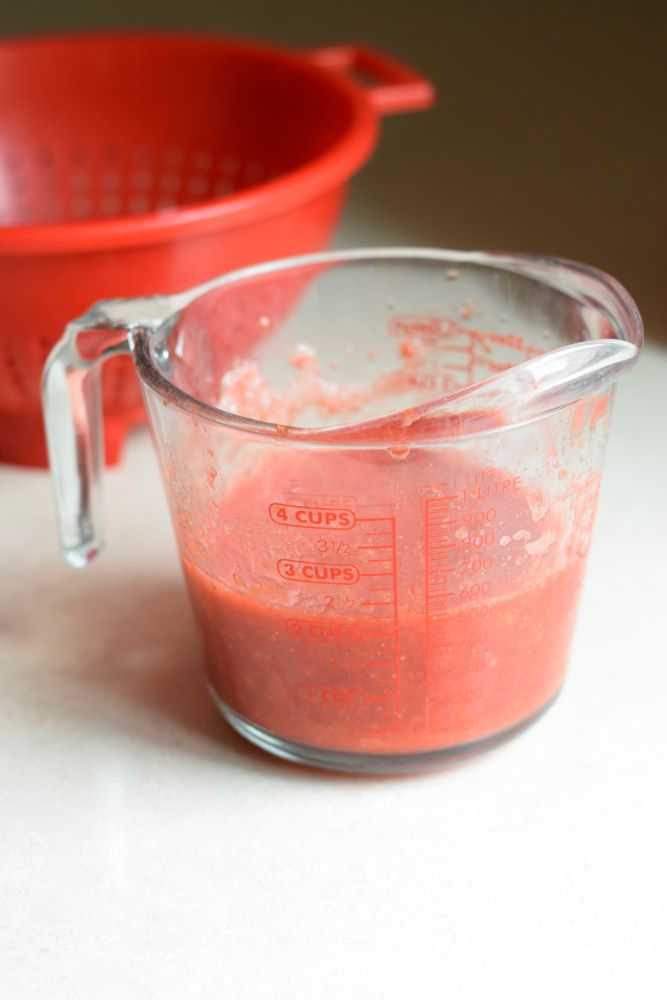
After the berries are mashed measure out exactly two cups of fruit. You are now ready to add the sugar!
Puree or mash the strawberries until the desired consistency is reached. Measure out two cups of berries and proceed to the next step.
Step 2: Stir the Fruit and Sugar Together
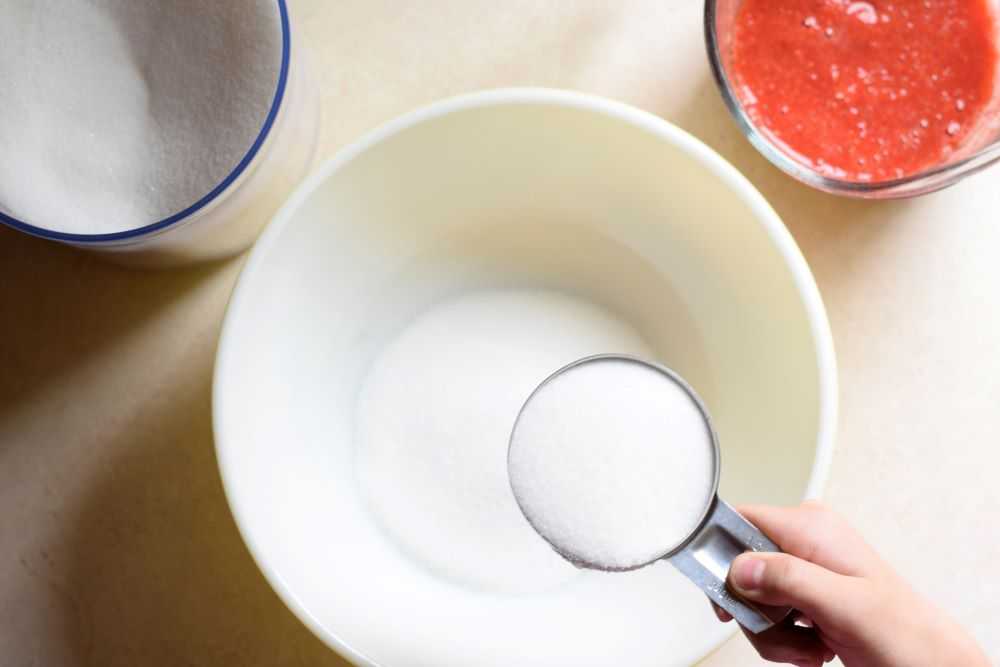
Measure out 4 cups of sugar into a large bowl. Add in the pureed strawberries and stir well. Let the strawberries and sugar sit in the bowl for 20 minutes, stirring occasionally. This will allow the sugar to dissolve most of the way.
Measure the sugar into a large bowl, then stir in the strawberry puree.
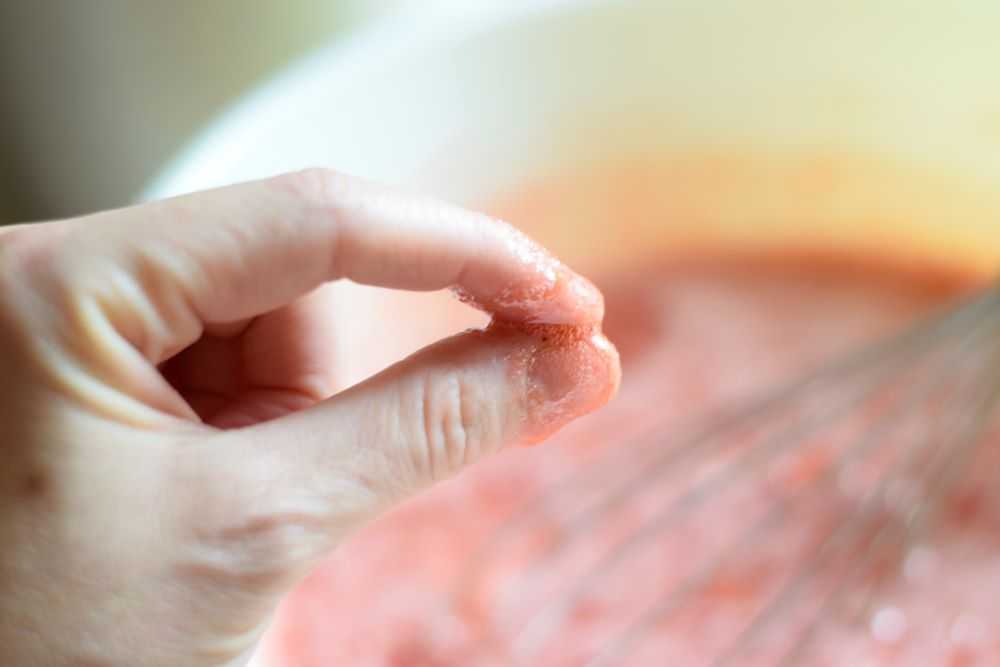
To test whether the sugar has dissolved enough you can take out a little jam and rub it between your fingers. By the end of the 20 minutes it should be much less gritty that it was initially (but it is okay if it is not perfectly smooth at this point). Towards the end of the 20 minutes you can start to cook the pectin.
Rub a little of the sugar and berries between your fingers to see if the sugar has dissolved.
Step 3: Cook the Pectin
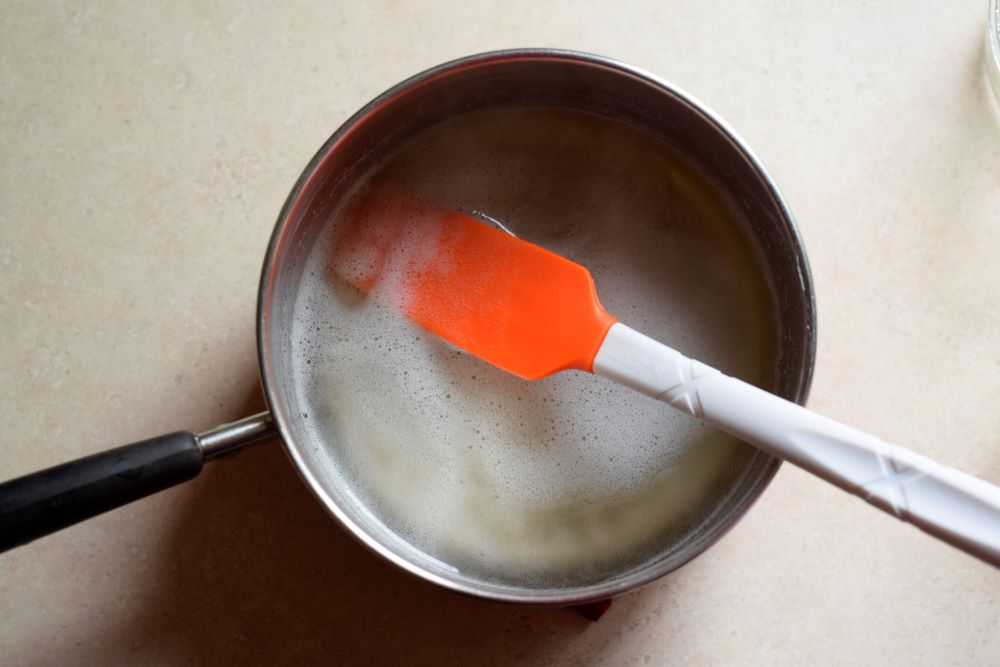
Empty the box of pectin into a small saucepan. Add 1 cup of cool water and stir well with a whisk to break up any clumps. Heat the pectin over medium high heat, stirring constantly, until it comes to a full boil. Boil for one minute and then remove from heat.
Cook the pectin and water together in a saucepan. Boil for one minute and then remove from heat.
Step 4: Add the Pectin to the Fruit
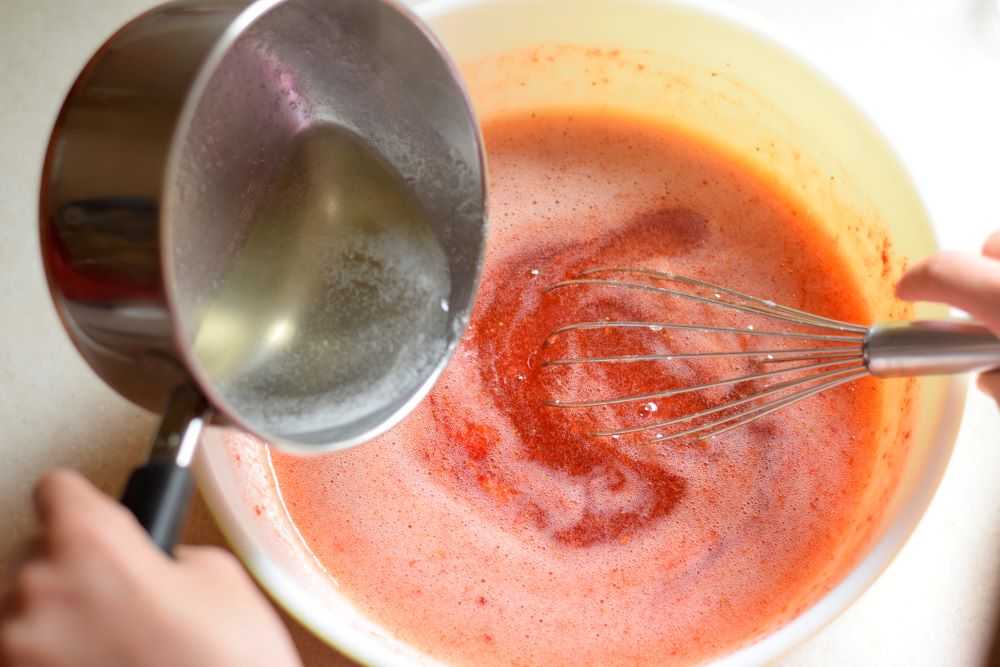
Add the hot pectin to the fruit and sugar. Whisk briskly for 1-2 minutes or until thoroughly incorporated. Instead of being watery the fruit should now have a thicker, more syrupy consistency. Your jam is now done and you are ready to fill the jars!
Add the pectin into the fruit. Stir briskly for 1-2 minutes or until thoroughly incorporated.
Step 5: Fill the Jars
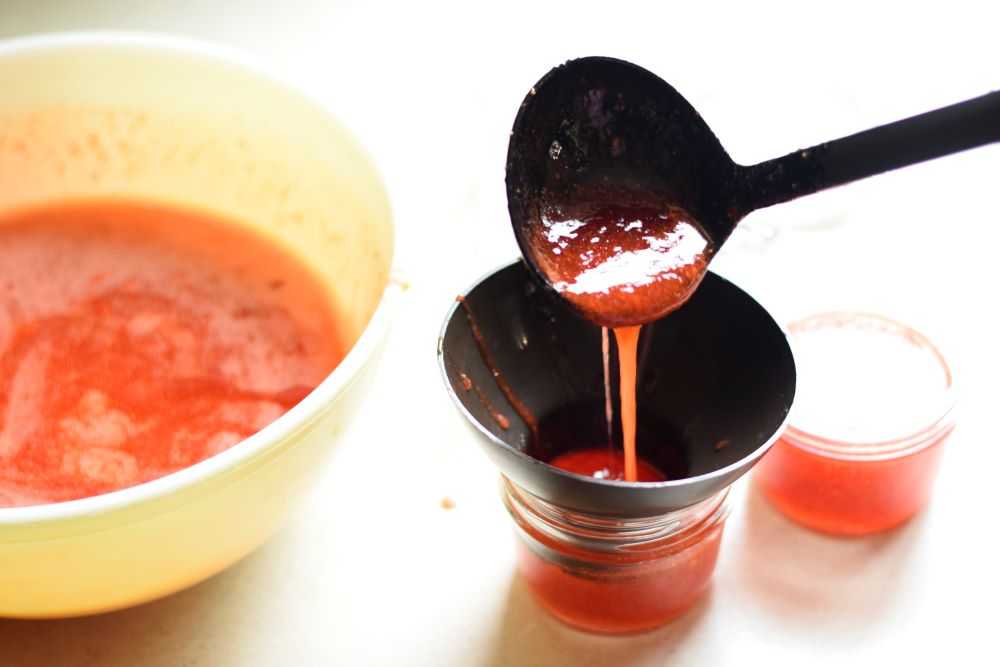
Use a ladle to fill the jars with the jam. A jar funnel is very handy for this so you do not drip sticky jam on the edges of the jars.
Fill the jars with jam. A jar funnel makes this an easier task.
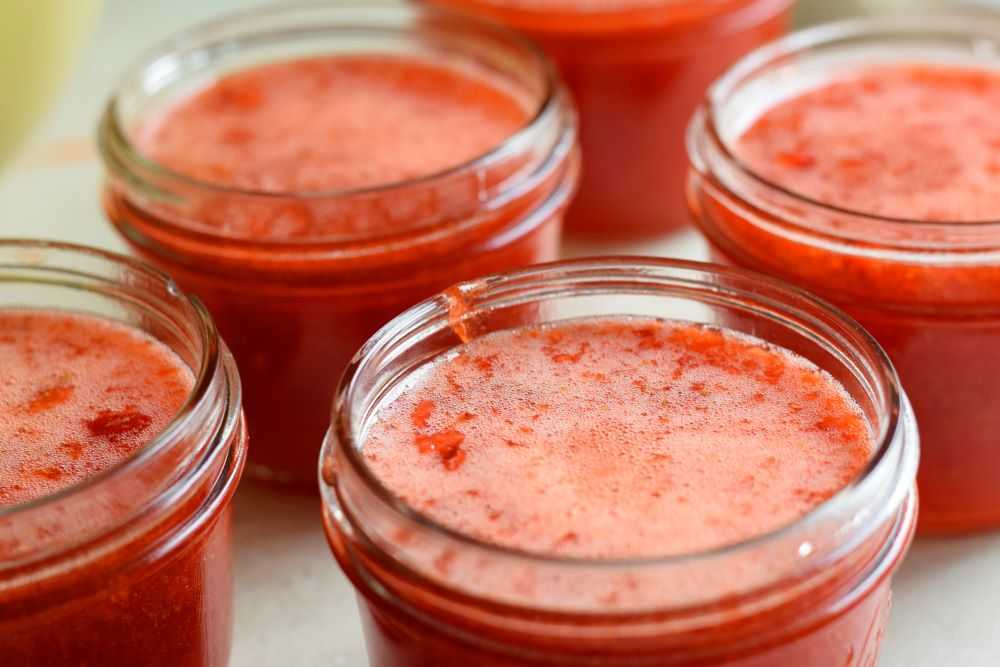
Leave about half an inch of head space between the top of the jam and the top of the jar. I use these plastic jar lids so the lids are easier to open and close. Once all of the jars are filled, transfer them to the refrigerator to cool and fully set.
After the jars are filled put on the lids and transfer them to the refrigerator for one day to fully set.
Freezer Jam Storage
After 24 hours the jam can be transferred to the freezer for long term storage. Thaw it in the refrigerator for a day before use. Once opened, use within 3 weeks or so. Jam keeps for up to 1 year in the freezer.
Serve
This strawberry freezer jam is good on so many different things! Try it on pancakes or waffles, toast or biscuits. It also tastes amazing on homemade yogurt!
Hope you get to try this freezer jam soon! Let me know how it went in the comments below. Happy Cooking!
Strawberry Freezer Jam
Recipe by: Mandy
This jam is easy to make, requires only four ingredients, and can be made in under an hour. Since the fruit is never cooked it is bursting with fresh strawberry taste. Yum!
2cupscrushed or pureed strawberries (from 1-2 pounds of fruit)
4 cupssugar
1boxregular fruit pectin (1.75 or 2 oz box, depending on the brand)
1cupcool water
Instructions
Stir the crushed strawberries and sugar together in a large bowl. Let sit for 20 minutes for the sugar to dissolve most of the way.
Empty the box of pectin into a small saucepan. Add in the water and stir well with a whisk to break up any clumps. Heat over medium high heat, stirring constantly, until it comes to a full boil. Boil for one minute then remove from heat.
Stir the hot pectin mixture into the strawberries. Whisk briskly for 1-2 minutes or until thoroughly incorporated.
Ladle the jam into small, clean jars or containers. Leave about half an inch of headspace between the top of the jam and the top rim of the jar. Once all the jars are filled, put the lids on the jars and transfer them to the refrigerator to cool and fully set.
After 24 hours the jam can be transferred to the freezer for long term storage. Thaw in the refrigerator for a day before use. Once opened use jam within three weeks or so. Jam keeps for up to 1 year in the freezer.