Tag: october

Garden Update – October

It is hard to believe it is already October! The weather is changing and cooler weather is here. We had a challenging gardening month because wildfires stretched across Oregon and the thick smoke hid the September sun for weeks. Despite this, it has been a very busy month in the garden! Here is what we’ve been up to:

Apples

Our apple trees are doing great! I love having a 5-way grafted tree because apples ripen over a much longer season. While our gravenstein apples are ready in July, our other types are ready now. A few weeks ago I picked a 33 pound box of apples. And there are still plenty more on the tree!

What have we been doing with all these apples? Most of them have been eaten fresh. We also made some apple crisp, which is my absolute favorite fall dessert! You can check out the recipe here.
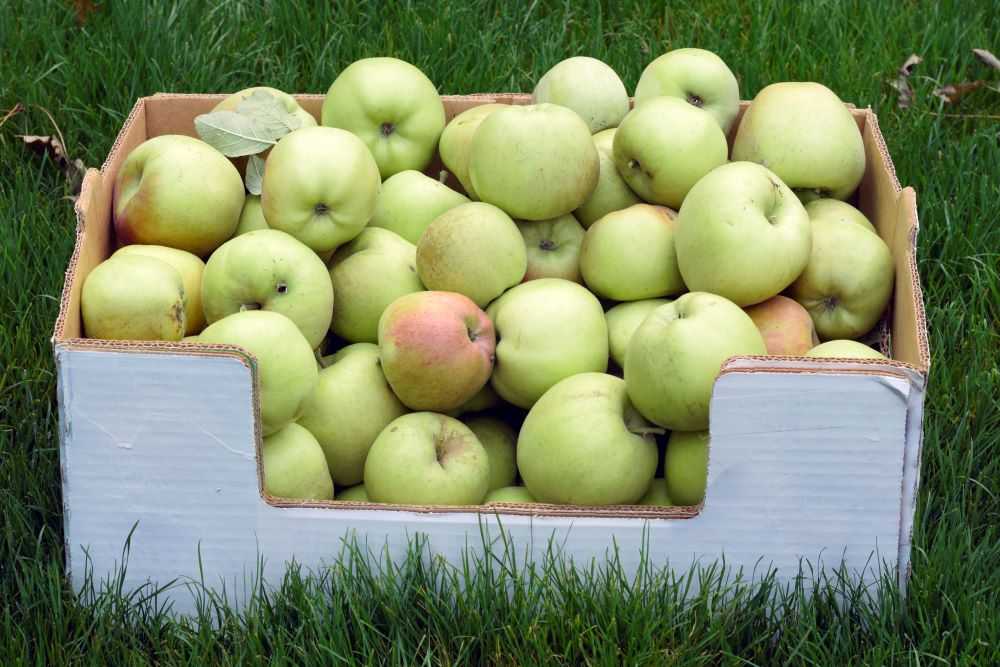
Box full of apples.
Lots of apples for apple crisp!

Beans

I cannot remember bean plants ever being as productive as ours have been this year. The variety I planted was Hickok from Territorial Seed. After setting a large crop in July, we got a second large crop a month later. In mid September we still had flowers and small beans on our plants!

I finally had to pull the bean plants after the weather started getting cooler at night. We have been enjoying lots of garlic roasted green beans! Yum!
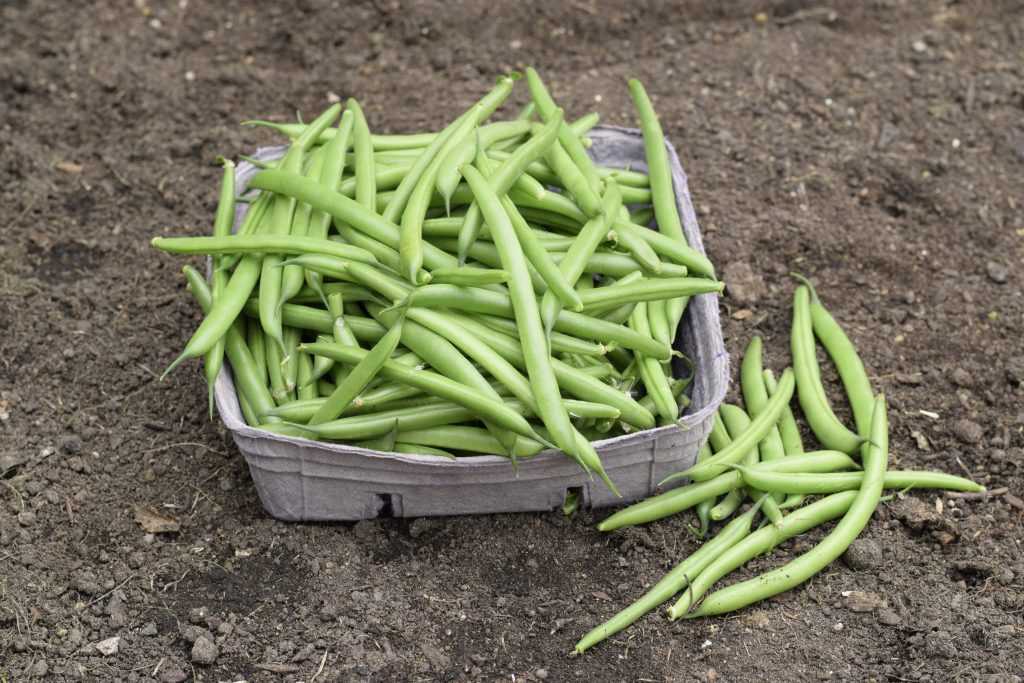
Hickok green beans.
We picked beans up through the middle of September. It was a great year!

Beets

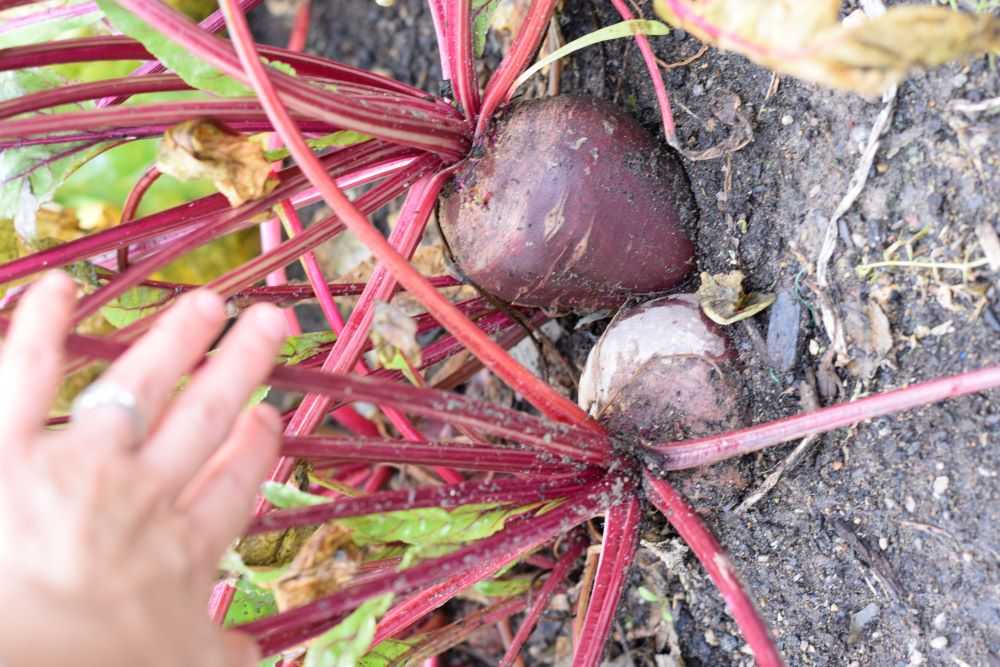
I did not plant many beets this year. After our radishes were done in June I poked a few seeds in here and there. I was surprised that they got as big as they did! I will have to plant more next year.

Blackberries

The canes for our marion berries are growing long! I wound them around the trellis so they were not dragging on the ground. This also prevents them from sprouting new plants. The blackberries seem healthy and strong so think we will have a pretty good harvest next year!
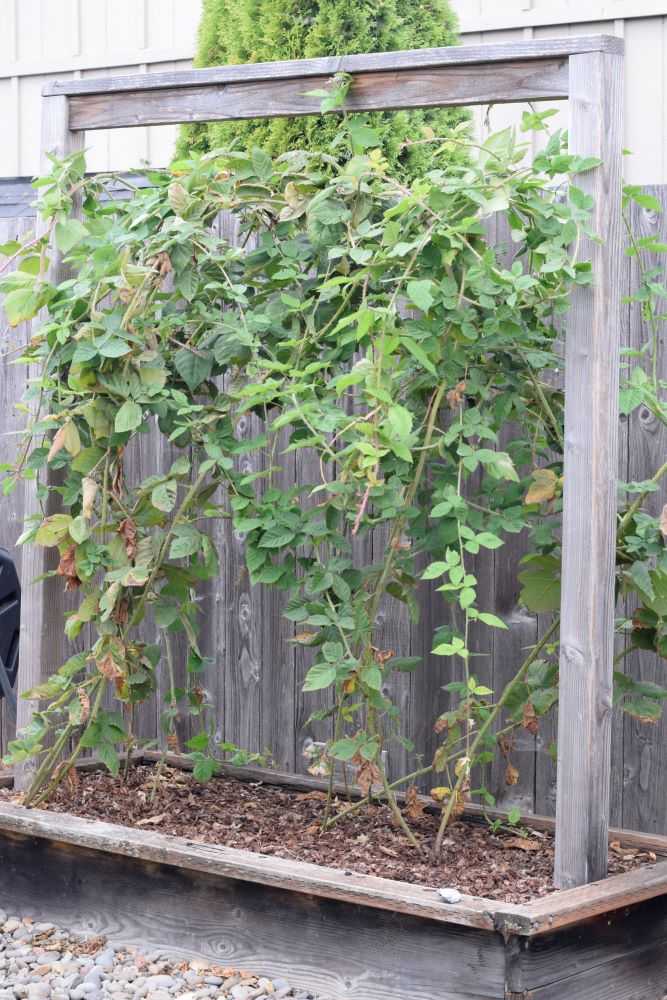
Marion berries on a trellis.
I wound the blackberries around the trellis so they do not drag on the ground. I think we will have a great harvest next year!

Marigold Flowers

I finally took our marigolds out last week. I saved the seeds and you can read more about that here. Marigolds produce SO MANY SEEDS and I will have plenty to plant next year!
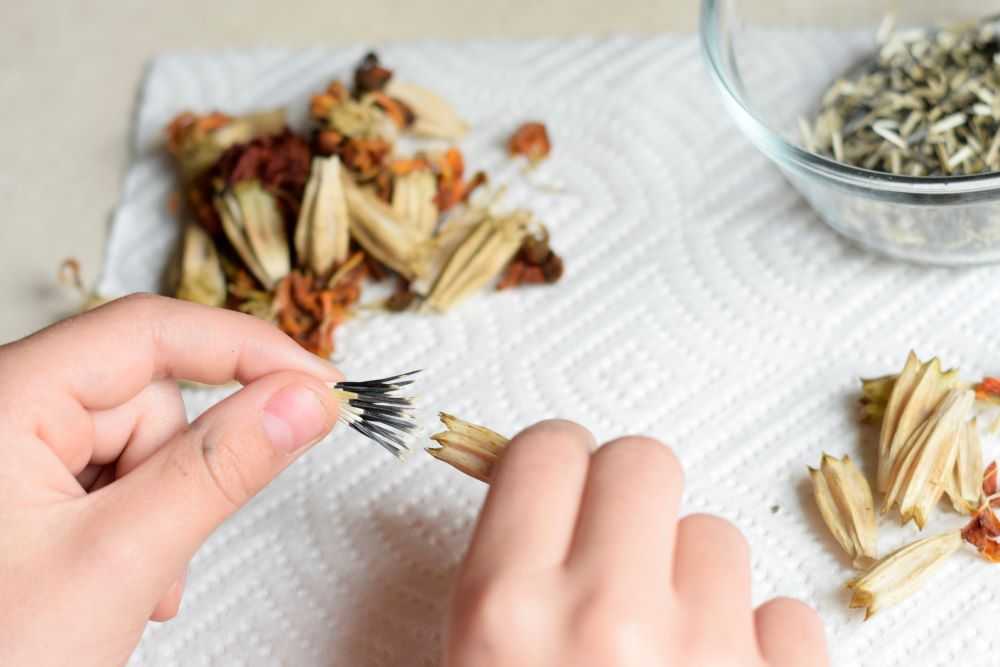
Taking marigold seeds out of seed heads
It is easy to save marigold seeds for next year!

Peas

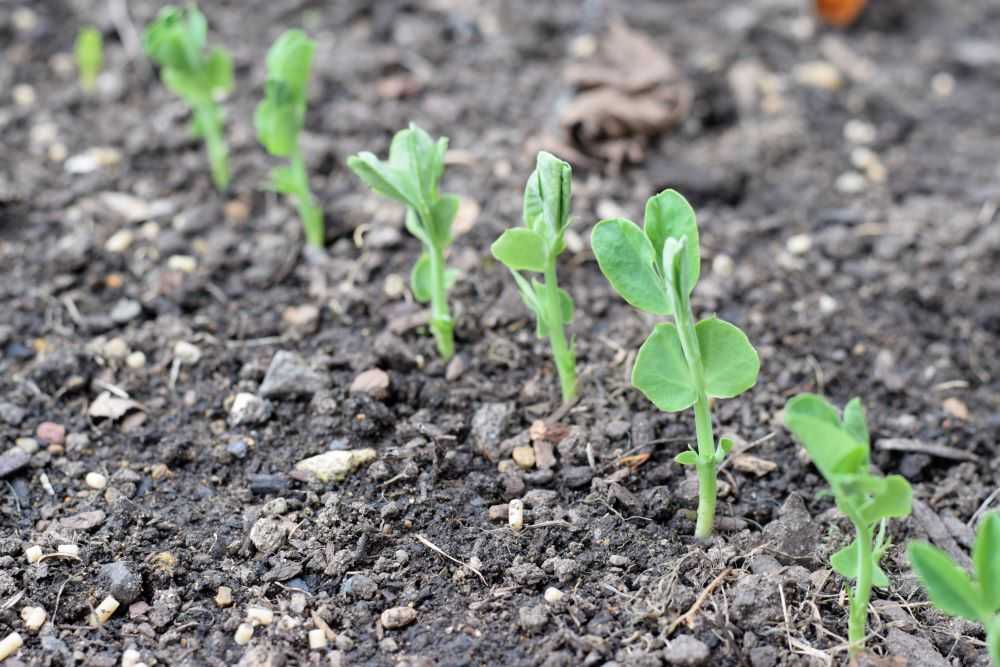
I planted peas a few weeks ago and the seedlings are about 4 inches tall now. I usually start my peas in the fall and overwinter them for a bigger and earlier crop. You can learn more about overwintering pea plants here.

Related post: Why Garden Planning Starts in September

Sweet Peas

Shortly after I planted my peas, I also planted my sweet pea flowers. After I saw “volunteer” sweet peas coming up already I knew the seeds would sprout easily. I planted a row along the bottom of my trellis so they can get established before winter comes. I am looking forward to early flowers in the spring!

Related post: How to Save Sweet Pea Seeds

Popcorn

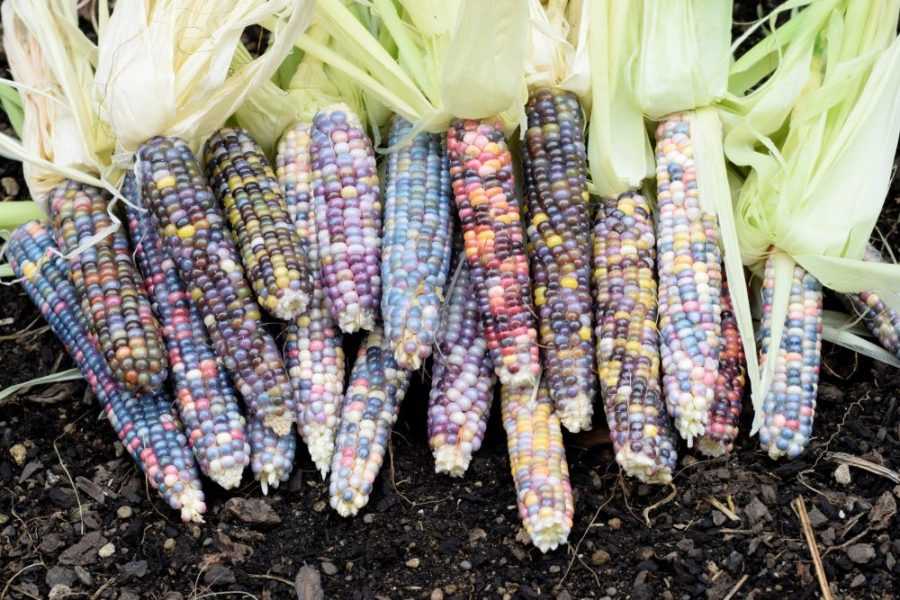
Each year we grow something we have never tried before, and the kids chose popcorn to grow this year! We planted the popcorn after the weather warmed in June. However I did not realize that popcorn takes 110-120 days to mature, which is significantly longer than regular sweet corn. It FINALLY got ripe and the end of September.
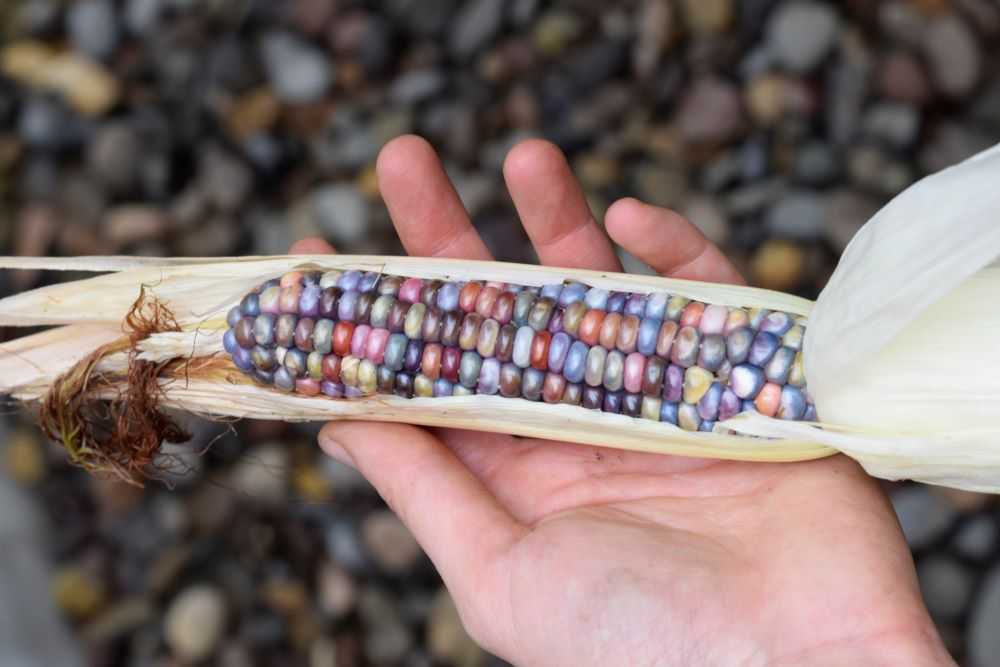
Glass Gem popcorn.
The popcorn is finally ready. It is SO pretty!!!

Ideally we would have let the popcorn dry in the garden but we had to pick it and bring it indoors since the weather has been so wet. The ears were so beautiful! We pulled the husks back and displayed some of the prettiest ears around the house.

We peeled the rest of the corn and put it in a box in the garage to dry out. We put one ear in the food dehydrator to speed up the process. It was very difficult to get the moisture content just right but finally we got it to pop! So fun!
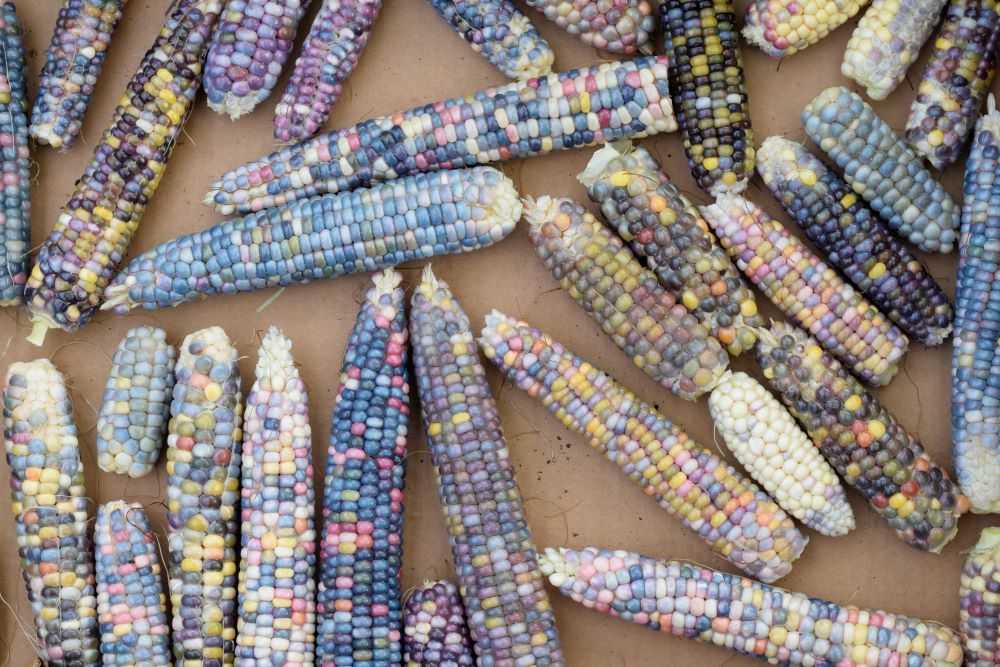
Place the popcorn in a box to dry.
We peeled the rest of the popcorn and put it in a box in the garage to dry out. It is so pretty to see the variety of different colors!

Pumpkins

We finally picked our pumpkins for the year! One weighed in at 15 pounds and the other was 25 pounds. We did not get as many pumpkins as we do some years. This may be because they were planted in a little more shade. The kids are already looking forward later in the month when they will get to carve them!

Sunflowers

I had to take some of my sunflowers out of the front yard so I made these cute DIY sunflower bird feeders. The birds found them right away and the seeds are almost gone already. It has been a lot of fun to watch the birds out our back window!
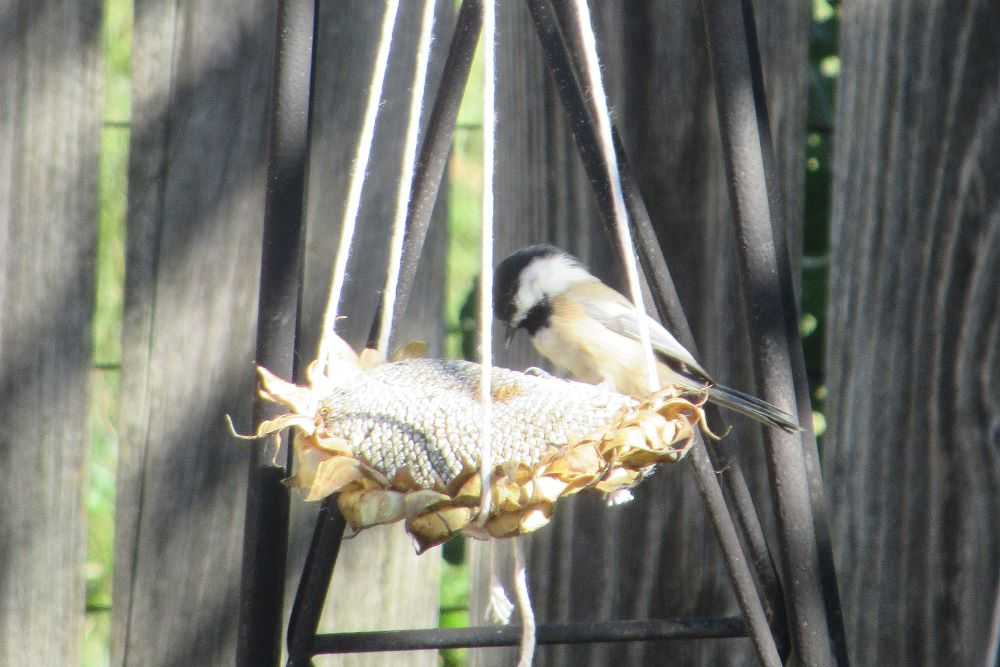
Chickadee bird on DIY sunflower birdfeeder.
The birds love these sunflower bird feeders!

Tomatoes

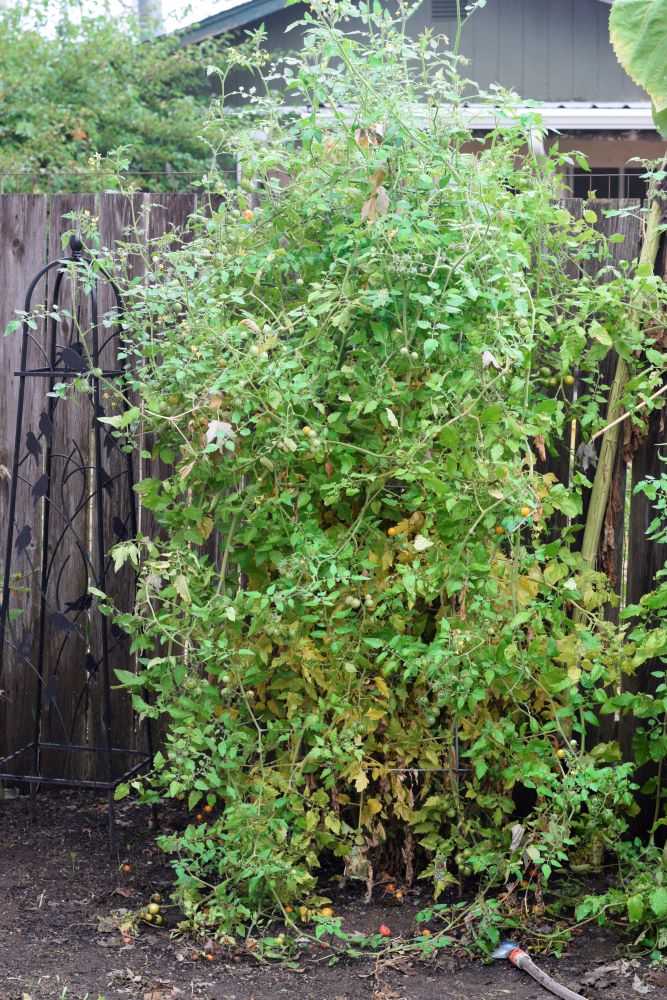
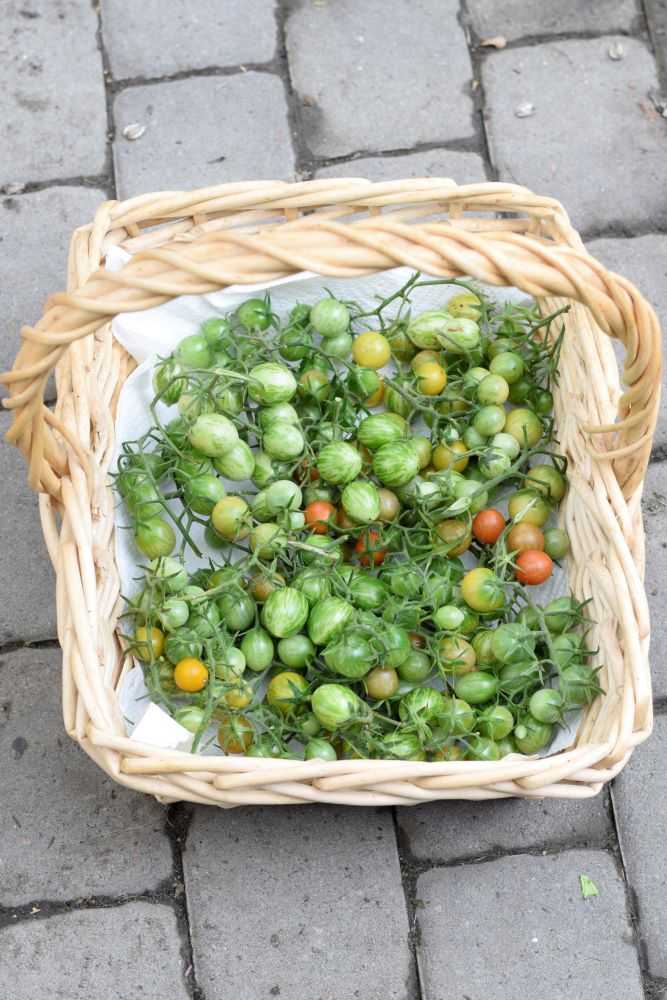
I took out my tomato plants a few weeks ago. The weather has been getting cooler and the tomatoes started ripening much slower. Before I pulled my plants I picked off all of the green fruit to ripen inside. You can read more about ripening green tomatoes here.

Only nine months to go until fresh tomatoes again next year! I am already thinking of what varieties I want to plant 🙂

Related: Cherry Tomato Taste Test

Final Thoughts

It has been a busy month around here but a lot of fun to harvest everything. What have you been up to in your garden? Let me know in the comments below!

Hope you are able to enjoy this beautiful fall weather! Happy Gardening!

How to Plant Garlic in the Fall

The mornings are cool and the leaves are turning colors. Fall is here! And that means that it is the perfect time to plant garlic in your garden!

While garlic can be planted in the fall or the spring, I usually prefer to plant my garlic in the fall. This way it can develop a good strong root system over the winter. The garlic has a longer time to grow during cool weather which may lead to larger heads. Some people think that fall planted garlic also tastes better and has a more complex flavor.

A second reason why I usually plant my garlic in the fall is because I am usually planting garlic that I grew the previous season. By planting it in the fall so I will not have to store it as long, so the garlic is less likely to sprout early or have other issues during storage. 

This post will explain the different types of garlic and how to plant it step-by-step. Let’s get started!

Related Post: Why Garden Planning Starts in September

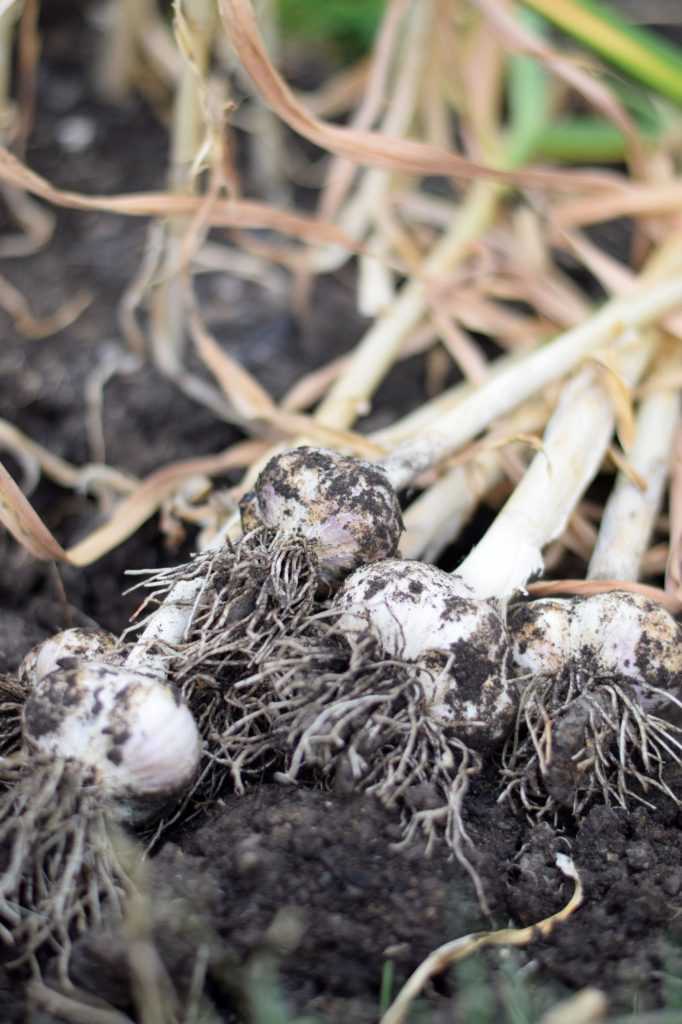
freshly dug garlic

This post may contain affiliate links, where I earn a small commission from qualifying purchases. I only provide links to products that I use personally and recommend highly.

When to Plant Garlic

Garlic should be planted in the late fall before the ground freezes for the winter. October through early November is the ideal time. It is best to err on the side of starting it too late rather than too early because too much top growth could make it more susceptible to winter injury.

What Type of Garlic to Plant

Make sure that you purchase garlic from a seed company rather than the grocery store. Grocery store garlic may be sprayed with chemicals to prevent sprouting, and it is not guaranteed to be free of disease.

There are two main types of garlic to choose from: hardnecks and softnecks. We will go through the differences below.

Hardneck Garlic

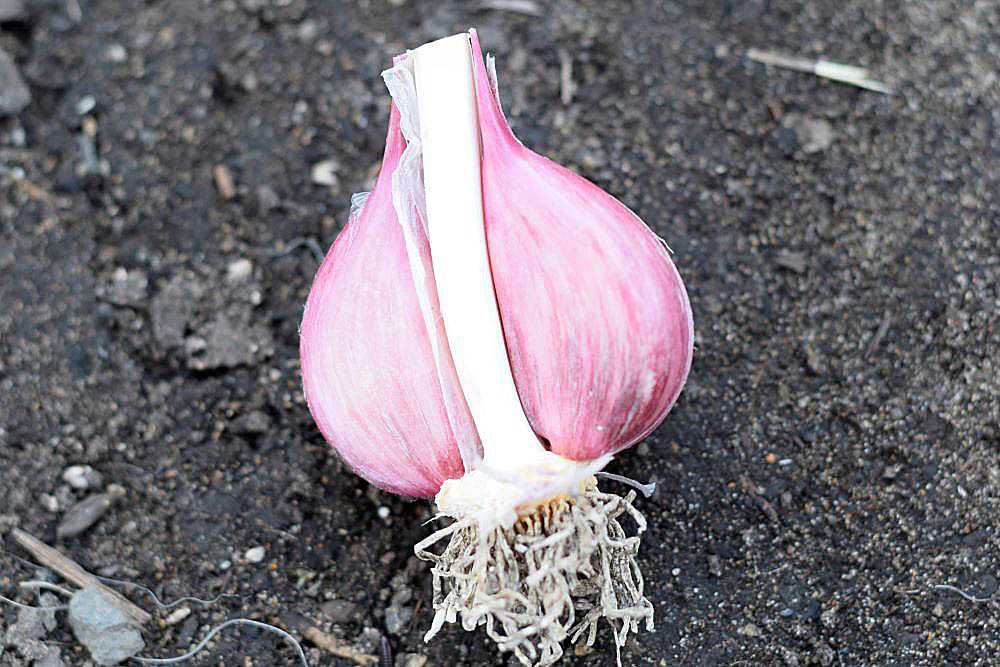
Hardneck garlic has one row of cloves around a stiff woody stem. The cloves are generally larger and there are generally 6-8 cloves per head. Some people think the flavor of hardneck garlic is superior to other types. However, hardneck garlic may not keep as well as softneck types and it is generally less hardy in warmer climates.

Hardneck garlic has one row of cloves around a stiff woody stem.

Popular hardneck varieties include: Music, German Extra Hardy, Purple Italian, German Red, Purple Glazer, and Chesnok Red.

Softneck Garlic

This type of garlic has a few rows of cloves and does not have a central stem like the hardneck garlic. The cloves are generally smaller and there are around 10-20 cloves per head. Softneck garlic can be better in warmer climates and the heads keep for 9-12 months if stored properly.

Popular softneck varieties include: Inchelium Red, Italian Late, Silver White, and Blanco Piacenza.

What Type to Choose

What variety to plant is up to you! Personally I usually plant the hardneck types because the cloves are larger and easier to peel. But depending on where you live the softenecks or hardnecks may grow better. Try a few different varieties and see what you like!

Related Post: Garlic Review: Comparing Music, Duganski, and German Red

How to Plant Garlic

Step 1: Select a Site

Garlic grows best in full sun. Choose a site that has loose, well drained soil and few weeds.

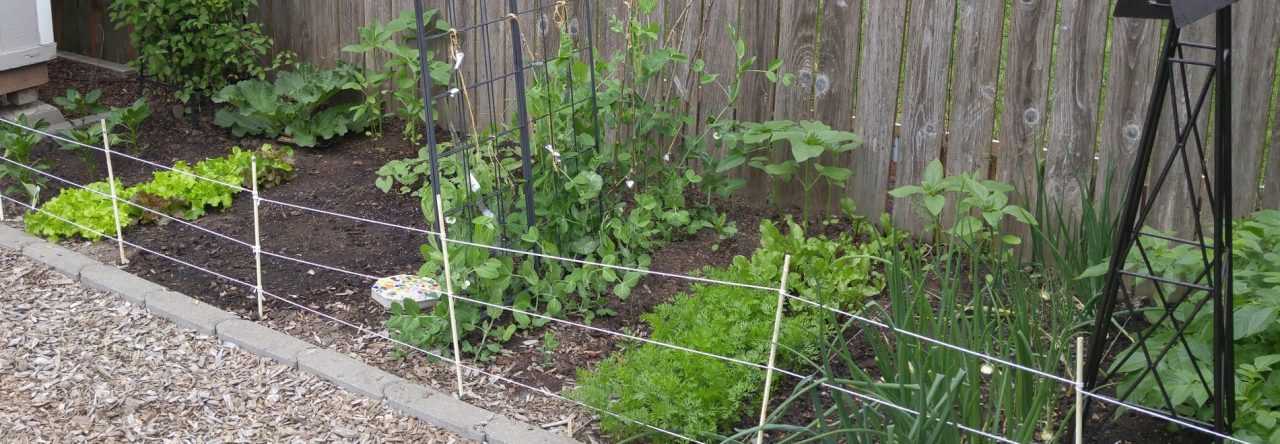
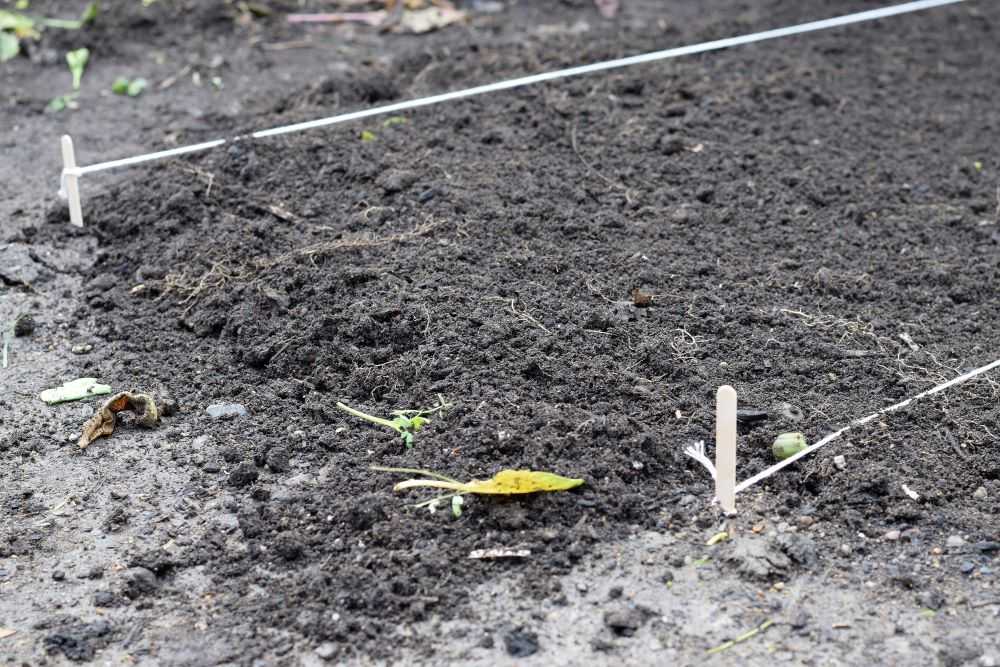
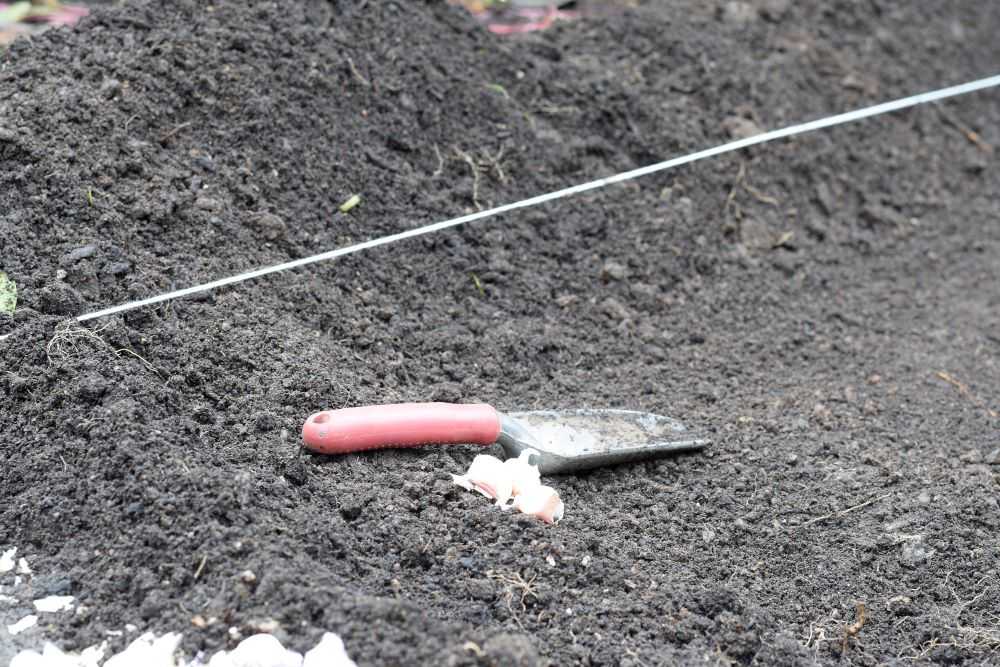
After I choose where I’m going to plant my garlic, I like to mark my rows with heavy cotton string (affiliate link) tied to popsicle sticks. This helps me to see the edges of the row so I plant my garlic in the correct place.

Mark garden rows with string or twine.

Step 2: Prepare the Soil

Garlic are heavy feeders but too much fertilizer at this point can make the plants more susceptible to winter damage. You can add a small amount of compost or fertilizer at planting time but this is not required.

If you do add fertilizer, choose one that is higher in phosphorus such as bone meal so it will help the garlic to get a good root system established. It is best to wait to add too much nitrogen until after growth starts in the spring.

Step 3: Dig a Hole

Garlic needs to be planted 3-4 inches deep. How you dig a hole for your garlic depends on how much you have to plant. If you don’t have many cloves to plant you can just dig a small individual hole for each clove and drop it in. If you are planting your garlic in rows, you can dig a long narrow trench.

I am planting a lot of garlic this year (about 80 cloves!) so I like to plant it in a wide row about 18-24 inches wide. Instead of digging individual holes, I use a rake to move all the soil off to the sides of the row. This way I can plant the garlic all at once.

Dig a hole for your garlic. Since I have so much garlic to plant I plant it in a wide row.

Step 4: Separate the Garlic into Cloves

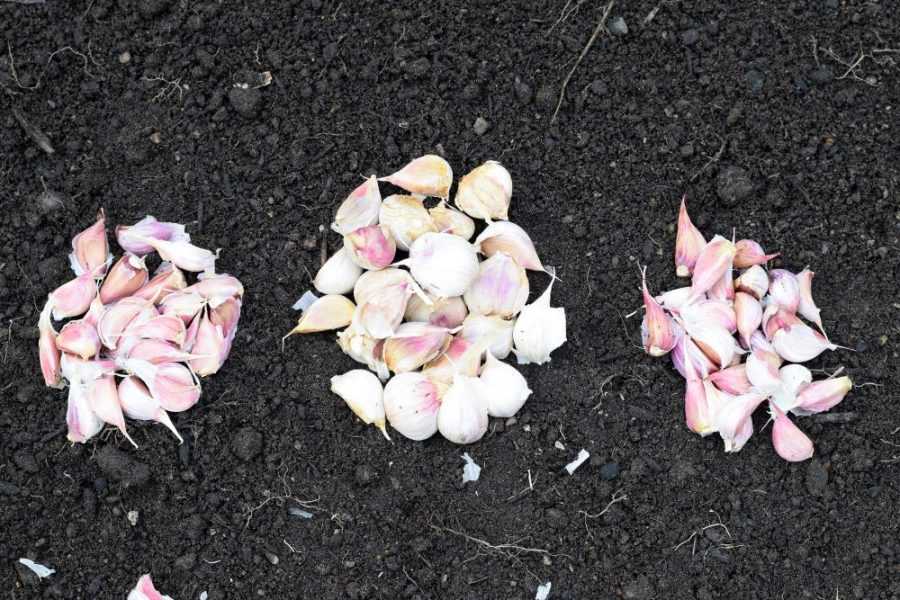
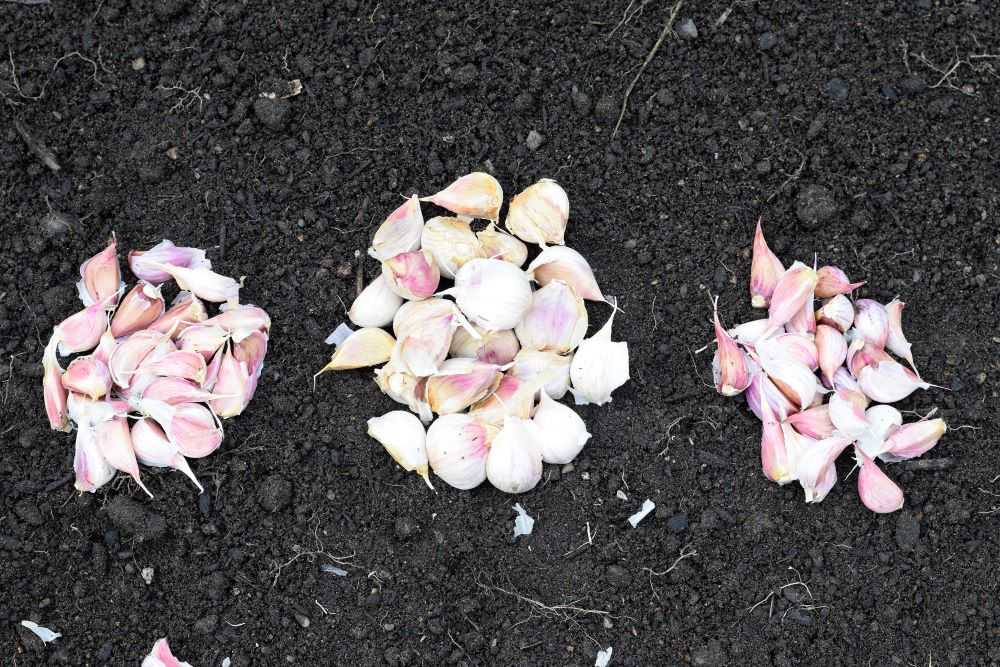
Carefully separate the garlic heads into cloves right before planting. Each of these cloves will eventually grow into a whole head of garlic. Try to keep the skins intact because they will help protect the cloves.

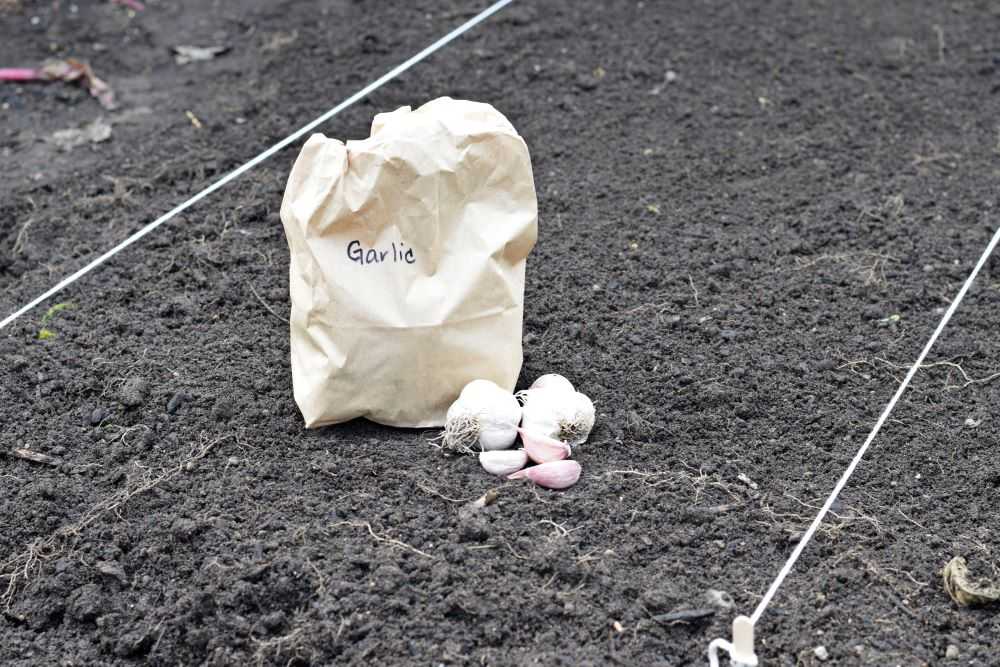
Garlic cloves ready to plant.
Separate the garlic into cloves right before planting. Today I am planting three varieties of garlic: Duganski, Music, and German Red.

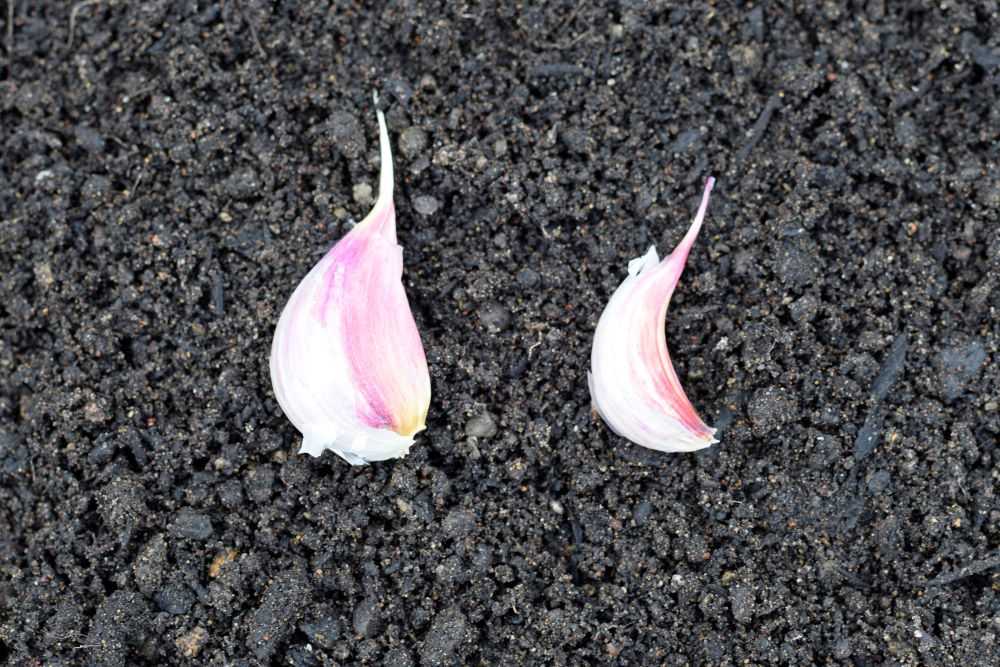
If you have more garlic than you need, select only the biggest cloves to plant and save the smaller ones for cooking. Larger cloves produce larger plants. You cannot get a big garlic plant from a puny clove!

Larger garlic cloves will produce larger plants.
Larger garlic cloves produce larger plants. After I have separated all of my garlic cloves, I select the biggest to plant. I will save the smaller cloves like the one on the right to use in the kitchen.

Step 5: Plant the Garlic

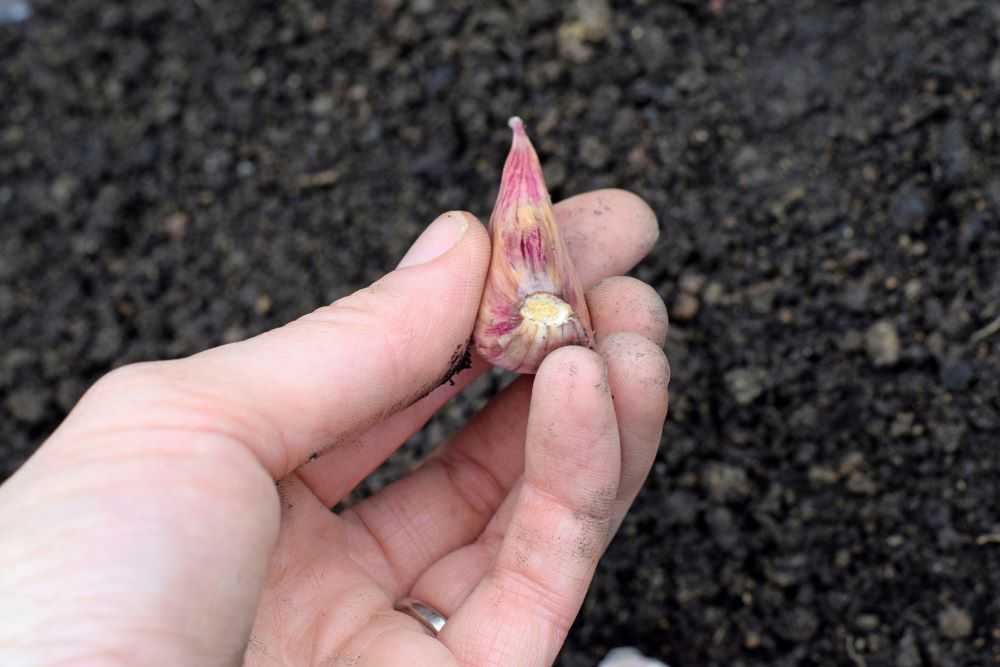
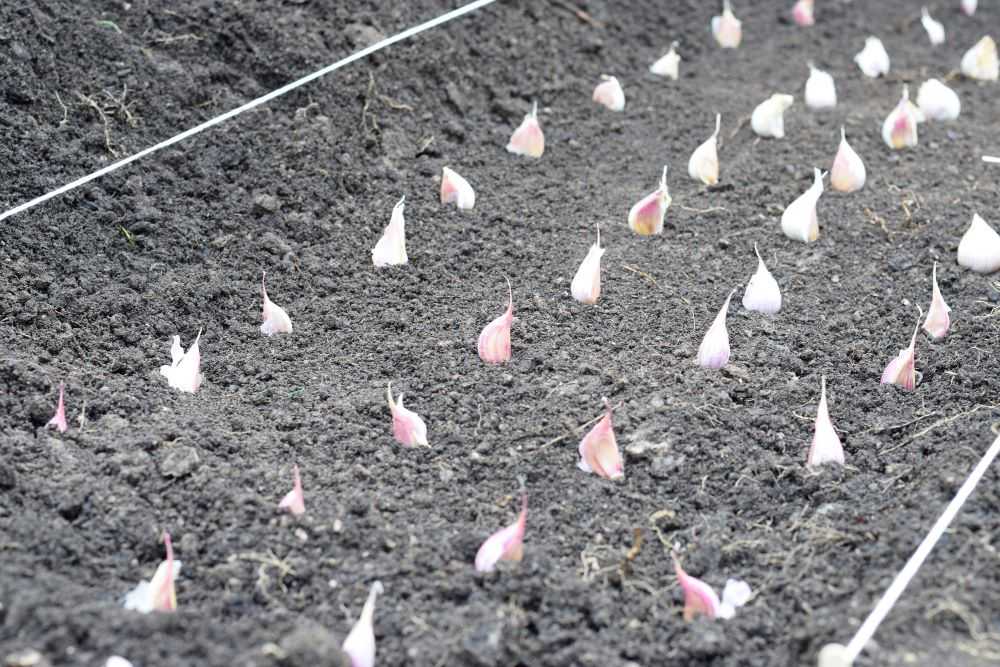
Plant the garlic cloves about 6 inches apart in all directions. Do not plant them closer than this because they will start to compete with each other for water and nutrients and not grow as big. Make sure the pointy ends of the cloves are facing upwards when you plant them.

Garlic
This flat part here will form the root so make sure it is pointing down. Plant with the pointy end up!

When all the garlic cloves are placed cover them with soil. Gently pat the soil down with your hand and water the garlic lightly. Now wait for it to start growing!

Plant garlic in rows about 6 inches apart.
Plant the garlic 6 inches apart in all directions and then cover them with soil.

Early Care

Garlic shoots should emerge in a few weeks to a few months, depending on the temperature. Water lightly because garlic does not like heavy wet soils. The fall rains will likely keep it plenty wet, and too much moisture could cause the garlic to rot in the ground if there is poor drainage.

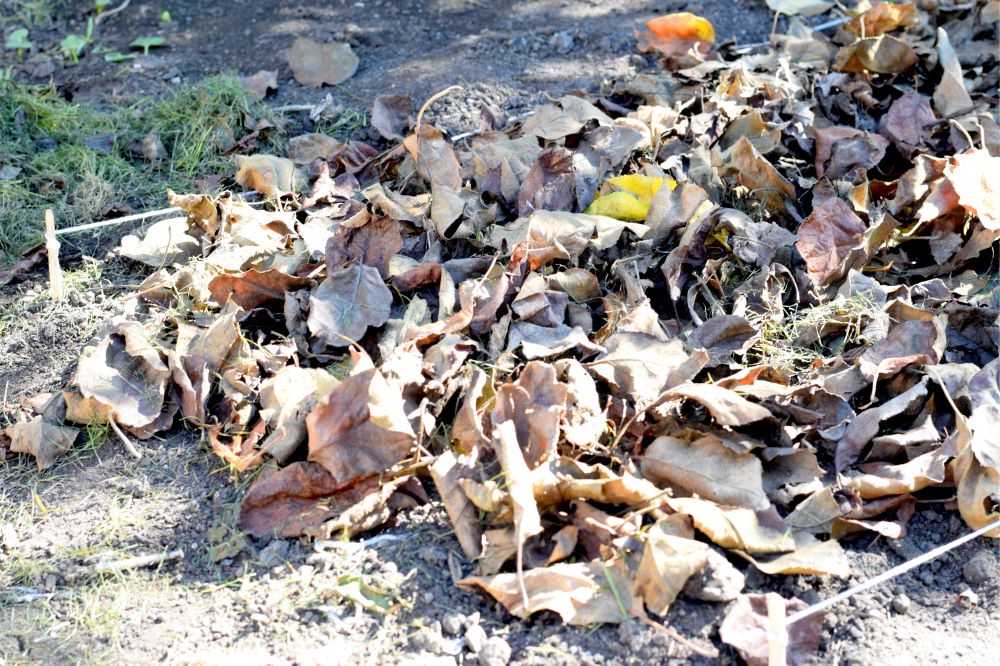
If you see green shoots appear you can add a few inches of mulch to help protect the plants against cold winter temperatures. Clean straw or leaves works well. You can pull the mulch away when the weather warms in the spring.

Add some mulch to help protect against cold winter temperatures. Clean straw or leaves works well.

Final Thoughts

There you have it! Now that you know how to plant garlic you will be rewarded with beautiful garlic plants next spring that will be ready around July. Happy Gardening!

Don’t forget to pin for later!

How to Overwinter Peas

I always struggle to get peas started in the spring. The weather is warm enough to plant pea seeds in March or so but the soil is so wet the seeds often rot. Then I have to replant the peas and the snails eat them. Or the birds. Yes, birds. They pick at the tendrils and chop the leaves to pieces. It’s annoying. And it often kills the whole plant and I need to start over completely.

Now I have a new method for getting my peas started. I plant them in the fall and overwinter them. This solves many of my problems. Since the soil is not so wet the seeds get off to a good strong start. And by spring the plants are big enough to withstand a bird or snail here and there. Read on to learn how easy it is to overwinter peas for an earlier spring harvest.

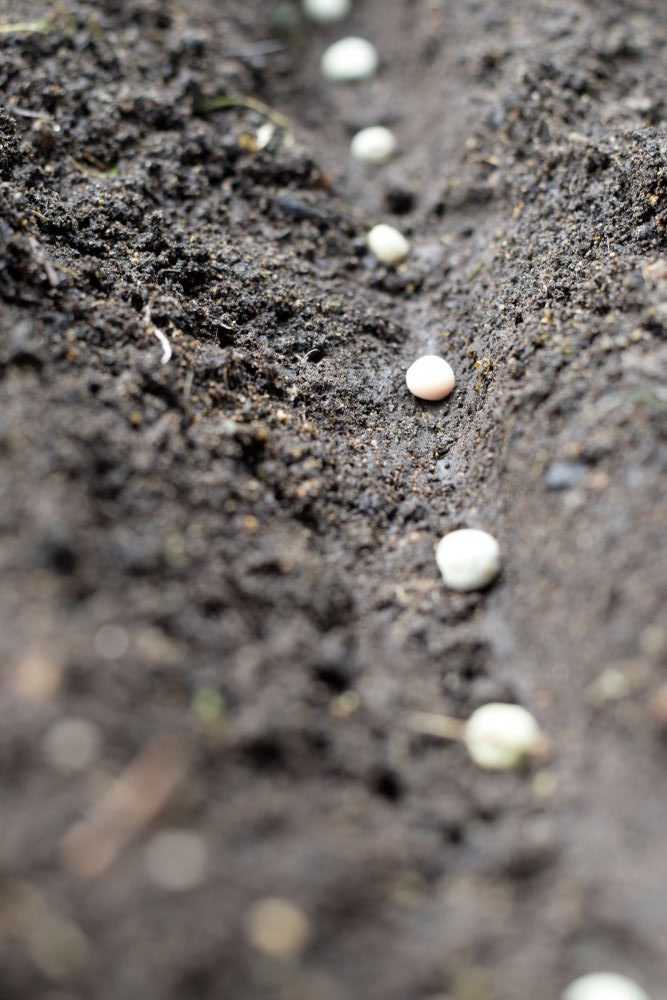
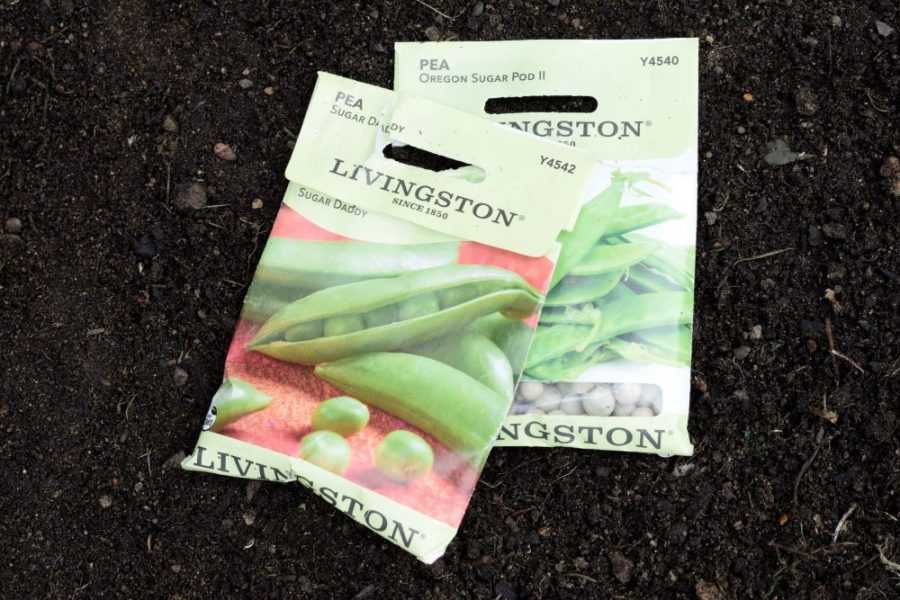
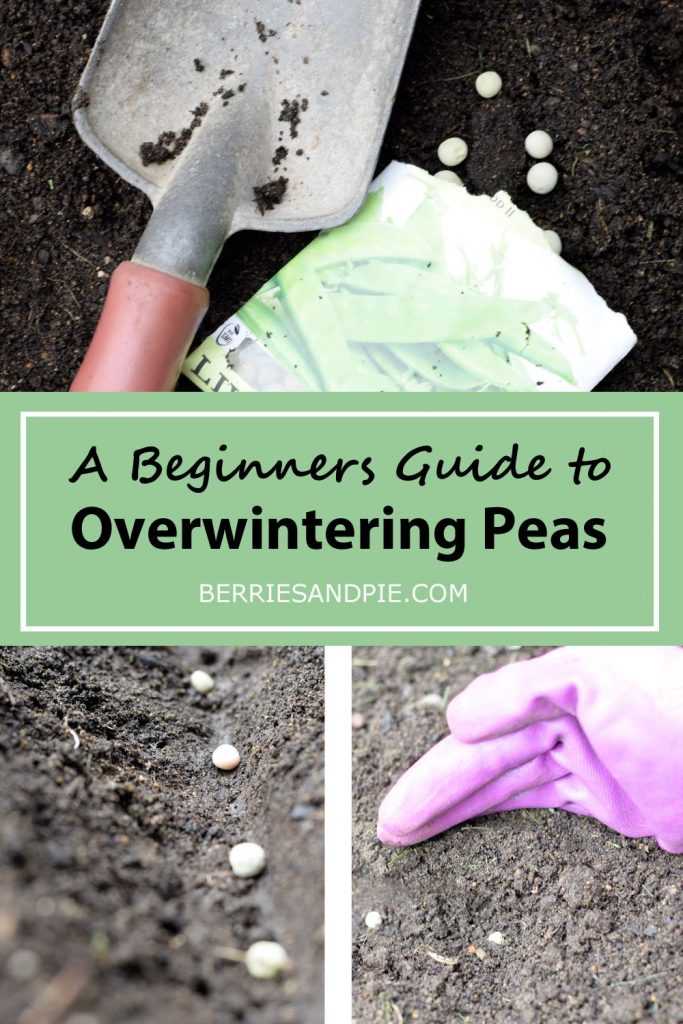
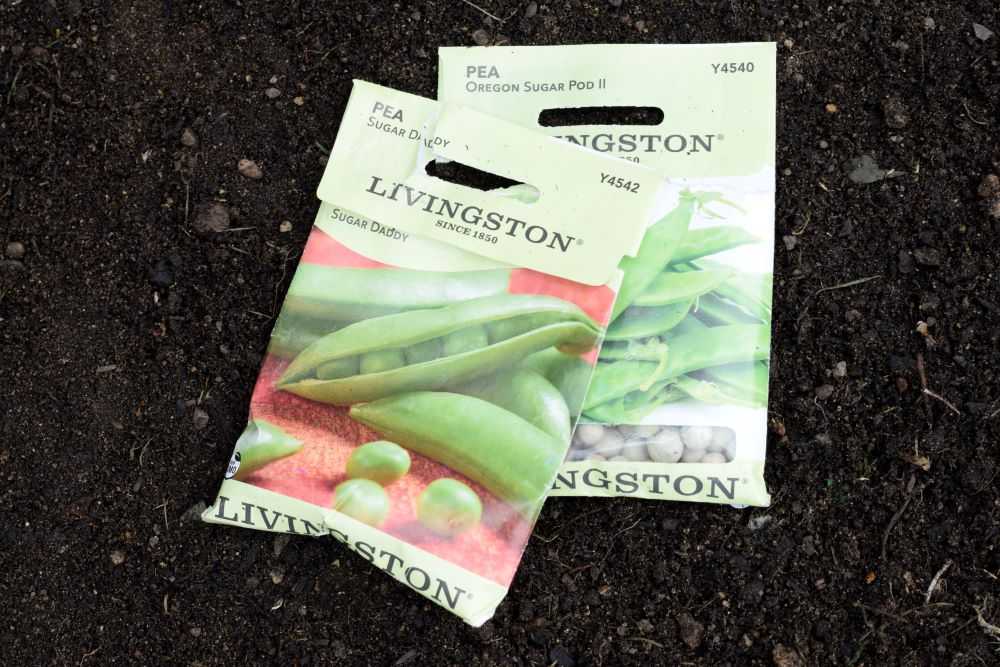
Pea seed packets in the dirt.
Late September or October is a great time to plant peas to overwinter!

Pea Plant Hardiness

Peas are hardy down to about 20 degrees, and colder if covered with an insulating layer of snow. Overwintering peas will not work in all areas without additional protection but here in Oregon we rarely have temperatures cooler than this so this method works well.

Keep in mind though that once in awhile the weather will get cold enough to damage your pea plants. But the worst case scenario is that all of your plants die and you need to replant in the spring. While this is unfortunate, you are no further behind than you would have been otherwise.

When to Plant Peas for Overwintering

Peas should be planted in late September or October. The timing can be a little tricky because you want them to get established and grow to about a foot high before going dormant for the winter. They may look a little scraggly over the winter months but when the temperatures warm in the spring they will put on lush green growth!

Related: Why Garden Planning Starts in September

How to Plant Peas for Overwintering

Step 1: Select a Site

Peas grow best in the cool temperatures of early spring. Choose a site that will be in full sun with good drainage.

Although peas do not grow very tall, they seem to do better with some type of support so the plants are not flopping on the ground. There are many types of trellises to choose from. I have a folding metal trellis that works great! Get this in place so you know where to plant your seeds.

Step 2: Prepare the Soil

Peas are light feeders. Since they are able to make their own nitrogen their need for extra fertilizer is low. You can add a small amount of compost or balanced fertilizer at planting time but this is not required. Fertilizing peas with too much nitrogen will cause big healthy plants but not many pea pods.

Step 3: Dig a Trench

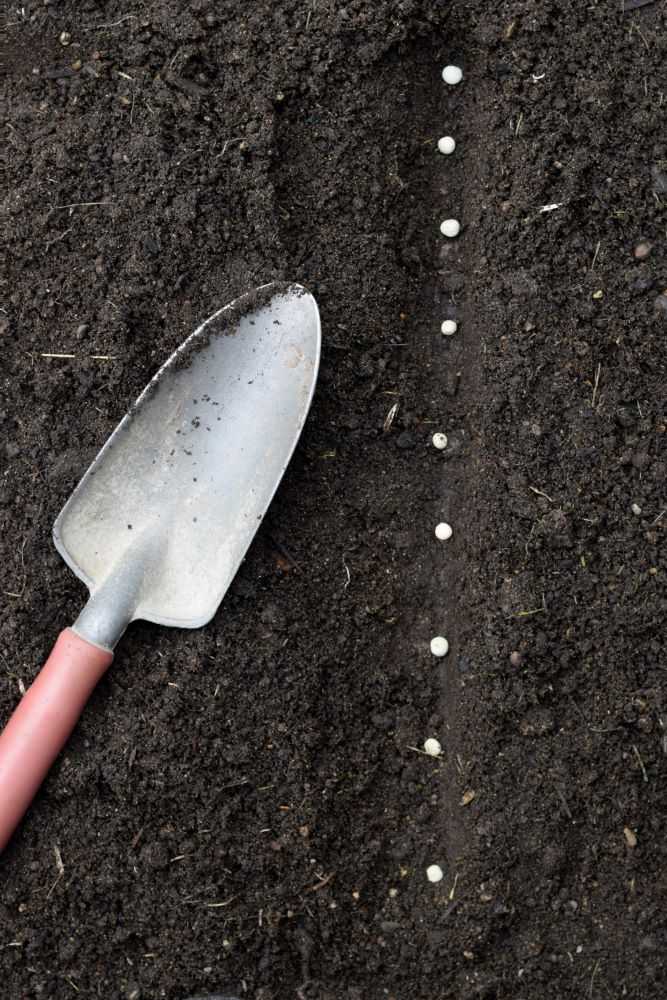
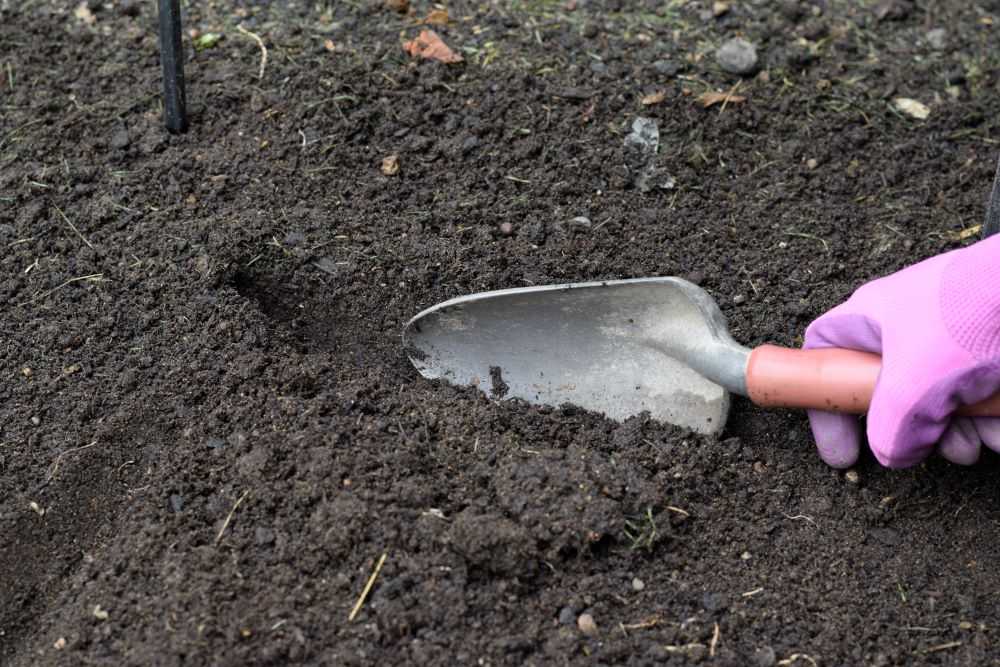
Digging a trench with a trowel.
Start by digging a trench about one inch deep.

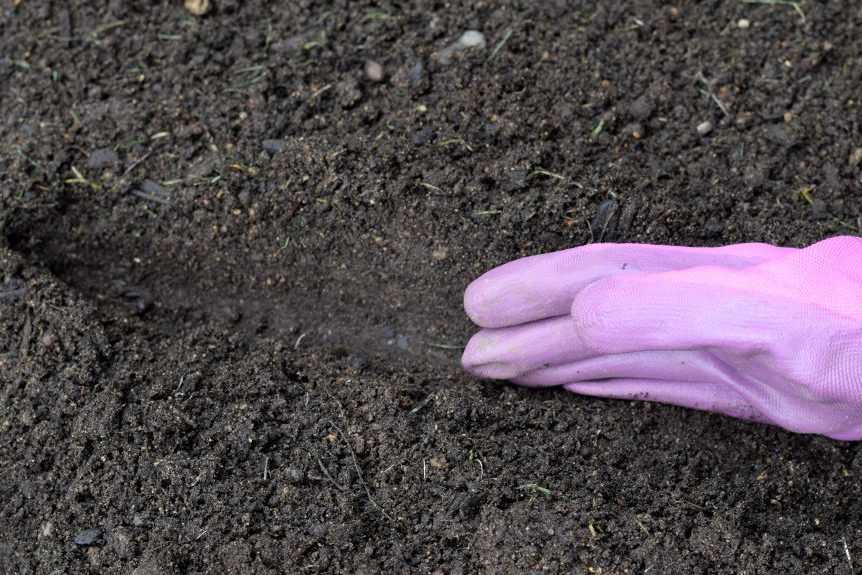
Start by digging a trench about 3-4 inches from the base of your trellis. The trench should be about 1 to 1 1/2 inches deep. Use the side of your hand to gently smooth the bottom of the trench so it is even.

Use your hand to gently smooth the bottom of the trench.

Step 4: Plant the Seeds

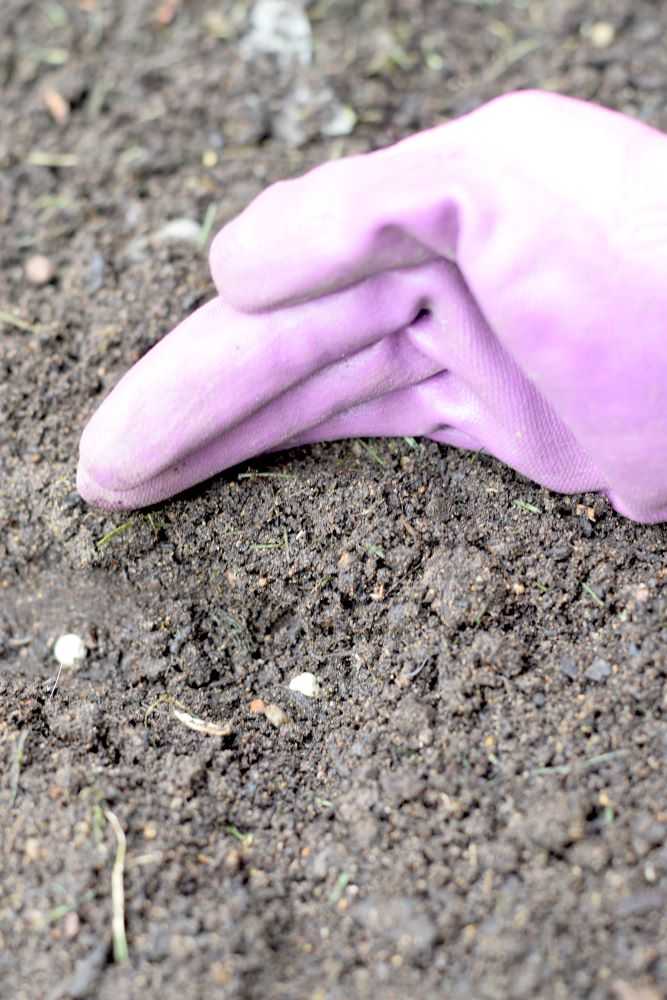
Plant your seeds about 2 inches apart and cover them with soil. Gently pat the soil down with your hand and water the seeds lightly. Now wait for them to start growing!

Planting pea seeds with a trowel.

Early Care

Peas seedlings should emerge in about 1-2 weeks, depending on the temperature. Help them find the trellis when they get tall enough. Peas like to be a little crowded so there is no reason to thin the seedlings.

Pea seedlings.
Pea seedlings about 2 weeks after planting. Peas like to be a little crowded so there is no reason to thin the seedlings.

Water the seedlings lightly because peas do not like heavy wet soils. The fall rains will likely keep them plenty wet. Protect them from slugs and snails, especially when they are small so the snails do not kill the whole plant. If you do lose some plants you can poke a hole with your finger and add in a few more seeds.

When winter comes consider protecting and covering the seedlings if the weather gets below 25 degrees or so. If you have snow it will insulate the peas plants and protect them down to even lower temperatures. Make sure you uncover them as the weather warms because they will soon put on rapid growth!

Final Thoughts

There you have it! Now that you know how to overwinter peas you will be rewarded with strong and healthy plants and have peas well before your neighbors in the spring. Happy Gardening!

Be sure to pin for later!

Powered by WordPress & Theme by Anders Norén